
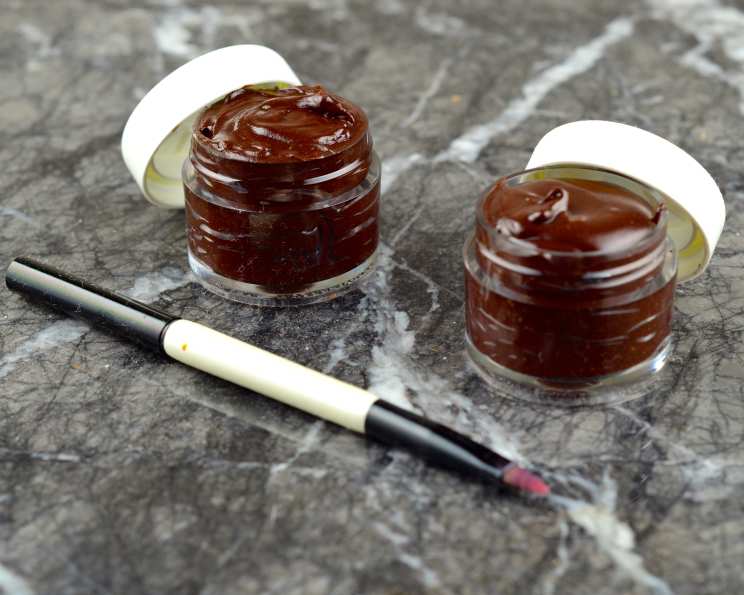
Cocoa Lip Gloss: A Sweet Treat for Your Lips
My earliest memories of playing “chef” involved far more than just pretend food. I recall spending afternoons in my grandmother’s kitchen, mesmerized by her concoctions, both edible and… not. One day, I decided to “borrow” some of her cocoa powder, convinced I could create the most delicious (and chocolatey) lip treatment the world had ever seen. The result was, shall we say, less than palatable, but the experimentation sparked a lifelong love for creating homemade beauty remedies. This Cocoa Lip Gloss recipe is a much more refined, and wonderfully moisturizing, version of my childhood experiment!
Recipe Overview
- Prep Time: 5 minutes
- Cook Time: 3 minutes
- Total Time: 8 minutes
- Yields: 1 container
- Dietary Type: Vegetarian
Ingredients
- 1/3 cup petroleum jelly (or however much lip gloss you wish to make)
- Cocoa powder, amount you desire
Equipment Needed
- Small glass bowl
- Microwave
- Small container for storage
Instructions
- Place the desired amount of petroleum jelly into a small glass bowl. The quantity of petroleum jelly directly corresponds to the amount of lip gloss you wish to produce, so adjust accordingly.
- Microwave the bowl for 30 seconds. Be cautious, as microwave power varies, and you want to gently melt the petroleum jelly, not scorch it.
- Remove the bowl from the microwave and stir the petroleum jelly. This helps to evenly distribute the heat and prevent hot spots.
- Continue microwaving in 30-second intervals, stirring after each interval, until the petroleum jelly is completely melted. This may take several intervals depending on your microwave.
- Add the desired amount of cocoa powder to the melted petroleum jelly. This is where you can truly personalize the color and scent of your lip gloss! Start with a small amount, perhaps 1/4 teaspoon, and gradually increase it until you achieve your desired shade and chocolatey aroma. Remember, a little goes a long way. Experiment and have fun!
- Stir the cocoa powder into the petroleum jelly until it is fully incorporated and there are no lumps. This ensures a smooth and even lip gloss.
- Microwave the mixture for 30 more seconds. This helps to further blend the cocoa powder and petroleum jelly, creating a more cohesive and stable product.
- Remove from microwave and stir again.
- Set the mixture aside to cool slightly.
- Once the mixture is cool enough to handle (but still liquid), carefully spoon it into a small, clean container. A lip gloss pot, small jar, or even an old contact lens case (thoroughly cleaned, of course!) will work perfectly.
- Allow the lip gloss to sit undisturbed until the petroleum jelly has completely firmed up. This will take a few hours at room temperature, or you can speed up the process by placing it in the refrigerator.
- Once firm, your homemade Cocoa Lip Gloss is ready to use! Apply liberally for soft, chocolate-scented lips.
Expert Tips & Tricks
- Infusion Boost: For an extra touch of luxury, infuse the petroleum jelly with a vanilla bean before melting. Simply slit a vanilla bean lengthwise, bury it in the petroleum jelly, and then microwave as directed. Remove the bean before adding the cocoa powder.
- Smooth Operator: To ensure an ultra-smooth lip gloss, consider sifting the cocoa powder before adding it to the melted petroleum jelly. This will help to remove any lumps and create a more refined texture.
- Color Customization: Don’t be afraid to experiment with different types of cocoa powder! Dark cocoa powder will result in a deeper, richer brown color, while lighter cocoa powder will create a more subtle tint.
- Heat Control: Microwaves vary widely in power. If your petroleum jelly starts to bubble or splatter, reduce the microwave time and increase the stirring frequency.
- Double Boiler Alternative: If you prefer to avoid the microwave, you can melt the petroleum jelly in a double boiler over low heat. This method offers more precise temperature control.
Serving & Storage Suggestions
This Cocoa Lip Gloss is best applied directly to clean, dry lips using a finger or lip brush. It provides a subtle tint and a moisturizing barrier against dryness. Store your lip gloss in a cool, dry place away from direct sunlight. It should last for several months, but be sure to discard it if you notice any changes in texture, smell, or color. Avoid exposing the lip gloss to extreme temperatures, as this can affect its consistency.
Nutritional Information
Since this lip gloss is not intended for consumption, the nutritional information is negligible. However, here’s a theoretical breakdown based on the ingredients:
| Nutrient | Amount per Serving | % Daily Value |
|---|---|---|
| Calories | 0 kcal | 0% |
| Total Fat | 0 g | 0% |
| Saturated Fat | 0 g | 0% |
| Cholesterol | 0 mg | 0% |
| Sodium | 0 mg | 0% |
| Total Carbohydrate | 0 g | 0% |
| Dietary Fiber | 0 g | 0% |
| Sugars | 0 g | 0% |
| Protein | 0 g | 0% |
Variations & Substitutions
- Mint Chocolate: Add a drop or two of peppermint essential oil for a refreshing mint chocolate lip gloss.
- Coconut Cocoa: Substitute a small amount of melted coconut oil for some of the petroleum jelly for added moisture and a subtle coconut scent.
- Tinted Treat: Incorporate a tiny pinch of beetroot powder for a natural pink tint. Be careful not to add too much, as it can be very potent!
- Vitamin E Boost: Add a capsule of Vitamin E oil for extra antioxidant benefits and to further moisturize the lips.
- DIY Colors: As mentioned in the original posting, you can also use this recipe to make fruit lip gloss by using powdered juice mix instead of cocoa.
FAQs (Frequently Asked Questions)
Q: Can I use Vaseline instead of petroleum jelly?
A: Yes, Vaseline is a brand name of petroleum jelly and can be used interchangeably in this recipe.
Q: How do I clean my lip gloss container before using it?
A: Wash the container thoroughly with soap and hot water. Rinse well and allow it to air dry completely before filling it with your lip gloss. You can also sanitize it by wiping it down with rubbing alcohol.
Q: Can I use this lip gloss on my children?
A: While the ingredients are generally considered safe for topical use, it’s always best to do a patch test on a small area of skin first, especially for young children. Avoid use if any irritation occurs.
Q: My lip gloss is too hard. How can I soften it?
A: You can gently warm the lip gloss by holding the container in your hands for a few minutes or placing it in a warm water bath. Avoid microwaving it directly, as this can cause it to melt unevenly.
Q: Can I add flavorings to this lip gloss?
A: Yes, you can add lip-safe flavor oils, but be sure to use them sparingly, as a little goes a long way.
Final Thoughts
Creating your own Cocoa Lip Gloss is a fun, easy, and rewarding experience. Not only will you have a personalized, moisturizing lip treatment, but you’ll also know exactly what ingredients are going on your lips. So, gather your ingredients, get creative, and enjoy the sweet treat of homemade beauty! Don’t hesitate to experiment and adjust the recipe to create your perfect shade and flavor. Share your creations with friends and family, and let me know what variations you come up with!