
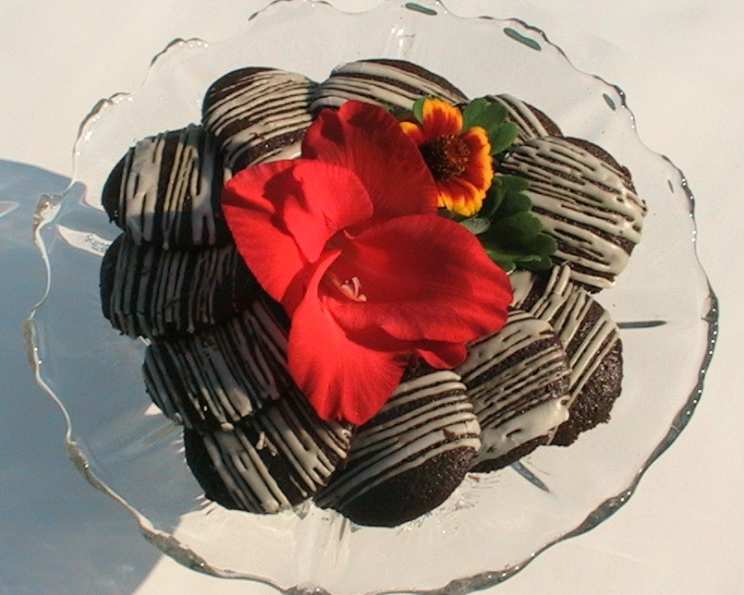
Cocoa-Molasses Drop Cookies: A Taste of Nostalgia
My grandmother, a woman whose hugs smelled perpetually of cinnamon and woodsmoke, wasn’t known for her elaborate baking. Her repertoire was small, but everything she made was imbued with a love that transcended ingredients. I remember once, rummaging through her old recipe tin – a treasure trove of faded index cards and newspaper clippings – I found a recipe titled simply “Cocoa-Molasses Cookies.” The combination intrigued me, a dark and mysterious counterpoint to her usual light and airy confections. I never got to bake them with her, but recreating them now always brings a rush of sweet, bittersweet memories.
Recipe Overview
- Prep Time: 15 minutes
- Cook Time: 9 minutes
- Total Time: 24 minutes
- Yields: 2-3 dozen cookies
- Dietary Type: Vegetarian
Ingredients
- 1/3 cup butter, softened
- 1/3 cup sugar
- 1/3 cup molasses
- 1 egg
- 3/4 cup all-purpose flour
- 3 tablespoons cocoa
- 1 teaspoon baking powder
For Vanilla Glaze (optional):
- 1 cup powdered sugar
- 2 tablespoons milk
- 1/2 teaspoon vanilla extract
Equipment Needed
- Oven
- Mixing bowl
- Electric mixer (optional, but recommended)
- Measuring cups and spoons
- Greased cookie sheet
- Wire rack
- Small bowl (for glaze)
- Whisk (for glaze)
- Piping bag or small spoon (for glaze)
Instructions
-
Preheat your oven to 375°F (190°C). Ensuring your oven is fully preheated will help the cookies bake evenly and prevent them from spreading too thin.
-
In a mixing bowl, cream together the softened butter and sugar until the mixture is light and fluffy. This step is crucial for incorporating air into the dough, which contributes to the cookies’ tender texture. Use an electric mixer for best results, but a wooden spoon and some elbow grease will also do the trick.
-
Add the molasses and egg to the creamed butter and sugar mixture. Beat until everything is well combined and the mixture is smooth. The molasses adds a depth of flavor and moisture to the cookies, while the egg acts as a binder.
-
In a separate small bowl, whisk together the baking powder and cocoa. This ensures that these dry ingredients are evenly distributed throughout the dough, preventing clumps of cocoa or baking powder from affecting the flavor or texture of individual cookies.
-
Gradually add the cocoa and baking powder mixture to the wet ingredients, alternating with the flour. Mix until just combined. Be careful not to overmix the dough, as this can develop the gluten in the flour, resulting in tough cookies. A few streaks of flour are perfectly fine at this stage.
-
Pipe or drop the cookie dough onto a greased cookie sheet in mounds slightly larger than a quarter. Use a piping bag for a more uniform look, or simply use a spoon to drop spoonfuls of dough onto the sheet. Make sure to leave some space between each cookie to allow for spreading during baking.
-
Bake for 9 minutes, or until the cookies are set. The edges of the cookies should be slightly firm, and the tops should spring back lightly when touched. Keep a close eye on the cookies, as baking times may vary depending on your oven.
-
Cool the cookies on the baking sheet for a few minutes before transferring them to a wire rack to cool completely. This allows the cookies to firm up slightly, making them easier to handle.
-
Prepare the Vanilla Glaze (optional): In a small bowl, stir together the powdered sugar and milk until the mixture is smooth and of drizzling consistency. Add the vanilla extract and stir until well combined. If the glaze is too thick, add a little more milk, a teaspoon at a time. If it’s too thin, add a little more powdered sugar.
-
Once the cookies are completely cool, drizzle the Vanilla Glaze in thin lines over the top of each cookie using a piping bag or a small spoon. Let the glaze set before serving.
Expert Tips & Tricks
- For a richer cocoa flavor, use Dutch-processed cocoa powder.
- Don’t overbake the cookies! They should be slightly soft in the center.
- If you don’t have a piping bag, you can use a resealable plastic bag with a small corner snipped off to drizzle the glaze.
- For a more intense molasses flavor, use blackstrap molasses. However, be aware that blackstrap molasses has a stronger, more bitter flavor than regular molasses.
- If your cookie dough is too sticky to work with, chill it in the refrigerator for 30 minutes before baking.
Serving & Storage Suggestions
These Cocoa-Molasses Drop Cookies are perfect served with a cold glass of milk, a warm cup of coffee, or a scoop of vanilla ice cream. They also make a wonderful addition to a holiday cookie platter.
To store, keep the cookies in an airtight container at room temperature for up to 3 days, or in the refrigerator for up to 1 week. For longer storage, freeze the cookies in a freezer-safe container for up to 2 months. Thaw completely before serving. You can freeze them glazed or unglazed; if glazed, separate layers of cookies with parchment paper to prevent sticking.
Nutritional Information
| Nutrient | Amount per Serving | % Daily Value* |
|---|---|---|
| Calories | 100 kcal | 5% |
| Total Fat | 4g | 6% |
| Saturated Fat | 2g | 10% |
| Cholesterol | 15mg | 5% |
| Sodium | 25mg | 1% |
| Total Carbohydrate | 15g | 5% |
| Dietary Fiber | 0g | 0% |
| Sugars | 8g | |
| Protein | 1g | 2% |
*Percent Daily Values are based on a 2,000 calorie diet.
Variations & Substitutions
- Gluten-Free: Substitute all-purpose flour with a gluten-free all-purpose flour blend.
- Spiced Cookies: Add 1/2 teaspoon of ground cinnamon, ginger, or cloves to the dough for a warm, spiced flavor.
- Chocolate Chips: Fold in 1/2 cup of chocolate chips (semi-sweet, milk, or dark) to the dough before baking.
- Nuts: Add 1/2 cup of chopped walnuts, pecans, or almonds to the dough for added crunch and flavor.
- Citrus Zest: Add the zest of one orange or lemon to the dough for a bright, citrusy flavor.
FAQs (Frequently Asked Questions)
Q: Can I use a different type of molasses?
A: Yes, you can use light, dark, or blackstrap molasses. Keep in mind that each type has a different flavor intensity. Blackstrap molasses has a very strong and somewhat bitter taste.
Q: Can I freeze the cookie dough?
A: Absolutely! Drop rounded tablespoons of dough onto a baking sheet and freeze until solid. Then transfer the frozen dough balls to a freezer-safe bag or container. Bake directly from frozen, adding a few extra minutes to the baking time.
Q: My cookies spread too thin. What did I do wrong?
A: This could be due to a few factors: the butter wasn’t cold enough, the oven wasn’t hot enough, or you overmixed the dough. Make sure your butter is softened but still cool, your oven is fully preheated, and mix the dough until just combined. Chilling the dough before baking can also help.
Q: Can I make these cookies without the glaze?
A: Definitely! The glaze is optional and adds a touch of sweetness and visual appeal, but the cookies are delicious on their own.
Q: How can I prevent my cookies from burning on the bottom?
A: Make sure your oven rack is positioned in the center of the oven. You can also try lining your baking sheet with parchment paper or a silicone baking mat.
Final Thoughts
These Cocoa-Molasses Drop Cookies are a testament to the fact that simple recipes can be incredibly delicious and comforting. The combination of rich cocoa and warm molasses creates a flavor profile that is both familiar and unique. I encourage you to try this recipe and experience the joy of baking (and eating!) these delightful cookies. They’re perfect for sharing with loved ones or enjoying as a little treat for yourself. Don’t hesitate to adjust the recipe to your liking and let me know how they turn out! Perhaps pair them with a spiced chai latte on a chilly evening – you won’t regret it!