
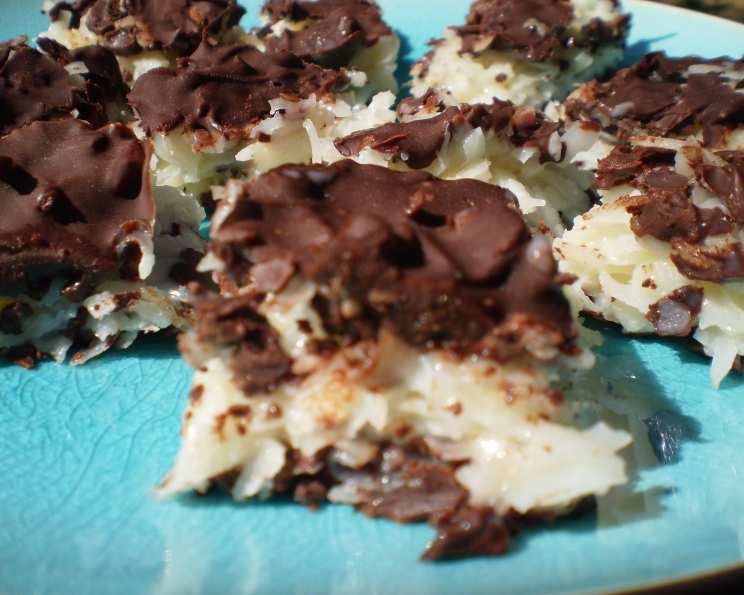
Decadent Coconut Chocolate Bites: A Sweet Escape
My earliest memories of baking involve my grandmother’s weathered hands, gently folding ingredients into a symphony of sweet aromas. She always had a stash of homemade treats, and among my favorites were her coconut mounds. These Coconut Chocolate Bites transport me right back to her kitchen, with that perfect balance of chewy coconut and rich chocolate – a combination that always felt like a warm hug. This version is even more divine, a truly “died and gone to heaven” confection, as my daughter affectionately calls them. The best part? They’re unbelievably easy to make!
Recipe Overview
- Prep Time: 15 minutes
- Cook Time: 5-7 minutes
- Total Time: 20-22 minutes (plus chilling time)
- Yields: 32 candies
- Dietary Type: Gluten-Free
Ingredients
- ¾ cup sweetened flaked coconut
- ¾ cup unsweetened dried coconut
- ⅓ cup sweetened condensed milk
- 3 ½ – 4 ounces fine-quality bittersweet chocolate, finely chopped (preferably 70% cacao)
Equipment Needed
- 8-inch square baking pan
- Wax paper
- Metal bowl or double boiler
- Saucepan
- Offset spatula
- Sharp knife
- Cutting board
- Paper cups (optional)
Instructions
-
Begin by preparing your 8-inch square baking pan. Line the bottom and two opposite sides with a sheet of wax paper, ensuring a 2-inch overhang on both sides. This overhang will be crucial for easily lifting the finished confection later.
-
In a medium-sized bowl, combine the sweetened flaked coconut and unsweetened dried coconut. Add the sweetened condensed milk. Using your fingertips, mix the ingredients thoroughly until they are well combined. The mixture should be evenly moistened and hold together when pressed.
-
Firmly press the coconut mixture into the prepared pan, creating an even layer. An offset spatula is perfect for smoothing the surface and ensuring a consistent thickness.
-
Chill the coconut layer in the refrigerator, uncovered, for approximately 5 minutes. This quick chill helps the coconut mixture firm up, making it easier to spread the chocolate.
-
While the coconut layer is chilling, prepare the chocolate. There are two methods for melting the bittersweet chocolate.
- Double Boiler Method: Fill a saucepan with a small amount of water and bring it to a gentle simmer. Place a metal bowl on top of the saucepan, ensuring the bottom of the bowl does not touch the water. Add the finely chopped chocolate to the bowl. Stir constantly until the chocolate is completely smooth and melted.
- Microwave Method (Alternative – not in original recipe): Place the finely chopped chocolate in a microwave-safe bowl. Microwave in 30-second intervals, stirring after each interval, until the chocolate is melted and smooth. Be careful not to overheat the chocolate.
-
Once the chocolate is melted and smooth, spread it evenly over the chilled coconut layer using the offset spatula. Ensure the entire coconut layer is covered in a uniform coating of chocolate.
-
Chill the pan again until the chocolate is firm, which should take about 5 to 7 minutes. Keep a close eye on it – you want the chocolate to be solid but not rock hard.
-
Now, using the wax paper overhangs, carefully lift the confection out of the pan and onto a cutting board. Using a sharp knife, halve the confection.
-
Here’s the secret to the extra-rich experience: sandwich the two halves together, with the coconut sides facing inwards. This creates an 8- by 4-inch rectangle with a double layer of coconut nestled between the chocolate. Discard the wax paper.
-
With your sharp knife, cut the rectangle into 32 (1-inch) squares.
-
If desired, arrange paper cups on a platter and fill them with the candies for an elegant presentation.
-
Chill, covered, until ready to serve.
Expert Tips & Tricks
- For an even smoother chocolate finish, temper your chocolate. Tempering involves carefully heating and cooling the chocolate to stabilize the cocoa butter, resulting in a glossy, snap-able finish. Look up online resources for a more in-depth explanation if you’re new to chocolate tempering.
- Don’t over-mix the coconut mixture. Over-mixing can make the coconut tough. Just combine until moistened.
- If you prefer a sweeter treat, use milk chocolate instead of bittersweet, but be aware that it will be significantly sweeter.
- To prevent the chocolate from cracking when cutting, use a warm knife. Simply dip the knife in hot water and dry it before each cut.
Serving & Storage Suggestions
Serve these Coconut Chocolate Bites chilled for the best texture and flavor. They are perfect as an after-dinner treat, a party snack, or a homemade gift. Store the candies in an airtight container in the refrigerator for up to 1 week. They can also be frozen for up to 2 months. If freezing, wrap them tightly in plastic wrap before placing them in an airtight container. Allow them to thaw in the refrigerator before serving. They are best served cold.
Nutritional Information
| Nutrient | Amount per Serving | % Daily Value |
|---|---|---|
| Calories | 32.1 kcal | N/A |
| Calories from Fat | 16 g | N/A |
| Total Fat | 1.8 g | 2% |
| Saturated Fat | 1.6 g | 7% |
| Cholesterol | 1.1 mg | 0% |
| Sodium | 15.5 mg | 0% |
| Total Carbohydrate | 3.8 g | 1% |
| Dietary Fiber | 0.2 g | 0% |
| Sugars | 3.6 g | 14% |
| Protein | 0.4 g | 0% |
Variations & Substitutions
- Dark Chocolate Delight: Use 85% cacao dark chocolate for an intense, less sweet version.
- Coconut Extract Boost: Add a ½ teaspoon of coconut extract to the coconut mixture for an even more pronounced coconut flavor.
- Nutty Addition: Incorporate ¼ cup of chopped toasted almonds or macadamia nuts into the coconut mixture for added texture and flavor.
- White Chocolate Variation: Replace the bittersweet chocolate with white chocolate for a sweeter, creamier alternative.
- Dairy-Free Option: Substitute the sweetened condensed milk with a plant-based condensed milk alternative to make this recipe dairy-free. Check ingredients on chocolate to ensure the chocolate is also dairy-free.
FAQs (Frequently Asked Questions)
Q: Can I use all sweetened flaked coconut if I can’t find unsweetened dried coconut?
A: Yes, you can! The original recipe creator did just that. The bites will be slightly sweeter, but still delicious.
Q: How do I prevent the chocolate from seizing when melting it?
A: Avoid getting any water or steam into the chocolate while melting. Use a clean, dry bowl and gentle heat.
Q: Can I make these ahead of time?
A: Absolutely! These bites are perfect for making ahead. Store them in an airtight container in the refrigerator for up to a week, or freeze them for longer storage.
Q: My coconut layer is crumbly and not sticking together. What did I do wrong?
A: You may not have used enough sweetened condensed milk. Add a tablespoon more at a time until the mixture holds together when pressed.
Q: Can I use a different size pan?
A: Yes, but the thickness of the bites will vary. A smaller pan will result in thicker bites, while a larger pan will yield thinner bites. You may need to adjust the chilling time accordingly.
Final Thoughts
These Coconut Chocolate Bites are a simple yet irresistible treat that will transport you to a place of pure indulgence. Whether you’re a seasoned baker or just starting out, this recipe is foolproof and guaranteed to impress. So, gather your ingredients, preheat your oven (figuratively!), and get ready to create a batch of these heavenly bites. Don’t be afraid to experiment with variations to suit your own taste preferences. And most importantly, enjoy the process and savor every delicious bite!