
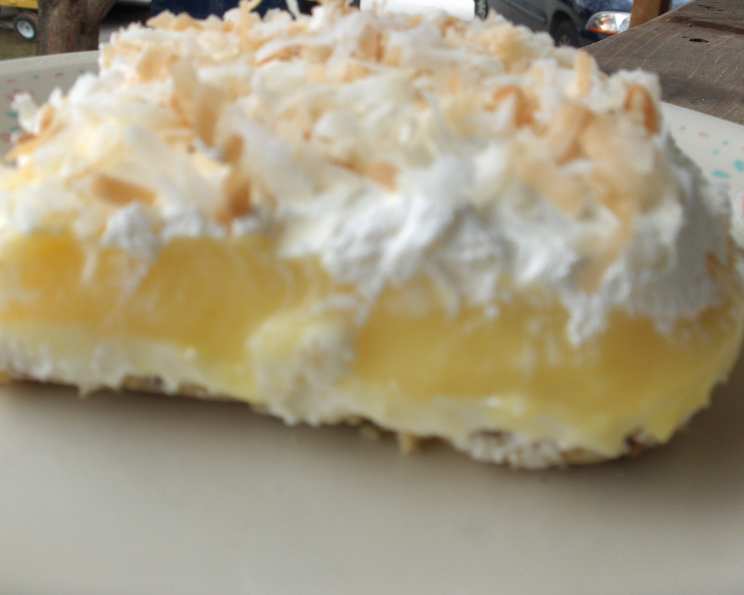
Coconut Dream Dessert: A Taste of Paradise
My grandmother, bless her heart, wasn’t much of a baker. Her strength lay in hearty stews and comforting roasts. But there was one dessert, a Coconut Dream, that she pulled out for every summer picnic, church potluck, and family gathering. It wasn’t fancy, but that was its charm. Each creamy, coconutty bite was a reminder of sunshine, laughter, and the simple joy of being together. This recipe is inspired by her original, a little bit updated, but with all the love intact.
Recipe Overview
- Prep Time: 45 minutes
- Cook Time: 15 minutes
- Total Time: 1 hour
- Servings: 12
- Yield: 1 (9×13 inch) pan
- Dietary Type: Not specified
Ingredients
Crust
- 1 cup flour
- 1/2 cup (1 stick) butter or margarine
- 1/2 – 1 cup chopped pecans (adjust to your preferred level of nuttiness)
Filling – First Layer
- 1 cup powdered sugar
- 8 ounces cream cheese, softened
- 8 ounces Cool Whip
Filling – Second Layer
- 2 (3 ounce) packages cook and serve coconut pudding mix
- 4 cups milk (whole or 2% recommended for best flavor)
Garnish
- 8 ounces Cool Whip
- 1/2 cup toasted coconut
- 1/4 cup chopped pecans
Equipment Needed
- 9×13 inch baking pan
- Mixing bowls (medium and large)
- Electric mixer
- Saucepan
- Whisk
- Plastic wrap
Instructions
- Prepare the Crust: Preheat your oven to 350°F (175°C). In a large mixing bowl, combine the flour, butter (or margarine), and chopped pecans. Use your hands or a pastry blender to cut the butter into the flour until the mixture resembles coarse crumbs. The pecans should be evenly distributed throughout.
- Press and Bake the Crust: Press the mixture firmly and evenly into the bottom of a 9×13-inch baking pan. Bake for 15 minutes, or until lightly browned. Keep a close eye on it during the last few minutes to prevent burning.
- Cool the Crust: Remove the pan from the oven and set aside to cool completely. This is crucial, as a warm crust will melt the subsequent layers.
- Make the First Filling Layer: In a medium mixing bowl, beat the softened cream cheese and powdered sugar together with an electric mixer until smooth and creamy. Ensure the cream cheese is thoroughly softened to avoid lumps.
- Incorporate Cool Whip: Gently fold in the Cool Whip until just combined. Be careful not to overmix, as this can deflate the Cool Whip.
- Spread the First Layer: Spread the cream cheese mixture evenly over the cooled crust. Use an offset spatula or the back of a spoon to create a smooth surface.
- Prepare the Coconut Pudding: In a saucepan, combine the coconut pudding mix and milk. Whisk constantly over medium heat until the mixture comes to a simmer and thickens. Continue to cook for 1 minute, stirring constantly, to ensure the pudding is fully cooked.
- Cool the Pudding: Remove the saucepan from the heat. To prevent a skin from forming on the surface of the pudding, press a sheet of plastic wrap directly onto the surface. Allow the pudding to cool completely to room temperature. Important: Cooling the pudding is necessary before adding the next layer.
- Assemble the Dessert: Once the coconut pudding has cooled, spread it evenly over the cream cheese layer.
- Top with Cool Whip: Spread the remaining Cool Whip evenly over the coconut pudding layer.
- Garnish: Sprinkle the toasted coconut and chopped pecans over the top of the Cool Whip. Get creative with the pattern!
- Chill: Cover the pan with plastic wrap and chill in the refrigerator for at least 2 hours before serving, or preferably overnight. This allows the flavors to meld together and the layers to set properly.
Expert Tips & Tricks
- Toasting Coconut: Toasting the coconut enhances its flavor and adds a nice crunch. Spread shredded coconut on a baking sheet and bake at 350°F (175°C) for 5-7 minutes, or until golden brown, watching carefully to prevent burning. You can also toast it in a dry skillet over medium heat, stirring constantly.
- Softening Cream Cheese: The easiest way to soften cream cheese is to leave it at room temperature for about 30 minutes. If you’re short on time, you can microwave it in 15-second intervals, checking and stirring in between, until softened. Be careful not to melt it!
- Preventing a Soggy Crust: Ensuring the crust is completely cooled before adding the filling is crucial to prevent it from becoming soggy.
- Nuts: Feel free to use other nuts such as walnuts or almonds, or even a mix!
- Flavor Boost: Consider adding a teaspoon of coconut extract to the pudding mixture for an even more intense coconut flavor.
Serving & Storage Suggestions
To serve, cut the Coconut Dream Dessert into squares and serve chilled. Garnish each serving with a fresh sprig of mint or a dollop of whipped cream, if desired.
Leftovers should be stored in an airtight container in the refrigerator. The dessert will keep for up to 3 days. While freezing is not recommended due to the texture of the Cool Whip, individual slices can be frozen for longer storage, though the texture may change slightly upon thawing.
Nutritional Information
Note: Nutritional information is an estimate and may vary based on specific ingredients and serving sizes.
| Nutrient | Amount per Serving | % Daily Value |
|---|---|---|
| Calories | 420 kcal | 21% |
| Total Fat | 28g | 43% |
| Saturated Fat | 18g | 90% |
| Cholesterol | 45mg | 15% |
| Sodium | 200mg | 8% |
| Total Carbohydrate | 38g | 13% |
| Dietary Fiber | 1g | 4% |
| Sugars | 25g | – |
| Protein | 4g | 8% |
Variations & Substitutions
- Gluten-Free: Substitute the regular flour in the crust with a gluten-free all-purpose flour blend. You may need to add a tablespoon or two of water to help the dough come together.
- Dairy-Free: Use a dairy-free cream cheese alternative and coconut milk for the pudding. Substitute the Cool Whip with a dairy-free whipped topping.
- Lower Sugar: Use a sugar substitute like Stevia or Monk Fruit in place of the powdered sugar in the cream cheese layer. Look for a sugar-free coconut pudding mix.
- Chocolate Coconut Dream: Add a layer of chocolate pudding between the cream cheese and coconut pudding layers for a decadent twist.
FAQs (Frequently Asked Questions)
Q: Can I use instant pudding instead of cook and serve?
A: Yes, if you’re short on time, you can substitute the cooked pudding with instant coconut pudding. Just prepare it according to the package directions and allow it to set slightly before spreading it on the cream cheese layer.
Q: How do I toast the coconut without burning it?
A: The key is to keep a close eye on the coconut while it’s toasting. Stir it frequently, and remove it from the oven or skillet as soon as it turns golden brown.
Q: Can I make this dessert ahead of time?
A: Absolutely! In fact, it’s best to make it at least a few hours ahead of time to allow the flavors to meld together and the layers to set. You can even make it the day before serving.
Q: My crust is too crumbly and won’t stay together. What can I do?
A: Try adding a tablespoon or two of cold water to the crust mixture and mixing it in until the dough comes together.
Q: Can I use a different size pan?
A: While a 9×13 inch pan is ideal, you can use a slightly smaller or larger pan. Keep in mind that the layers may be thicker or thinner, and the baking time may need to be adjusted.
Final Thoughts
I truly hope you give this Coconut Dream Dessert a try. It’s more than just a recipe; it’s a connection to cherished memories and simple pleasures. It’s perfect for bringing to potlucks, sharing with family and friends, or simply enjoying on a warm summer evening. Feel free to personalize it with your own favorite toppings or flavor variations. And please, share your creations and experiences – I’d love to hear how it turns out! Maybe pair it with a light, fruity white wine or a refreshing iced tea for the ultimate treat.