
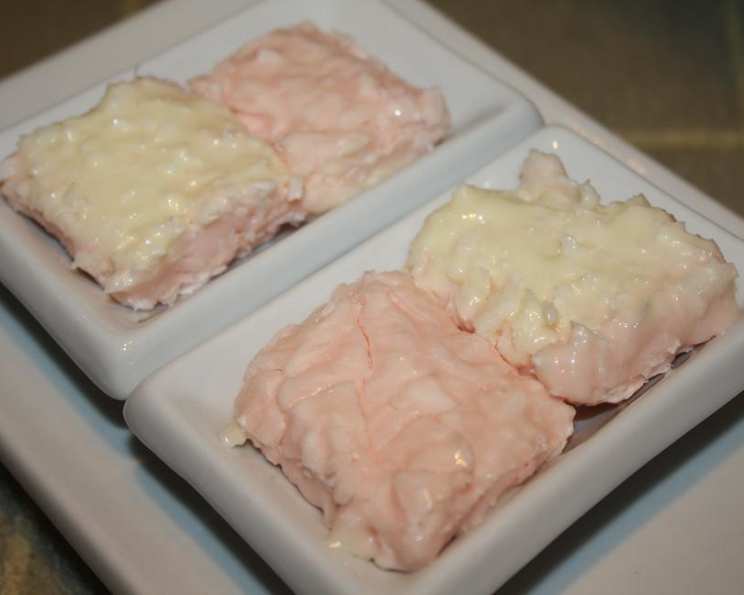
Coconut Ice: An Old-Fashioned Sweet Shop Classic
The scent of coconut always transports me back to childhood summer holidays. My grandmother, a baker of legendary status in our family, would always have a batch of coconut ice cooling in the pantry. The pastel pink and white squares, sweet and slightly crumbly, were an irresistible treat, a taste of pure joy that I’ve carried with me ever since. Making coconut ice today feels like a warm hug from the past, a way to connect with those cherished memories and share that simple pleasure with a new generation.
Recipe Overview
- Prep Time: 15 minutes
- Cook Time: 0 minutes (plus setting time)
- Total Time: 4 hours 15 minutes (minimum)
- Yields: 50-60 Squares
- Dietary Type: Vegetarian
Ingredients
- 405g condensed milk (NOT evaporated milk)
- 340g desiccated coconut (coconut flakes, unsweetened)
- 340g icing sugar, sifted (confectioner’s sugar)
- ½ teaspoon vanilla extract
- 2-3 drops red food coloring
Equipment Needed
- 20cm square tin
- Baking parchment
- Mixing bowl
- Spoon
Instructions
- Start by lining your 20cm square tin with baking parchment. This will make it much easier to remove the coconut ice later and cut it into neat squares. Ensure the parchment slightly overhangs the edges of the tin for easy lifting.
- In a large mixing bowl, combine the condensed milk, desiccated coconut, sifted icing sugar, and vanilla extract. Mix thoroughly until all the ingredients are evenly combined. You’re looking for a fairly stiff, slightly sticky mixture.
- Divide the mixture in half. Spoon half of the mixture into the base of the prepared tin and spread it out evenly with the back of a spoon. Press down firmly to create a compact layer.
- Add the red food coloring to the remaining mixture in the bowl. Start with 2 drops and add another if needed to achieve your desired shade of pink. Blend well until the color is even throughout.
- Carefully spread the pink mixture over the top of the white layer in the tin. Use the back of a spoon to smooth out the surface, ensuring it’s level and even.
- Now comes the hard part: patience! Leave the coconut ice overnight, or at least for 4-5 hours, in a cool place to set. This is crucial for the coconut ice to firm up properly and develop its characteristic crumbly texture. Avoid placing it in the refrigerator, as this can make it too hard.
- Once set, remove the coconut ice from the tin by lifting the baking parchment. Place it on a cutting board and use a sharp knife to cut it into squares. The size of the squares is up to you, but traditionally they are around 2-3cm.
Expert Tips & Tricks
- Sifting the icing sugar is crucial to avoid lumps in your coconut ice, resulting in a smoother texture.
- Don’t be tempted to use evaporated milk! Only condensed milk will give you the correct consistency and sweetness.
- For a more intense coconut flavor, you can lightly toast the desiccated coconut in a dry pan before adding it to the mixture. Just be careful not to burn it!
- If your coconut ice is too soft after the setting time, leave it for longer. The setting time can vary depending on the temperature and humidity of your environment.
- For a more professional finish, use a warm, clean knife to cut the coconut ice into squares. This will help to prevent the mixture from sticking to the knife and creating ragged edges.
- If you want to get really creative, you can add a few drops of peppermint extract to half of the mixture instead of red food coloring for a refreshing twist.
Serving & Storage Suggestions
Coconut ice is best served at room temperature. Arrange the squares on a pretty plate or in a small bowl for a delightful treat.
To store, keep the coconut ice in an airtight container. It will keep for up to 4 weeks at room temperature. The flavor and texture may change slightly over time, but it will still be delicious. There’s no need to refrigerate it unless your kitchen is exceptionally warm. You can freeze coconut ice, but the texture may become slightly more crumbly upon thawing.
Nutritional Information
(Estimated values per square, based on approximately 55 squares per batch)
| Nutrient | Amount per Serving | % Daily Value |
|---|---|---|
| Calories | 85 kcal | 4% |
| Total Fat | 3g | 4% |
| Saturated Fat | 2g | 10% |
| Cholesterol | 3mg | 1% |
| Sodium | 28mg | 1% |
| Total Carbohydrate | 14g | 5% |
| Dietary Fiber | 0g | 0% |
| Sugars | 14g | 28% |
| Protein | 1g | 2% |
Variations & Substitutions
- Vegan Coconut Ice: Unfortunately, this recipe relies heavily on condensed milk, so a like-for-like vegan substitution is challenging. However, with significant recipe modifications using a combination of coconut cream, sugar, and potentially a thickener like agar-agar, you could attempt a vegan version. The texture will likely be different.
- Flavor Variations: Experiment with different extracts, such as almond, lemon, or orange, to add a unique twist to the flavor. You can also add a pinch of ground cardamom or ginger to the mixture for a warmer, spicier flavor.
- Color Variations: Instead of red food coloring, use other food colorings to create a variety of pastel shades. Green, yellow, and blue would all work well.
- Texture Variations: If you prefer a less crumbly texture, add a tablespoon of melted butter or coconut oil to the mixture. This will help to bind the ingredients together and create a smoother, more fudge-like consistency.
FAQs (Frequently Asked Questions)
Q: Why is my coconut ice too soft?
A: The most common reason for soft coconut ice is not allowing it to set for long enough. Leave it in a cool place for at least 4-5 hours, or preferably overnight. Also, ensure you’ve used condensed milk, not evaporated milk.
Q: Can I use fresh coconut instead of desiccated coconut?
A: While you could use fresh coconut, it will significantly alter the texture and moisture content of the coconut ice. Desiccated coconut is recommended for the best results.
Q: How do I prevent the layers from separating?
A: Press down firmly on the first layer before adding the second layer. This will help to create a good bond between the two layers.
Q: Can I add other ingredients, like nuts or dried fruit?
A: Yes, you can add chopped nuts or dried fruit to the mixture for added flavor and texture. Just be sure to chop them finely so they don’t make it difficult to cut the coconut ice into squares.
Q: Is it possible to make this recipe without icing sugar?
A: Icing sugar is essential for the texture of coconut ice. Granulated sugar will not work as a direct substitute, as it will result in a grainy texture. You could try grinding granulated sugar into a fine powder, but the results may vary.
Final Thoughts
Coconut ice is more than just a sweet treat; it’s a little piece of history, a taste of nostalgia, and a reminder of simpler times. Whether you’re making it for a special occasion, a gift for a loved one, or simply to satisfy your own sweet tooth, I hope this recipe brings you as much joy as it has brought me over the years. So gather your ingredients, roll up your sleeves, and get ready to create a batch of this classic confectionery. I’d love to hear about your experience and any variations you try, so please share your feedback and photos! Happy baking!