
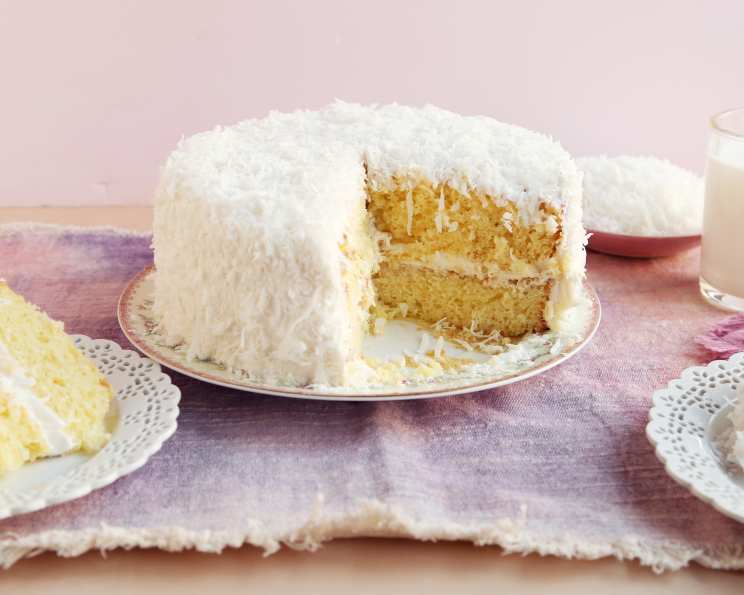
Coconut Layer Cake with Cream Cheese Coconut Frosting
The scent of coconut always transports me back to my grandmother’s kitchen. Every summer, she would bake a towering coconut cake, its layers impossibly light and fluffy, slathered with a tangy cream cheese frosting. We’d sit on her porch swing, the humid air thick with the aroma of sunshine and sweet coconut, each bite a little piece of heaven. This recipe is my attempt to recapture that magic, to share a slice of those precious memories.
Recipe Overview
- Prep Time: 30 minutes
- Cook Time: 30-35 minutes
- Total Time: 1 hour 5 minutes
- Servings: 24
- Yield: 1 Coconut Layer Cake
- Dietary Type: Not specified
Ingredients
- 3 cups all-purpose flour
- 1 tablespoon baking powder
- 1/4 teaspoon salt
- 1 cup butter, softened
- 2 cups sugar
- 4 eggs, separated
- 1 cup milk
- 1 teaspoon vanilla extract
- 1 teaspoon coconut extract
- 1 cup shredded coconut
- 1/2 cup butter, softened
- 8 ounces cream cheese, softened
- 4 cups powdered sugar
- 1 teaspoon vanilla extract
- 1 teaspoon coconut extract
- 1 cup shredded coconut
Equipment Needed
- Two 9-inch cake pans
- Mixing bowls
- Electric mixer (handheld or stand)
- Sifter
- Rubber spatula or wooden spoon
- Measuring cups and spoons
- Cooling rack
Instructions
-
Preheat your oven to 350 degrees F (175 degrees C). Grease and flour two 9-inch cake pans. This is crucial to prevent the cake from sticking and ensuring easy removal after baking. A light dusting of flour after greasing is usually sufficient.
-
In a medium bowl, sift together the all-purpose flour, baking powder, and salt. Sifting ensures a light and airy cake by removing lumps and evenly distributing the baking powder and salt. Set this dry mixture aside.
-
In a large mixing bowl, cream together 1 cup of softened butter until it is light and fluffy. Add the sugar gradually, beating until the mixture is smooth and well combined. Proper creaming of butter and sugar is key to a tender cake; aim for a pale, fluffy consistency.
-
Add the egg yolks one at a time, beating well after each addition. Ensure each yolk is fully incorporated before adding the next. This helps to emulsify the batter and create a stable structure.
-
Gradually add the dry flour mixture and the milk to the wet ingredients, alternating between the two. Begin and end with the flour mixture. Mix until just combined. Be careful not to overmix, as this can develop the gluten in the flour and result in a tough cake.
-
Stir in the vanilla extract, coconut extract, and 1 cup of shredded coconut. These flavor enhancers add depth and complexity to the cake’s profile.
-
In a separate clean, dry bowl, beat the egg whites until stiff but not dry peaks form. The bowl and beaters must be completely clean to achieve properly whipped egg whites. Stiff peaks should stand up straight when the beaters are lifted.
-
Gently fold the whipped egg whites into the cake batter. This step is crucial for creating a light and airy texture. Fold gently using a rubber spatula or wooden spoon, being careful not to deflate the egg whites. Work from the bottom of the bowl up and over, turning the batter as you go.
-
Divide the batter evenly between the prepared cake pans. Use a kitchen scale for precise evenness if desired.
-
Bake in the preheated oven for 30-35 minutes, or until a toothpick inserted into the center of the cake comes out clean. Start checking for doneness around the 30-minute mark. If the cake is browning too quickly, you can tent it loosely with aluminum foil.
-
Allow the cakes to cool completely in the pans before frosting. Cooling prevents the frosting from melting and allows the cake to firm up, making it easier to handle.
-
To Make the Frosting: In a large mixing bowl, blend together the 1/2 cup softened butter and softened cream cheese until smooth and creamy.
-
Gradually add the powdered sugar, beating on low speed until incorporated. Then increase the speed and beat until the frosting is light and fluffy.
-
Stir in the vanilla extract, coconut extract, and 1 cup of shredded coconut.
-
Spread the frosting evenly over the cooled cake layers, starting with a generous layer on top of the first cake, then stacking the second layer on top, and finishing by frosting the top and sides.
Expert Tips & Tricks
- Room temperature ingredients are key. Softened butter and cream cheese will cream together much more easily, resulting in a smoother frosting. Room temperature eggs will also incorporate better into the batter.
- Don’t overbake the cakes. Overbaking will result in a dry, crumbly cake. Check for doneness with a toothpick, and err on the side of slightly underbaked if necessary. The cake will continue to cook slightly as it cools.
- For a moister cake: Brush the cooled cake layers with simple syrup flavored with coconut extract before frosting. This will add extra moisture and flavor.
- Toasting the coconut: Toasting the shredded coconut before adding it to the cake and frosting enhances its flavor and adds a slightly nutty taste. Spread the coconut on a baking sheet and bake at 350 degrees F (175 degrees C) for 5-7 minutes, or until lightly golden brown, watching carefully to prevent burning.
- Make ahead frosting: The frosting can be made a day in advance and stored in the refrigerator. Bring it to room temperature and rewhip it before using.
Serving & Storage Suggestions
Serve the coconut layer cake chilled or at room temperature. Garnish with extra shredded coconut or toasted coconut flakes for a beautiful presentation.
- Storage: Leftover cake should be stored in an airtight container in the refrigerator. It will keep for up to 3-4 days.
- Freezing: The unfrosted cake layers can be frozen for up to 2 months. Wrap them tightly in plastic wrap and then in aluminum foil. Thaw completely before frosting. Frosted cake can also be frozen, but the frosting may become slightly soft upon thawing.
- Reheating: No reheating is necessary, but a slightly warmed slice can be delicious.
Nutritional Information
(Estimated values; actual values may vary based on ingredient brands and specific measurements)
| Nutrient | Amount per Serving | % Daily Value |
|---|---|---|
| Calories | 392.7 kcal | N/A |
| Calories from Fat | 169 g | 43% |
| Total Fat | 18.8 g | 28% |
| Saturated Fat | 12.1 g | 60% |
| Cholesterol | 73.3 mg | 24% |
| Sodium | 239.3 mg | 9% |
| Total Carbohydrate | 53.4 g | 17% |
| Dietary Fiber | 0.8 g | 3% |
| Sugars | 40 g | 159% |
| Protein | 3.9 g | 7% |
Variations & Substitutions
- Gluten-Free: Substitute a gluten-free all-purpose flour blend for the regular flour. Be sure to use a blend that contains xanthan gum or guar gum for binding.
- Dairy-Free: Use a plant-based butter substitute and cream cheese alternative for a dairy-free version. Coconut milk can also be used in place of regular milk.
- Extract Variations: Experiment with different extracts, such as almond extract or rum extract, for a unique flavor twist.
- Citrus Zest: Add a tablespoon of lemon or lime zest to the cake batter for a bright, refreshing flavor.
FAQs (Frequently Asked Questions)
Q: Can I use sweetened coconut instead of unsweetened?
A: Yes, you can, but you may want to reduce the amount of sugar in the cake batter slightly to compensate for the added sweetness.
Q: What if I don’t have coconut extract?
A: If you don’t have coconut extract, you can omit it. The cake will still have a coconut flavor from the shredded coconut. Consider adding a bit of coconut oil for extra flavor.
Q: Can I make this cake ahead of time?
A: Absolutely! The cake layers can be baked a day or two in advance and stored tightly wrapped at room temperature or in the refrigerator. You can also make the frosting ahead of time and store it in the refrigerator.
Q: How do I prevent the cake from sticking to the pan?
A: Make sure to grease and flour your cake pans thoroughly. You can also use parchment paper rounds in the bottom of the pans for extra insurance.
Q: My frosting is too thick. What should I do?
A: Add a tablespoon or two of milk or cream until the frosting reaches the desired consistency.
Final Thoughts
This Coconut Layer Cake with Cream Cheese Coconut Frosting is more than just a dessert; it’s a taste of sunshine, a slice of nostalgia, and a testament to the power of simple, home-baked goodness. Don’t be intimidated by the multiple steps – each one is straightforward, and the result is well worth the effort. Gather your ingredients, preheat your oven, and prepare to create a cake that will transport you and your loved ones to a tropical paradise. Share it with friends, family, or anyone who needs a little sweetness in their day. And please, let me know how it turns out – I’d love to hear your baking adventures!