
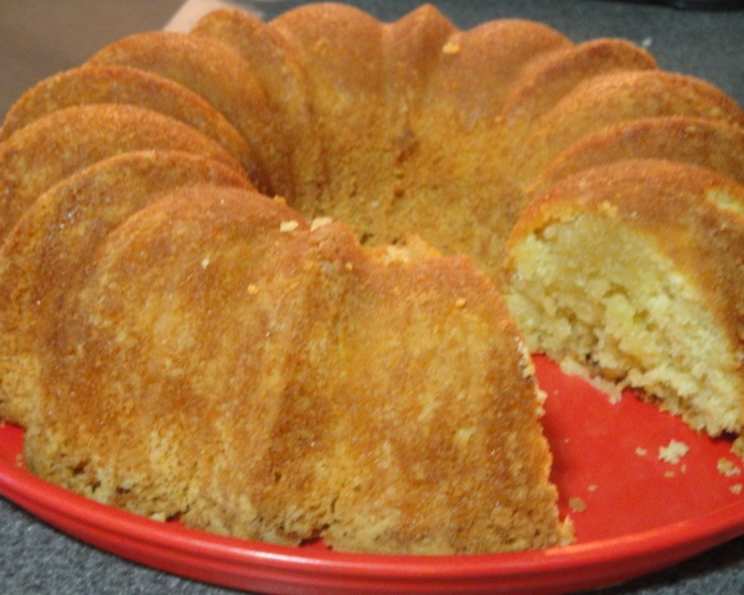
The Irresistible Charm of Coconut Pound Cake: A Taste of Southern Comfort
I still remember the first time I tasted coconut pound cake. It was at my Aunt Carol’s house in Savannah, during a sweltering summer afternoon. The humidity hung thick in the air, but the moment that slice of cake touched my tongue, I was transported. The rich, buttery crumb, the intense coconut flavor, and the sweet, almost crystalline glaze—it was pure Southern comfort on a plate. It wasn’t just dessert; it was a hug from my aunt, a taste of home, and a memory I’ve cherished for years. That’s why I’m so excited to share this incredible Coconut Pound Cake recipe with you. It captures the essence of that memory, delivering a moist, flavorful cake that’s perfect for any occasion.
Recipe Overview
- Prep Time: 20 minutes
- Cook Time: 1 hour
- Total Time: 1 hour 20 minutes
- Servings: 12-15
- Yield: 1 cake
- Dietary Type: Not Gluten-Free
Ingredients
- 2 cups sugar
- 1 cup Butter Flavor Crisco
- 1 pinch salt
- 5 eggs
- 2 teaspoons coconut extract
- 2 cups flour
- 1 1/2 teaspoons baking powder
- 1/2 cup milk
- 1 (3 1/2 ounce) can angel flake coconut
Topping
- 1 cup sugar
- 2 teaspoons coconut extract
- 1/2 cup water
Equipment Needed
- Large mixing bowl
- Separate mixing bowl
- Sifter
- Small saucepan
- Greased and floured bundt pan
- Measuring cups and spoons
- Cooling rack
Instructions
-
Begin by preheating your oven to 325 degrees Fahrenheit. This lower temperature is crucial for achieving that incredibly moist texture pound cakes are known for.
-
In a large mixing bowl, cream together the sugar, Butter Flavor Crisco, and salt. Creaming is the process of incorporating air into the fat and sugar, creating a light and fluffy base for your cake. Beat these ingredients together until the mixture is pale and smooth.
-
Add the eggs one at a time, ensuring each egg is fully incorporated before adding the next. This prevents the mixture from curdling and helps to maintain a smooth batter. Mix well after each addition.
-
Stir in the coconut extract and mix thoroughly. The coconut extract is what gives this cake its signature tropical flavor, so don’t skimp on it!
-
In a separate bowl, sift together the flour and baking powder. Sifting ensures that the baking powder is evenly distributed throughout the flour, resulting in a more uniform rise.
-
Add the milk to the creamed mixture, alternating with the flour mixture. Begin and end with the flour mixture, adding it in three additions. This helps to prevent gluten development, which can lead to a tough cake. Mix until just combined. Be careful not to overmix, as this will result in a dense cake.
-
Gently fold in the angel flake coconut. Be careful not to overmix at this stage as well. You want the coconut to be evenly distributed without deflating the batter.
-
Pour the batter into a greased and floured bundt pan. Greasing and flouring the pan ensures that the cake releases easily after baking.
-
Bake in the preheated oven for 1 hour. The baking time may vary slightly depending on your oven, so it’s important to check for doneness.
-
About 10 minutes before the cake is done, prepare the topping. In a small saucepan, combine the sugar, coconut extract, and water.
-
Bring the mixture to a boil over medium heat and boil for one minute, stirring constantly until the sugar has completely dissolved. This creates a simple syrup that will soak into the cake, adding moisture and sweetness.
-
Once the cake is done – a toothpick inserted into the center comes out clean – remove it from the oven and immediately pour the hot topping over the cake while it’s still in the pan. This allows the syrup to penetrate the cake evenly, creating a wonderfully moist and flavorful crumb.
-
Let the cake sit in the pan for 30 minutes before inverting it onto a serving plate. This allows the cake to cool slightly and set, making it easier to remove without breaking.
Expert Tips & Tricks
- Use room temperature ingredients: Allowing your butter, eggs, and milk to come to room temperature will help them emulsify properly, resulting in a smoother batter and a more tender cake.
- Don’t overmix: Overmixing the batter will develop the gluten in the flour, leading to a tough cake. Mix until just combined.
- Check for doneness: Insert a toothpick into the center of the cake. If it comes out clean, the cake is done. If it comes out with wet batter on it, bake for a few more minutes and check again.
- If the top of the cake is browning too quickly, tent it loosely with foil.
Serving & Storage Suggestions
This Coconut Pound Cake is delicious served on its own, but it’s also wonderful with a dollop of whipped cream or a scoop of vanilla ice cream. You can also garnish it with fresh berries or toasted coconut flakes for an extra touch of elegance.
To store, wrap the cake tightly in plastic wrap or place it in an airtight container. It will keep at room temperature for 2-3 days, in the refrigerator for up to a week, or in the freezer for up to 2 months. If freezing, wrap the cake well to prevent freezer burn. To reheat, thaw the cake at room temperature and then warm it slightly in the oven or microwave.
Nutritional Information
| Nutrient | Amount per Serving | % Daily Value |
|---|---|---|
| Calories | 501.1 kcal | N/A |
| Calories from Fat | 197 g | 39% |
| Total Fat | 22 g | 33% |
| Saturated Fat | 10 g | 50% |
| Cholesterol | 88.5 mg | 29% |
| Sodium | 117.6 mg | 4% |
| Total Carbohydrate | 71 g | 23% |
| Dietary Fiber | 1.4 g | 5% |
| Sugars | 53.1 g | 212% |
| Protein | 5.4 g | 10% |
Note: Nutritional information is an estimate and may vary based on specific ingredients and portion sizes.
Variations & Substitutions
- For a dairy-free version: Substitute the milk with coconut milk or almond milk. You may also need to use a dairy-free butter substitute for the Butter Flavor Crisco.
- For a gluten-free version: Use a gluten-free all-purpose flour blend. You may also need to add a binding agent such as xanthan gum to help hold the cake together.
- Add citrus zest: A teaspoon of lemon or lime zest will brighten the flavor of the cake and complement the coconut beautifully.
- Toast the coconut: Toasted coconut flakes add a nutty flavor and a crunchy texture to the cake. Simply toast the coconut flakes in a dry skillet over medium heat until golden brown, stirring frequently.
FAQs (Frequently Asked Questions)
Q: Can I use regular butter instead of Butter Flavor Crisco?
A: While you can substitute with butter, the Butter Flavor Crisco contributes to the cake’s exceptionally moist texture. Butter may yield a slightly denser result.
Q: Can I use sweetened shredded coconut instead of angel flake coconut?
A: Yes, you can, but angel flake coconut is finer and disperses more evenly throughout the cake. If using shredded coconut, consider pulsing it in a food processor to make it finer.
Q: Why is my cake sinking in the middle?
A: This can happen if the oven temperature is too high or if the cake is not fully baked. Make sure to use an oven thermometer to ensure accurate temperature and check for doneness with a toothpick.
Q: Can I make this cake ahead of time?
A: Absolutely! This cake actually tastes better the next day, as the flavors have had time to meld together. Store it tightly wrapped at room temperature or in the refrigerator.
Q: Can I freeze this cake?
A: Yes, you can freeze this cake for up to 2 months. Wrap it tightly in plastic wrap and then in foil to prevent freezer burn. Thaw overnight in the refrigerator before serving.
Final Thoughts
This Coconut Pound Cake is more than just a recipe; it’s an invitation to create memories. It’s a reminder of simpler times, of summer afternoons spent with loved ones, and of the comforting power of a delicious homemade treat. So, gather your ingredients, preheat your oven, and embark on this culinary adventure. I encourage you to try this recipe, share it with your friends and family, and create your own coconut pound cake memories. Perhaps you could serve it alongside a refreshing iced tea or a creamy coconut cocktail. And please, let me know how it turns out! I’d love to hear your feedback and any variations you might try. Happy baking!