
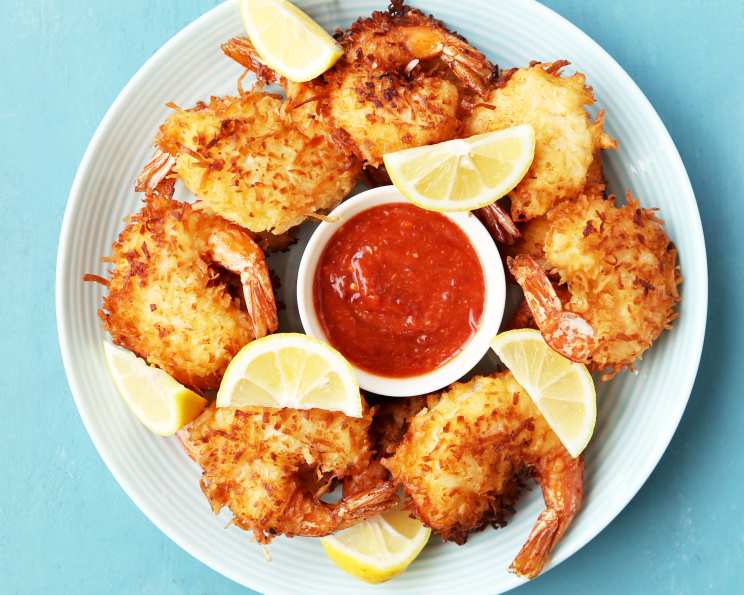
Golden Coconut Shrimp: A Taste of Paradise
I remember the first time I tasted coconut shrimp. I was on a family vacation in the Florida Keys, probably about ten years old, and we stumbled upon a tiny beachfront shack that promised “the best coconut shrimp in the world.” Skeptical, yet intrigued, we ordered a basket, and what arrived was pure, unadulterated bliss: crispy, golden-brown shrimp, dripping with a sweet, tropical flavor that transported me straight to paradise. That first bite sparked a lifelong love affair with this iconic dish, and I’ve been chasing that perfect coconut shrimp ever since.
Recipe Overview
- Prep Time: 20 minutes
- Cook Time: 10-15 minutes
- Total Time: 30-35 minutes
- Servings: 4-6
- Dietary Type: Not specified
Ingredients
- 6 ounces beer
- 5 eggs
- 1 cup milk
- 2 1/2 cups flour
- 8 ounces coconut, shredded
- 1/2 teaspoon salt
- 1-2 teaspoons sugar (adjust to taste)
- 1/2 teaspoon baking powder
- 15-20 large shrimp, peeled and deveined
- Oil, for frying (vegetable, canola, or peanut oil work well)
Equipment Needed
- Large mixing bowl
- Whisk
- Shallow dishes or plates (for dredging)
- Deep fryer or large pot
- Slotted spoon or spider
- Paper towels (for draining)
Instructions
-
Prepare the batter: In a large mixing bowl, whisk together the beer, eggs, milk, flour, salt, sugar, and baking powder until smooth. It is important to ensure there are no lumps in the batter so that you get a smooth and even coating on the shrimp. A slightly thicker batter will adhere to the shrimp better.
-
Prepare the dredging station: Pour the shredded coconut into a shallow dish or plate. This will be the final coating for your shrimp.
-
Dredge the shrimp: Take each shrimp and dredge it thoroughly in the batter mixture. Ensure the shrimp is fully coated.
-
Double dip (optional, but recommended): For an extra crispy and substantial coating, redip the battered shrimp a second time into the batter. This step creates a thicker layer that will hold the coconut better and result in a crispier final product.
-
Coat with coconut: Immediately after the second dip, roll the battered shrimp in the shredded coconut, pressing gently to ensure the coconut adheres well. Make sure the entire surface of the shrimp is covered with coconut for that signature flavor and texture.
-
Resting period: After coating with coconut, let the shrimp rest for about 10 minutes. This allows the batter and coconut to set slightly, preventing the coconut from falling off during frying.
-
Heat the oil: In a deep fryer or large pot, heat the oil to 350-375°F (175-190°C). Use a thermometer to ensure the oil is at the correct temperature. If the oil is not hot enough, the shrimp will be greasy. If it is too hot, the coconut will burn before the shrimp is cooked through.
-
Fry the shrimp: Carefully place the coconut-coated shrimp into the hot oil in batches, ensuring not to overcrowd the fryer. Overcrowding will lower the oil temperature and result in soggy shrimp.
-
Cook until golden: Deep fry the shrimp for 2-3 minutes per side, or until they are golden brown and cooked through. The internal temperature of the shrimp should reach 145°F (63°C).
-
Drain: Using a slotted spoon or spider, remove the fried shrimp from the oil and place them on a plate lined with paper towels to drain excess oil. This helps to keep the shrimp crispy and prevents them from becoming soggy.
-
Serve immediately: Serve the coconut shrimp immediately while they are still hot and crispy.
Expert Tips & Tricks
- Beer Selection: The type of beer you use can affect the flavor of the batter. A light lager will give a subtle flavor, while a more robust beer like an IPA will add a more pronounced, hoppy note. Experiment to find your preference. Non-alcoholic beer can also be used.
- Coconut Toasting: For a more intense coconut flavor, lightly toast the shredded coconut in a dry skillet before using it. Be careful not to burn it.
- Shrimp Preparation: Pat the shrimp dry with paper towels before dredging. This helps the batter adhere better.
- Frying Oil: Use a high-smoke-point oil like vegetable, canola, or peanut oil for frying. Avoid olive oil, which has a lower smoke point.
- Keeping it Crispy: To keep the fried shrimp crispy while you are frying subsequent batches, place them on a wire rack in a preheated oven at 200°F (93°C). This will help to maintain their crispiness without overcooking them.
- Batter Consistency: The batter should be thick enough to coat the shrimp evenly but thin enough to drip off easily. If the batter is too thick, add a little more milk or beer. If it is too thin, add a little more flour.
- Flavor Boost: Add a pinch of cayenne pepper to the batter for a subtle kick.
Serving & Storage Suggestions
Serve the coconut shrimp hot, ideally immediately after frying, to enjoy their maximum crispness and flavor. They pair exceptionally well with sweet chili sauce, mango salsa, or a creamy pineapple dipping sauce. Garnish with fresh cilantro or lime wedges for a pop of color and freshness.
Leftover coconut shrimp can be stored in an airtight container in the refrigerator for up to 2 days. To reheat, bake in a preheated oven at 350°F (175°C) for 5-10 minutes, or until heated through and crispy. Reheating in the microwave is not recommended, as it will make the shrimp soggy. Freezing is also not recommended, as it can affect the texture of the shrimp and the crispness of the coating.
Nutritional Information
| Nutrient | Amount per Serving | % Daily Value (approximate) |
|---|---|---|
| Calories | 450 kcal | 23% |
| Total Fat | 25g | 38% |
| Saturated Fat | 18g | 90% |
| Cholesterol | 150mg | 50% |
| Sodium | 350mg | 15% |
| Total Carbohydrate | 40g | 13% |
| Dietary Fiber | 5g | 20% |
| Sugars | 3g | N/A |
| Protein | 15g | 30% |
Note: Nutritional information is an estimate and may vary based on specific ingredients and portion sizes.
Variations & Substitutions
- Gluten-Free Coconut Shrimp: Substitute the all-purpose flour with a gluten-free flour blend. You may need to adjust the amount of liquid to achieve the desired batter consistency.
- Dairy-Free Coconut Shrimp: Use a non-dairy milk alternative, such as almond milk or coconut milk, in place of regular milk.
- Spicy Coconut Shrimp: Add a pinch of cayenne pepper or a dash of hot sauce to the batter for a spicy kick.
- Baked Coconut Shrimp: For a healthier alternative, you can bake the coconut shrimp instead of frying. Preheat oven to 400°F (200°C). Place the coconut-coated shrimp on a baking sheet lined with parchment paper and bake for 10-15 minutes, or until golden brown and cooked through.
- Panko Coconut Shrimp: Substitute half of the shredded coconut with panko breadcrumbs for a crispier texture.
FAQs (Frequently Asked Questions)
Q: Can I use frozen shrimp for this recipe?
A: Yes, you can use frozen shrimp. Just make sure to thaw them completely and pat them dry before dredging.
Q: How do I know when the shrimp is cooked through?
A: The shrimp is cooked through when it turns pink and opaque, and the internal temperature reaches 145°F (63°C).
Q: Can I make the batter ahead of time?
A: It is best to make the batter fresh, as it can lose its leavening power if left to sit for too long. However, you can prepare it up to 30 minutes in advance and store it in the refrigerator.
Q: My coconut keeps falling off during frying. What am I doing wrong?
A: Make sure the batter is thick enough and that you are pressing the coconut firmly onto the shrimp. Allowing the shrimp to rest for 10 minutes after coating will also help the coconut adhere better.
Q: Can I use sweetened coconut instead of unsweetened?
A: Yes, you can use sweetened coconut, but reduce the amount of sugar in the batter accordingly.
Final Thoughts
Coconut shrimp is more than just a dish; it’s a culinary escape to a tropical paradise. Whether you’re recreating a cherished memory or simply seeking a flavorful adventure, this recipe offers a golden opportunity to impress your family and friends with a restaurant-quality meal in the comfort of your own kitchen. So, gather your ingredients, crank up the heat, and prepare to be transported to a world of crispy, coconutty goodness. Don’t hesitate to experiment with the variations and substitutions to create your own unique take on this classic dish. And most importantly, enjoy the process and savor every delicious bite! Pair it with a refreshing Piña Colada for the ultimate tropical experience. Bon appétit!