
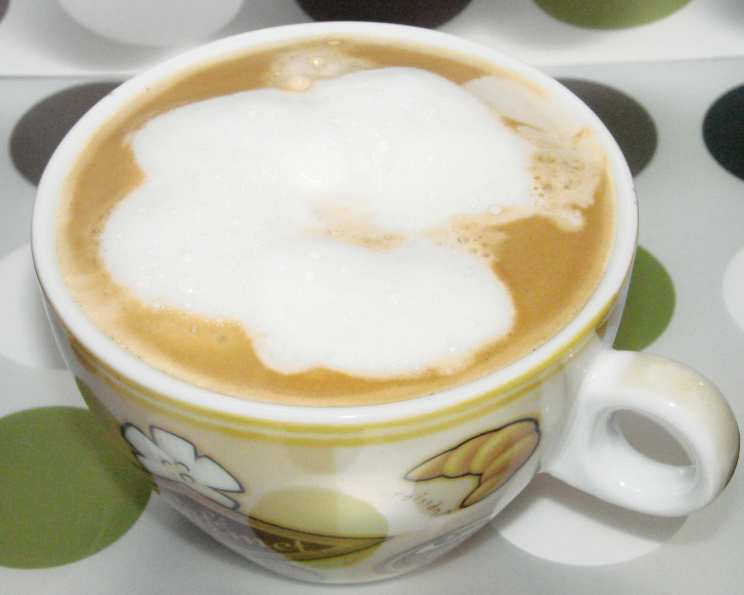
Coffee Foam in a Microwave: A Quick & Easy Guide
There’s something magical about a perfectly frothed milk topping on a morning coffee. I remember my grandmother, a creature of comfort and routine, would always insist on a “proper” cappuccino, even if it was just instant coffee underneath. She used a fancy, clunky milk frother, which, as a child, seemed like something out of a lab. The whirring sound, the anticipation, and the final, velvety foam – it was all part of the ritual. Now, with this incredibly simple microwave method, you can achieve that same luxurious texture without any special equipment. It’s perfect for busy mornings when you crave a little bit of indulgence without the fuss.
Recipe Overview
- Prep Time: 1 minute
- Cook Time: 30 seconds
- Total Time: 1 minute 30 seconds
- Servings: 1
- Yield: About 1/2 cup of foam
- Dietary Type: Varies depending on milk choice
Ingredients
- Milk (2% to heavy cream): As much as you normally like in your coffee or other hot beverage
Equipment Needed
- Jar with a lid
- Microwave
- Spoon
Instructions
- Find a clean jar with a lid. It’s crucial to use a jar that can withstand shaking and microwaving. Glass jars are generally preferred, but make sure there are no chips or cracks.
- Pour milk into the jar. The type of milk you use will significantly impact the foam’s texture and stability. While 2% milk works fine, whole milk or even heavy cream will produce a richer, denser foam. Fill the jar no more than halfway. This leaves ample room for the milk to expand as it froths.
- Secure the lid tightly onto the jar. Ensure the lid is on properly to prevent any spills during shaking.
- Shake the jar vigorously with the lid on until the milk becomes frothy and doubles in size. This usually takes about 30 seconds of intense shaking. You should notice the milk transforming into a light, airy foam.
- Carefully remove the lid from the jar. It’s essential to remove the lid before microwaving to prevent pressure from building up and potentially causing an explosion.
- Microwave the jar (without the lid) for 30 seconds. The microwave heat will stabilize the foam and prevent it from collapsing quickly. Keep a close eye on the jar while it’s microwaving, as the foam may rise rapidly. If it looks like it’s about to overflow, stop the microwave immediately.
- Gently pour the milk into your coffee. Use a spoon to hold back the foam as you pour the liquid milk first.
- Spoon the foam on top of your coffee. Now, carefully scoop the airy foam from the jar and arrange it on top of your coffee. Enjoy immediately!
Expert Tips & Tricks
- Milk Temperature: Starting with cold milk is key. It froths better than warm milk.
- Jar Choice: A wide-mouthed jar is easier to pour from.
- Shaking Technique: Shake vigorously up and down rather than side to side for optimal frothing.
- Microwave Power: Microwave power varies. If the foam collapses quickly, try microwaving for a few seconds less. If it doesn’t stabilize, microwave for a few seconds more, but be careful not to overheat.
- Sweeten it Up: Add a touch of sugar, vanilla extract, or cinnamon to the milk before shaking for extra flavor.
- Don’t let it sit: Use immediately after microwaving for best results.
- Cleaning: Wash the jar promptly after use to prevent milk residue from sticking.
- Experiment with milk types: Almond milk, oat milk, and soy milk can also be used, but the foam may not be as stable as with dairy milk.
Serving & Storage Suggestions
This coffee foam is best served immediately after preparation. It’s designed for single-serving use and doesn’t store well. The foam will collapse and the milk will separate if left to sit. Therefore, it’s recommended to make it fresh each time you desire a frothy coffee topping. Don’t attempt to store leftover foam in the refrigerator, as it will lose its airy texture and become watery.
Nutritional Information
(Note: Nutritional information will vary greatly depending on the type of milk used)
| Nutrient | Amount per Serving | % Daily Value |
|---|---|---|
| Calories | ~50-150 kcal | ~3-8% |
| Total Fat | ~0-12g | ~0-18% |
| Saturated Fat | ~0-8g | ~0-40% |
| Cholesterol | ~0-30mg | ~0-10% |
| Sodium | ~30-100mg | ~1-4% |
| Total Carbohydrate | ~5-12g | ~2-4% |
| Dietary Fiber | ~0g | ~0% |
| Sugars | ~5-12g | ~0% |
| Protein | ~3-8g | ~6-16% |
Values are approximate and based on 2% milk. Heavy cream will significantly increase the calorie and fat content.
Variations & Substitutions
- Dairy-Free Foam: Use almond milk, soy milk, oat milk, or coconut milk. Keep in mind that the foaming capability and texture will vary depending on the type of plant-based milk. Some brands are specifically designed for frothing.
- Flavored Foam: Add a dash of vanilla extract, almond extract, cinnamon, cocoa powder, or maple syrup to the milk before shaking.
- Spiced Foam: Infuse the milk with cardamom, nutmeg, or ginger for a warm, aromatic twist.
- Sweetener Alternatives: Use honey, agave nectar, or a sugar substitute instead of granulated sugar.
- Mocha Foam: Add a spoonful of chocolate syrup or cocoa powder to the milk for a mocha-flavored foam.
FAQs (Frequently Asked Questions)
Q: Can I use this method with non-dairy milk?
A: Yes, you can, but the results may vary. Some non-dairy milks froth better than others. Look for barista blends or “frothing” versions for best results.
Q: Why is my foam collapsing so quickly?
A: This could be due to several factors: the type of milk, not shaking vigorously enough, or overheating the milk in the microwave. Try using a higher-fat milk, shaking harder, and reducing the microwave time slightly.
Q: Can I use a plastic jar instead of glass?
A: While technically possible if the plastic is microwave-safe, glass is generally preferred for safety and stability. Plastic can sometimes leach chemicals into the milk when heated.
Q: Do I need to remove the lid before microwaving?
A: Yes, removing the lid is crucial to prevent pressure from building up inside the jar and causing an explosion in the microwave.
Q: My milk overflowed in the microwave! What did I do wrong?
A: You likely overfilled the jar. Remember to only fill the jar halfway with milk to allow room for expansion during microwaving. Also, keep a close watch on the foam and stop the microwave if it rises too quickly.
Final Thoughts
Now you have the secret to achieving perfectly frothed milk for your coffee in under two minutes, using just a jar and a microwave! This simple technique is a game-changer for those mornings when you crave a cafe-quality coffee experience without the hassle. Don’t be afraid to experiment with different types of milk and flavorings to create your signature coffee foam. I encourage you to try this method and share your creations with friends and family. Elevate your daily coffee ritual and enjoy the luxurious touch of homemade foam!