
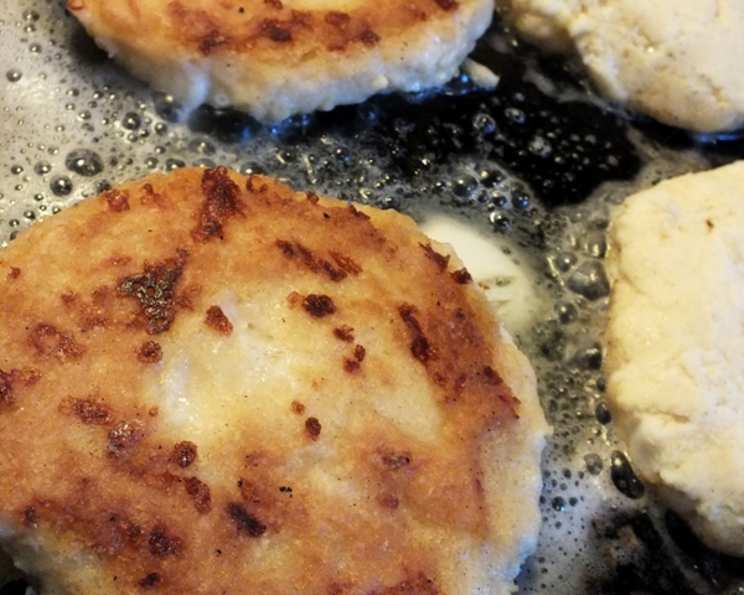
Colombian Arepas With Ham and Cheese: A Taste of Home
The scent of arepas sizzling on a hot griddle instantly transports me back to my grandmother’s kitchen in Medellín. I remember standing on a stool, mesmerized as she expertly flipped the golden discs, the aroma of toasted corn filling the air. She’d always sneak me a bite, the warm, slightly sweet corn cake melting in my mouth, a comforting prelude to the savory ham and cheese filling that would follow. Those arepas weren’t just food; they were love, tradition, and a taste of home I carry with me wherever I go.
Recipe Overview
- Prep Time: 20 minutes
- Cook Time: 20 minutes
- Total Time: 40 minutes
- Servings: 6
- Yield: 6 sandwiches
- Dietary Type: Gluten-Free
Ingredients
For The Arepas:
- 2 cups masa harina (instant corn flour)
- 1 cup grated white cheese (such as queso fresco or mozzarella)
- 1 teaspoon baking soda
- 1 teaspoon salt
- 2 1/2 cups warm water
- 4-6 tablespoons butter, divided
For The Sandwich:
- 1⁄2 lb sliced ham
- 1⁄2 lb mozzarella cheese, in 6 slices
- 1 large tomato, cut into 6 slices
- 1⁄4 teaspoon salt
- 1⁄4 teaspoon pepper
- 4-6 teaspoons butter, divided
- 1⁄2 cup salsa (for serving)
Equipment Needed
- Large bowl
- Cast iron skillet or flat top grill
- Mixing spoon
- Cutting board
- Knife
Instructions
-
Making the Arepas: In a large bowl, combine the masa harina with the grated cheese, baking soda, and salt.
-
Slowly pour in the warm water, stirring well to combine the ingredients.
-
Using your hands, knead the mixture until a smooth dough forms. The dough should be moist but not sticky. If it’s too dry, add a tablespoon of water at a time until it reaches the right consistency.
-
Divide the dough into 6 even balls. Flatten each ball into a circle, about 4 inches in diameter and 1/2 inch thick. Aim for a uniform thickness to ensure even cooking.
-
In a cast iron skillet or on a flat top grill, melt half of the butter over medium heat. The skillet should be hot before adding the arepas.
-
Working in batches, if necessary, cook the arepas until golden brown on the first side, about 3 minutes.
-
Add the remaining butter to the skillet. Turn the arepas and cook for another 2-3 minutes, until they are golden brown on the second side. The arepas should be cooked through and slightly puffed up.
-
Set the cooked arepas aside to cool slightly.
-
Making the Sandwich: Slice each arepa in half horizontally, like a bun.
-
Layer on the ham, cheese, and tomato slices on the bottom half of each arepa.
-
Season with salt and pepper.
-
Top the fillings with the remaining arepa halves.
-
Heat half the butter in the skillet or on the flat top grill over medium heat.
-
Cook the arepa sandwiches in batches for about 3 minutes, until golden brown on the first side.
-
Add the remaining butter, turn the sandwiches, cover the skillet, and cook for another 2-3 minutes, until the cheese is melted and the arepas are golden brown on both sides. Covering the skillet helps to melt the cheese faster.
-
Serve hot with salsa on the side.
Expert Tips & Tricks
- For a richer flavor, use homemade queso fresco.
- Don’t overcrowd the skillet; cook the arepas in batches to ensure they brown evenly.
- If your arepas are browning too quickly, reduce the heat slightly.
- For extra crispy arepas, brush them with melted butter before adding them to the skillet.
- To prevent the arepas from sticking, make sure the skillet is well-seasoned or use a non-stick skillet.
- You can also use a grill pan for a smoky flavor.
- For a spicier kick, add a pinch of cayenne pepper to the arepa dough.
- To make ahead, cook the arepas and store them in the refrigerator for up to 2 days. Reheat them in a skillet or oven before filling.
Serving & Storage Suggestions
Serve these delicious Colombian arepas hot, straight from the skillet, with a generous dollop of your favorite salsa. They’re perfect for breakfast, lunch, or a satisfying snack. Leftover arepas can be stored in an airtight container in the refrigerator for up to 3 days. To reheat, warm them in a skillet, oven, or microwave until heated through. For best results, reheat in a skillet to restore their crispy texture. While freezing is possible, the texture may change slightly upon thawing, so it’s best to consume them fresh.
Nutritional Information
| Nutrient | Amount per Serving | % Daily Value |
|---|---|---|
| Calories | 409 kcal | N/A |
| Calories from Fat | 201 kcal | N/A |
| Total Fat | 22.4 g | 34% |
| Saturated Fat | 12.4 g | 61% |
| Cholesterol | 76.6 mg | 25% |
| Sodium | 1322.2 mg | 55% |
| Total Carbohydrate | 32.4 g | 10% |
| Dietary Fiber | 0.7 g | 2% |
| Sugars | 1.9 g | N/A |
| Protein | 21.1 g | 42% |
Note: Nutritional information is an estimate and may vary based on specific ingredients and preparation methods.
Variations & Substitutions
- Vegetarian: Substitute the ham with grilled vegetables like bell peppers, zucchini, and onions.
- Vegan: Omit the cheese or use a plant-based cheese alternative. Use vegetable oil instead of butter.
- Spicy: Add a pinch of chili flakes or a dash of hot sauce to the arepa dough or the filling.
- Sweet: Add a tablespoon of sugar to the arepa dough for a sweeter flavor.
- Different Cheese: Experiment with different types of cheese, such as cheddar, Monterey Jack, or pepper jack.
- Different fillings: Instead of Ham and Cheese, fill with shredded chicken, seasoned beef, or black beans and avocado.
FAQs (Frequently Asked Questions)
Q: What is masa harina?
A: Masa harina is a finely ground corn flour that has been treated with an alkaline solution, which gives it a distinctive flavor and makes it easier to digest. It is essential for making authentic arepas.
Q: Can I use regular cornmeal instead of masa harina?
A: No, regular cornmeal will not work in this recipe. Masa harina has been specially processed and has a different texture and flavor.
Q: How do I know when the arepas are cooked through?
A: The arepas should be golden brown on both sides and slightly puffed up. They should also feel firm to the touch.
Q: Can I freeze arepas?
A: Yes, you can freeze cooked arepas. Wrap them individually in plastic wrap and then store them in an airtight container. Thaw them in the refrigerator before reheating.
Q: What if my arepa dough is too sticky?
A: If your dough is too sticky, add a tablespoon of masa harina at a time until it reaches the right consistency.
Final Thoughts
I hope this recipe brings the warmth and comfort of Colombian arepas to your kitchen. Don’t be afraid to experiment with different fillings and toppings to create your own unique variations. This dish is more than just a recipe; it’s an invitation to connect with a rich culinary tradition. So, gather your ingredients, turn on the stove, and prepare to savor a taste of home. And please, share your creations and feedback – I’d love to hear how they turn out! Perhaps pair these arepas with a refreshing Colombian lulo juice for the full experience.