
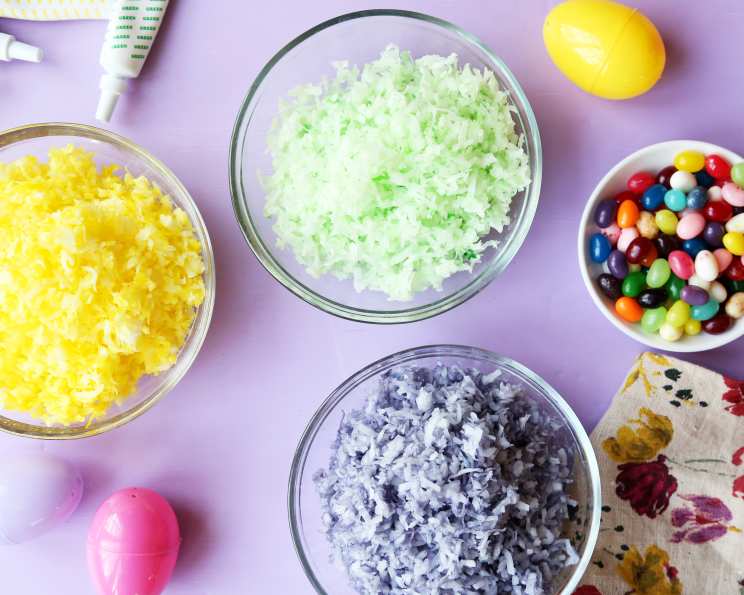
Rainbow Dreams: The Art of Colored Coconut Flakes
I remember my grandmother’s Easter desserts like they were yesterday. Every year, she’d bake a simple but elegant coconut cake, and the entire thing would be covered in a vibrant carpet of pastel-colored coconut flakes. As a child, I was absolutely mesmerized. It wasn’t just a cake; it was a magical landscape. That sugary, slightly chewy coconut, tinted in rainbow hues, tasted like pure joy and springtime celebration. Now, I love creating that same magic for my own family, and the best part is how incredibly easy it is to achieve.
Recipe Overview
- Prep Time: 5 minutes
- Cook Time: 0 minutes
- Total Time: 5 minutes
- Yields: 1 cup
- Dietary Type: Vegan, Gluten-Free, Dairy-Free
Ingredients
- 1 cup coconut flakes (shredded or flakes)
- 1 teaspoon water
- Food coloring (gel or liquid)
Equipment Needed
- Ziploc bag (quart or gallon size, depending on the amount of coconut)
Instructions
-
Place the coconut flakes into the Ziploc bag. Make sure the bag is large enough to allow the coconut to move freely.
-
In a small bowl or measuring cup, dissolve a few drops of your desired food coloring in the 1 teaspoon of water. The amount of food coloring will depend on the intensity of color you desire. Start with a few drops and add more until you achieve the desired hue. Remember that the color will appear lighter once it’s mixed with the coconut.
-
Pour the colored water solution over the coconut inside the Ziploc bag.
-
Seal the Ziploc bag tightly, ensuring all air is removed as much as possible.
-
Shake the bag vigorously, massaging the coconut from the outside of the bag, until all the coconut flakes are uniformly colored. This might take a minute or two, but keep shaking! Make sure to break up any clumps of coconut as you go.
-
If the color is not intense enough, open the bag, add a few more drops of food coloring directly to the coconut, reseal, and shake again.
-
Once the coconut is evenly colored, spread it out on a clean, dry surface (like a baking sheet lined with parchment paper) to air dry. This prevents the coconut from clumping together. It will be slightly damp from the water, but it should dry quickly, usually within 15-30 minutes.
-
Once the coconut flakes are fully dry, they’re ready to use.
Expert Tips & Tricks
- Gel vs. Liquid Food Coloring: Gel food coloring is generally more concentrated, so you’ll need less of it. It also tends to produce more vibrant colors. However, liquid food coloring works just fine!
- Preventing Clumping: The key to fluffy, evenly colored coconut is thorough shaking and even distribution of the colored water. If you notice any large clumps, break them up with your fingers before the coconut dries completely.
- Intensify the Color: For really vibrant colors, let the colored coconut sit in the Ziploc bag for a little longer (about 30 minutes) before spreading it out to dry. This allows the color to fully absorb.
- Drying Alternatives: If you’re in a hurry, you can spread the coconut on a baking sheet and place it in a preheated oven at the lowest possible temperature (around 170°F or 75°C) for about 10-15 minutes, keeping a close eye to prevent burning.
- Layering Colors: For a truly stunning effect, create different shades of the same color and layer them on your dessert.
- Strategic Coloring: If you’re aiming for a specific shade and happen to have primary colors on hand, don’t hesitate to mix them! Got leftover yellow? Add a touch of red for orange!
Serving & Storage Suggestions
Colored coconut flakes are incredibly versatile. Sprinkle them around individual servings of fruit salad or ambrosia. Use them to create “grass” on an Easter-themed cake, or mimic carrot tops on a carrot cake. They also add a festive touch to cupcakes, cookies, and even ice cream. You can even use it to add texture to cake frosting.
Store your colored coconut flakes in an airtight container at room temperature. They will keep for several weeks, if not longer. Just make sure they are completely dry before storing to prevent mold growth. You don’t need to refrigerate or freeze them.
Nutritional Information
Here’s an estimated nutritional breakdown (approximate values and may vary):
| Nutrient | Amount per Serving | % Daily Value |
|---|---|---|
| Calories | 150 kcal | 8% |
| Total Fat | 14 g | 21% |
| Saturated Fat | 13 g | 65% |
| Cholesterol | 0 mg | 0% |
| Sodium | 10 mg | 0% |
| Total Carb | 4 g | 1% |
| Dietary Fiber | 1 g | 4% |
| Sugars | 2 g | – |
| Protein | 1 g | 2% |
Variations & Substitutions
- Natural Food Coloring: For a more natural approach, use plant-based food colorings derived from beets (red), spinach (green), turmeric (yellow), or blueberries (purple). The colors may be less intense, but the result will still be beautiful and free from artificial dyes.
- Unsweetened Coconut: If you prefer a less sweet option, use unsweetened coconut flakes.
- Extracts: Add a few drops of your favorite extract (vanilla, almond, coconut) to the colored water for an extra layer of flavor.
- Spice Infusion: For a warm, spiced version, mix a pinch of cinnamon or nutmeg into the coconut before adding the colored water.
- Shredded vs. Flakes: While this recipe works with both shredded and flaked coconut, the larger flakes tend to showcase the color more vividly.
FAQs (Frequently Asked Questions)
Q: Can I use dried shredded coconut that has been sitting in my pantry for a while?
A: Yes, as long as the coconut hasn’t gone stale or developed an off-flavor. Just give it a quick taste test to ensure it’s still fresh.
Q: My coconut isn’t as brightly colored as I’d like. What can I do?
A: Add a few more drops of food coloring directly to the coconut and shake again. Remember that gel food coloring is more concentrated, so you may need to use more liquid food coloring to achieve the same intensity.
Q: How long will the colored coconut flakes last?
A: Stored in an airtight container at room temperature, the colored coconut flakes should last for several weeks, if not longer.
Q: Can I freeze the colored coconut flakes?
A: While you can freeze them, it’s not recommended. Freezing might affect the texture slightly, making them a bit softer.
Q: Can I make multiple colors at once?
A: Absolutely! Just use separate Ziploc bags for each color. This is a great way to create a vibrant rainbow effect.
Final Thoughts
Creating colored coconut flakes is a simple yet impactful way to elevate your desserts and bring a touch of whimsy to any occasion. Whether you’re recreating a cherished childhood memory, adding a festive touch to a holiday treat, or simply looking for a fun and easy baking project, this recipe is sure to delight. So, grab your coconut, choose your colors, and let your creativity shine. Don’t be afraid to experiment with different shades and flavor combinations, and most importantly, have fun with it! I’d love to hear about your creations and the special occasions you use them for. Happy baking!