
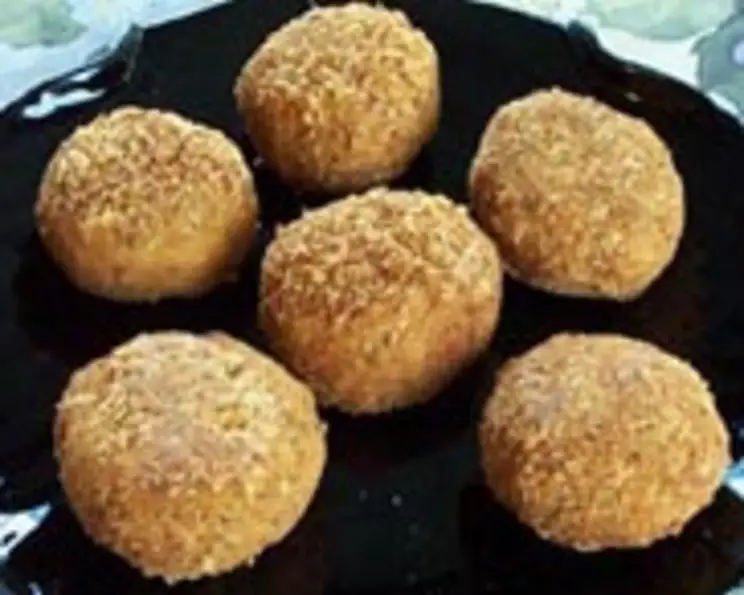
Comforting Chicken Croquettes: A Culinary Embrace
There’s a scent that instantly transports me back to my grandmother’s kitchen – warm butter, savory chicken, and that unmistakable aroma of something being fried to golden perfection. It wasn’t fancy, but her chicken croquettes were pure love on a plate. Each bite was a comforting hug, a reminder of simpler times and the unwavering warmth of family. Today, I’m excited to share a recipe that captures that same essence, offering a taste of nostalgia and a culinary embrace in every delectable morsel.
Recipe Overview
- Prep Time: 30 minutes
- Cook Time: 15 minutes
- Total Time: 2 hours 45 minutes (includes chilling time)
- Servings: 4-6
- Yield: 4-6 croquettes
- Dietary Type: Not specified (contains dairy, eggs, and gluten)
Ingredients
- 2 cups cooked chicken, finely chopped
- 1 tablespoon fresh onion, minced
- 1 tablespoon fresh parsley, minced
- Salt and pepper to taste
- 1 egg
- 2 tablespoons water
- 1/4 cup dry breadcrumbs
For the White Sauce:
- 1/4 cup butter
- 1/4 cup all-purpose flour
- 1/4 teaspoon salt
- 1/8 teaspoon pepper
- 1 cup milk
Equipment Needed
- Saucepan
- Whisk
- 8x8x2 inch square pan (or any shallow pan)
- Measuring cups and spoons
- Deep fat fryer or kettle
- Slotted spoon
- Cooling rack
Instructions
- Begin by preparing the white sauce. In a saucepan, melt the butter over low heat.
- Blend in the flour, salt, and pepper.
- Cook over low heat, stirring continuously until the mixture is smooth and bubbly. This is crucial to avoid a lumpy sauce, so patience and constant stirring are key.
- Remove the saucepan from the heat.
- Stir in the milk. Ensure it is thoroughly incorporated.
- Return the saucepan to the heat and bring the mixture to a boil, stirring constantly.
- Boil and stir for 1 minute. This step ensures the sauce thickens properly.
- Now, add the cooked chicken, minced onion, and parsley to the white sauce.
- Season with salt and pepper to your liking. Taste as you go and adjust the seasoning accordingly.
- Spread the mixture in an ungreased 8x8x2 inch square pan (or any shallow pan). A shallow pan is essential for quicker and more even cooling, making the croquettes easier to handle later.
- Cover the pan and chill in the refrigerator for at least 2 hours. This step is non-negotiable! The mixture needs to be firm enough to shape into croquettes.
- Once chilled, mix the egg and water in a bowl to create an egg wash.
- Shape the chilled chicken mixture into croquettes. I find that using a 1/4 or 1/3-cup measuring cup to scoop out the mixture helps ensure uniform size. Roll the scooped mixture in your hands to form the desired shape.
- Dip each croquette in the egg wash, making sure it’s fully coated.
- Immediately roll the egg-washed croquette in the dry breadcrumbs, ensuring a complete and even coating. The breadcrumbs are what give the croquettes their crispy exterior.
- Chill the breaded croquettes again for at least 30 minutes. This helps the breadcrumbs adhere better during frying.
- Heat fat or oil (3-4 inches deep) in a deep fat fryer or kettle to 365 degrees Fahrenheit (185 degrees Celsius). Use a thermometer to ensure the oil is at the correct temperature for optimal frying.
- Fry the croquettes in the hot fat for 1-1/2 to 2 minutes, or until they are light brown and crispy. Be careful not to overcrowd the fryer, as this will lower the oil temperature and result in soggy croquettes. Fry in batches if necessary.
- Remove the fried croquettes from the oil using a slotted spoon and drain them on a cooling rack or paper towels.
- To keep the croquettes warm until serving time, place them in a 350-degree Fahrenheit (175 degrees Celsius) oven.
Expert Tips & Tricks
- For extra flavor: Before adding the chicken to the white sauce, sauté the minced onion in the butter until softened. This will deepen the flavor of the croquettes.
- Preventing soggy croquettes: Ensure the oil is hot enough (365°F/185°C) before frying. If the oil is too cool, the croquettes will absorb too much oil and become soggy.
- Make-ahead tip: The chicken mixture can be made up to 2 days in advance and stored in the refrigerator. This is a great way to break up the preparation time.
- Breadcrumb Upgrade: For a richer flavor, use panko breadcrumbs instead of regular dry breadcrumbs. They provide a crispier and more satisfying texture.
- Shaping Croquettes: Wet your hands slightly with water before shaping the croquettes to prevent the mixture from sticking to your hands.
Serving & Storage Suggestions
Serve these comforting chicken croquettes hot, ideally with a side of creamy mashed potatoes and a generous ladle of gravy. They also pair well with a crisp green salad or steamed vegetables.
Storage:
- Room Temperature: Croquettes should not be left at room temperature for more than 2 hours.
- Refrigerator: Store leftover croquettes in an airtight container in the refrigerator for up to 3 days.
- Freezer: For longer storage, freeze the cooked and cooled croquettes in a single layer on a baking sheet. Once frozen solid, transfer them to a freezer bag or container. They can be stored in the freezer for up to 2 months.
Reheating:
- Oven: Reheat the croquettes in a 350-degree Fahrenheit (175 degrees Celsius) oven for 10-15 minutes, or until heated through.
- Air Fryer: Air frying is an excellent way to reheat croquettes and restore their crispiness. Preheat the air fryer to 350 degrees Fahrenheit (175 degrees Celsius) and cook for 5-7 minutes, or until heated through.
- Microwave: While not ideal for maintaining crispiness, you can reheat croquettes in the microwave for a quick meal.
Nutritional Information
| Nutrient | Amount per Serving | % Daily Value (approximate) |
|---|---|---|
| Calories | 333 kcal | 17% |
| Total Fat | 20g | 31% |
| Saturated Fat | 10g | 50% |
| Cholesterol | 144mg | 48% |
| Sodium | 377mg | 16% |
| Total Carbohydrate | 14g | 5% |
| Dietary Fiber | 1g | 4% |
| Sugars | 1g | 2% |
| Protein | 23g | 46% |
Note: Nutritional information is an estimate and may vary based on specific ingredients and portion sizes.
Variations & Substitutions
- Spicy Croquettes: Add a pinch of cayenne pepper or a dash of hot sauce to the chicken mixture for a kick.
- Herb Variations: Experiment with different herbs like thyme, rosemary, or sage for a unique flavor profile.
- Cheese Croquettes: Add shredded cheddar, Gruyere, or Parmesan cheese to the chicken mixture for a cheesy twist.
- Gluten-Free Croquettes: Use gluten-free breadcrumbs and a gluten-free flour blend for the white sauce to make this recipe gluten-free.
- Vegetable Additions: Add finely diced celery, carrots, or peas to the chicken mixture for added nutrients and texture.
FAQs (Frequently Asked Questions)
Q: Can I use rotisserie chicken for this recipe?
A: Absolutely! Rotisserie chicken is a great shortcut and provides excellent flavor. Just be sure to remove the skin and bones before chopping the chicken.
Q: How do I prevent the croquettes from falling apart during frying?
A: Chilling the chicken mixture thoroughly and ensuring the breadcrumbs are pressed firmly onto the croquettes are crucial for preventing them from falling apart. Also, avoid overcrowding the fryer.
Q: Can I bake these croquettes instead of frying them?
A: Yes, you can bake them. Place the breaded croquettes on a baking sheet lined with parchment paper and bake in a preheated oven at 375 degrees Fahrenheit (190 degrees Celsius) for 20-25 minutes, or until golden brown and heated through.
Q: What kind of oil is best for frying croquettes?
A: Vegetable oil, canola oil, or peanut oil are all good choices for frying croquettes because they have a high smoke point.
Q: Can I add other meats besides chicken?
A: Absolutely! You can experiment with using cooked turkey, ham, or even leftover roast beef in this recipe. Just adjust the seasonings accordingly.
Final Thoughts
I hope this recipe for Comforting Chicken Croquettes brings as much joy to your table as it has to mine over the years. There’s something truly special about taking simple ingredients and transforming them into a dish that evokes such warmth and nostalgia. Don’t be afraid to experiment with variations and make it your own. I encourage you to try it out, share your creations, and perhaps even pair it with a classic cocktail like an Old Fashioned for a truly comforting experience. Happy cooking!