
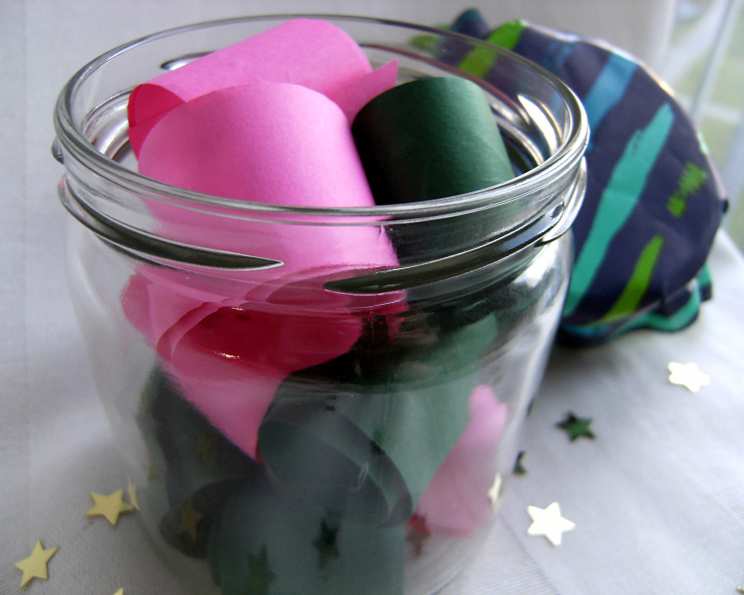
Kid-Crafted Compliments: A Heartfelt Gift from the Kitchen
My grandmother, a woman whose love language was undeniably acts of service, always had a way of making everyone feel seen and appreciated. I remember one year, feeling particularly down about a school play audition gone wrong, I found a small, hand-decorated box on my bed. Inside were little slips of paper, each with a reason why she was proud of me. “You have the kindest heart,” one read. “Your determination inspires me,” another. That little box of affirmations completely turned my day around, and I still have it to this day. Now, inspired by those early, unforgettable memories, I share this simple, heartfelt craft: the Compliment Jar. It’s a beautiful way for children to express their affection and appreciation for the special people in their lives.
Recipe Overview
- Prep Time: 30 minutes
- Cook Time: 0 minutes
- Total Time: 30 minutes
- Servings: 1
- Yield: 1 jar
- Dietary Type: N/A (Craft)
Ingredients
- 3 sheets paper, 3 different colors of construction paper
- Glue
- 18 inches ribbon (optional)
- 1 pencil
- 1 pen
- 1 quart jar with lid
- Scissors
- 1 photo of yourself (ask permission before cutting up the photo)
Equipment Needed
- Scissors
- Pencil
- Pen
- Quart jar with lid
Instructions
- Begin by brainstorming. The most important step is to think of at least 20 nice things about your mom (or whoever the jar is for!). Really consider what makes them special and appreciated. Compliments are things you might say like, “You’re so pretty,” “You’re so smart – especially at homework time,” or “You’re always there when I need you.” You can also include specific examples, like “Your cookies are the best on earth!” or “I love it when you sing with me.”
- Prepare the paper. Using your scissors, cut strips of construction paper about 1 inch wide and 6 inches long. These will be the individual compliment notes.
- Write the compliments. Using your pen, carefully write one compliment on each strip of construction paper. Make sure the writing is clear and easy to read.
- Create the curls. Take one strip of paper and wrap it tightly around the pencil. Ensure you’re wrapping it snugly to create a nice curl.
- Release the curl. Carefully slide the paper off the pencil. The paper should retain its curled shape. Repeat steps 4 and 5 for all the remaining paper strips.
- Fill the jar. Place all the curled paper strips into the quart jar. Gently mix up the colors so they look festive and appealing.
- Personalize the lid. If you have a photo of yourself, ask permission before cutting it up, and then use glue to paste it on top of the jar lid. This adds a personal touch to the gift.
- If you don’t have a photo, don’t worry! Draw a picture of your mom (or the recipient) with a big smile on a piece of paper and attach that to the lid. Alternatively, decorate the lid with colorful markers or stickers.
- Finish the jar. Carefully screw the lid onto the jar.
- Add the finishing touch. If you have ribbon, tie it around the neck of the jar to add an extra decorative element. A pretty bow will make it look even more special!
Expert Tips & Tricks
- Brainstorming Session: Before you even touch the paper, spend some quality time thinking about all the wonderful things you appreciate about the recipient. The more specific and heartfelt the compliments, the more meaningful the gift will be. Don’t just say “You’re nice,” say “I love how you always listen to me when I’m sad.”
- Paper Choice: While construction paper works great, you could also use scrapbook paper for a more decorative touch. Look for paper with patterns or textures that the recipient would enjoy.
- Curb Appeal: If you don’t have ribbon, you can use twine, yarn, or even strips of fabric to decorate the jar. Get creative with it!
- Lettering Matters: If you have nice handwriting, great! If not, don’t worry! Just make sure the writing is neat and legible. You could even use colorful pens or markers to make the compliments stand out.
- Jar Alternatives: If you don’t have a quart jar, any clean jar or container will work. Even a decorative box can be used.
- Age-Appropriate Help: If young children are making this gift, have an adult help with the scissors and glue.
- Beyond Compliments: Consider tailoring the contents of the jar to the recipient’s needs. For someone who is stressed, include quotes or affirmations. For someone who is bored, include jokes or riddles.
- Task Jar: To adapt this for kids to give to their parents, make the jar filled with tasks that they can reasonably do.
Serving & Storage Suggestions
This gift is meant to be displayed and enjoyed! The recipient can keep the Compliment Jar in a prominent place, such as on a bedside table, desk, or shelf. When they need a little pick-me-up, they can simply open the jar and read a compliment. There’s no need to refrigerate or worry about expiration dates! Keep out of reach of pets. This isn’t something to eat or chew!
Nutritional Information
This is a craft, not food, so there are no nutritional values.
| Nutrient | Amount per Serving | % Daily Value |
|---|---|---|
| Calories | 0 kcal | 0% |
| Total Fat | 0 g | 0% |
| Saturated Fat | 0 g | 0% |
| Cholesterol | 0 mg | 0% |
| Sodium | 0 mg | 0% |
| Total Carbohydrate | 0 g | 0% |
| Dietary Fiber | 0 g | 0% |
| Sugars | 0 g | 0 g |
| Protein | 0 g | 0% |
Variations & Substitutions
- Themed Compliments: Tailor the compliments to a specific theme, such as “Reasons Why You’re a Great Teacher,” “Things I Love About My Best Friend,” or “Why You’re the Best Grandma Ever.”
- Joke Jar: For someone with a great sense of humor, fill the jar with jokes instead of compliments.
- Affirmation Jar: For someone who needs a little encouragement, fill the jar with positive affirmations.
- Activity Jar: Instead of compliments, write down fun activities that you can do together.
- Message in a Bottle: Use a decorative glass bottle instead of a jar for a unique presentation.
- Unbreakable Container: If giving to someone in a nursing home, use an unbreakable container instead of glass for safety.
FAQs (Frequently Asked Questions)
Q: What if I can’t think of 20 compliments?
A: Don’t worry! Just start by writing down a few things that come to mind, and then try to elaborate on those. Think about specific examples of times when the person made you feel good or did something kind.
Q: Can I make this for someone other than my mom?
A: Absolutely! This gift is perfect for anyone you want to show appreciation for, such as a dad, grandparent, teacher, friend, or sibling.
Q: What if I don’t have construction paper?
A: Any type of paper will work! You can use printer paper, scrapbook paper, or even old magazines.
Q: How can I make this gift more personal?
A: In addition to the compliments, you can include small photos, drawings, or other mementos in the jar.
Q: Can younger children participate in making this gift?
A: Yes! Younger children can help with tasks like cutting the paper, decorating the jar, and brainstorming compliments. Just be sure to supervise them closely when using scissors or glue.
Final Thoughts
Creating this Kid-Crafted Compliment Jar isn’t just about making a gift; it’s about taking the time to truly appreciate the people in our lives. It’s about fostering a culture of kindness and gratitude, starting with the simple act of putting pen to paper. So gather your supplies, unleash your creativity, and prepare to spread some joy! This simple yet heartfelt gift is sure to bring a smile to the face of anyone who receives it. I encourage you to try this today and share the love! Let me know what you think, and what ways you added your own personal touch!