
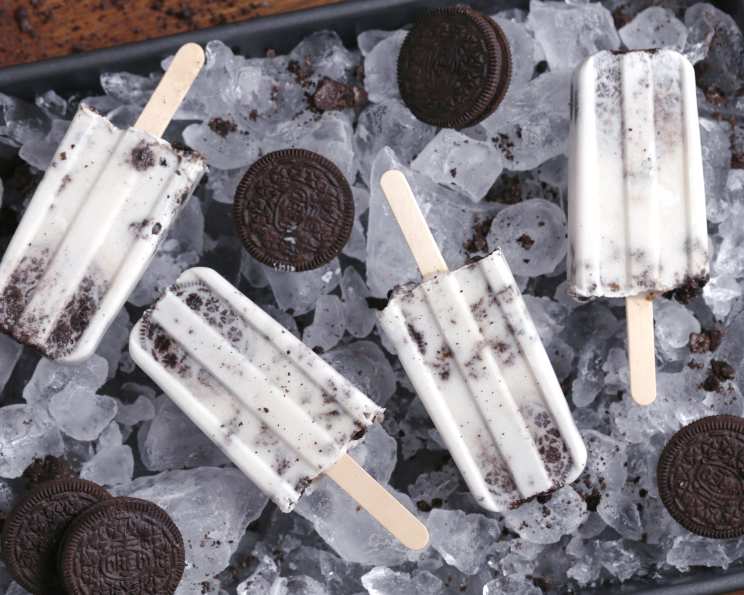
Cookies & Cream Pops: A Vegan Frozen Delight
The first time I tasted a cookies and cream ice cream, I was maybe eight years old at a summer carnival. The creamy vanilla base swirled with crunchy chocolate cookies was pure magic. It felt like the ultimate treat, a perfect balance of sweet and comforting. These vegan Cookies & Cream Pops bring back that same joy, but with a lighter, plant-based twist that I can feel good about sharing with my family. They’re incredibly easy to make, too – a definite win in my book!
Recipe Overview
- Prep Time: 10 minutes
- Cook Time: 0 minutes
- Total Time: 4+ hours (including freezing)
- Servings: 8 Pops
- Yields: 8 Pops
- Dietary Type: Vegan
Ingredients
- 14 ounces full-fat coconut milk
- 14 chocolate sandwich-style cookies
- ¼ cup sugar
- ½ teaspoon vanilla extract
Equipment Needed
- Popsicle mold
- Plastic bag
- Rolling pin
- Whisk
Instructions
-
Begin by preparing the cookie crumble. Place 6 of the chocolate sandwich-style cookies into a plastic bag. Seal the bag, ensuring no air escapes. Use a rolling pin to crush the cookies inside the bag. Aim for a mixture of fine crumbs and larger pieces to provide a varied texture in the final pops. Set the crushed cookies aside.
-
Prepare the cookie pops. For the remaining 8 chocolate sandwich-style cookies, carefully twist off the top cookie from each sandwich. This will expose the cream filling.
-
Insert the popsicle sticks. Gently place a popsicle stick into the center of the cream filling of each cookie bottom. Be careful not to split the cookie. Place the top cookie back onto the bottom cookie, creating a cookie “pop” with the stick securely held in place by the cream.
-
Prepare the coconut milk mixture. In a mixing bowl, whisk together the 14 ounces of full-fat coconut milk, ¼ cup of sugar, and ½ teaspoon of vanilla extract. Taste the mixture and adjust the sweetness to your liking, adding more sugar if desired.
-
Assemble the popsicles. Arrange the cookie pops inside the popsicle mold. The cookie portion should rest at the bottom of the mold.
-
Layer the ingredients. Carefully pour the coconut milk mixture into the popsicle mold, ensuring that the sandwich cookie at the bottom of the mold is fully covered.
-
Incorporate the cookie crumble. Alternate between adding the crushed cookie pieces and the coconut milk mixture into the mold. Repeat this layering process 2 to 3 more times, until the popsicle molds are completely filled. Distribute the crushed cookies evenly among the pops for the best texture.
-
Freeze the popsicles. Place the lid securely onto the popsicle mold. Transfer the mold to the freezer. Freeze the popsicles for at least 4 hours, or preferably overnight, to ensure they are completely solid.
-
Unmold and serve. Once the popsicles are fully frozen, remove them from the molds. You may need to run the mold briefly under warm water to loosen the popsicles if they are sticking.
Expert Tips & Tricks
- Coconut Milk Consistency: Full-fat coconut milk is essential for the creamiest texture. If your coconut milk has separated, whisk it vigorously before using.
- Cookie Crumb Size: Don’t over-crush the cookies. A mix of fine crumbs and larger pieces gives the pops a delightful crunch.
- Sweetness Adjustment: Taste the coconut milk mixture before freezing and adjust the sugar to your preference. Remember that freezing can dull the sweetness slightly.
- Popsicle Stick Security: Ensure the popsicle sticks are firmly embedded in the cream filling to prevent them from falling out when eating.
- Easy Unmolding: If you’re having trouble removing the pops, try dipping the bottom of the mold in warm water for 10-15 seconds. This will loosen the pops without melting them too much. Be careful not to get water inside the molds.
- Prevent Ice Crystals: Using full-fat coconut milk and avoiding over-sweetening can help minimize ice crystal formation.
- Layering Technique: Don’t be afraid to get creative with layering the cookie crumbs and coconut milk. This ensures that every bite is packed with flavor.
Serving & Storage Suggestions
Serve these Cookies & Cream Pops straight from the freezer for the best texture. They make a fantastic dessert on a hot day or a fun treat for kids. For an elegant touch, try drizzling them with melted dairy-free chocolate or dipping them in toasted shredded coconut before serving.
Store any leftover popsicles in the freezer, wrapped individually in plastic wrap or placed in a freezer-safe container. They will keep well for up to 2-3 weeks. Avoid storing them in the refrigerator, as this will cause them to melt. They are best consumed directly from the freezer.
Nutritional Information
Please note that these values are estimates and may vary based on specific ingredients used.
| Nutrient | Amount per Serving | % Daily Value |
|---|---|---|
| Calories | 217 kcal | N/A |
| Total Fat | 14.6g | 22% |
| Saturated Fat | 10.7g | 53% |
| Cholesterol | 0mg | 0% |
| Sodium | 107.8mg | 4% |
| Total Carbohydrate | 21.9g | 7% |
| Dietary Fiber | 0.6g | 2% |
| Sugars | 14.5g | N/A |
| Protein | 2.1g | 4% |
Variations & Substitutions
- Gluten-Free Version: Use gluten-free chocolate sandwich cookies. There are many delicious options available in most grocery stores.
- Different Extract Flavors: Experiment with different extracts in the coconut milk mixture, such as almond, peppermint, or coffee.
- Cookie Butter Swirl: Add a swirl of vegan cookie butter to the coconut milk mixture for an extra layer of flavor.
- Chocolate Chips: Fold in some dairy-free chocolate chips into the coconut milk mixture for an even richer chocolate experience.
- Fruit Puree: Swirl in some fruit puree (like strawberry or raspberry) into the mixture for a fruity twist on the classic cookies and cream flavor.
FAQs (Frequently Asked Questions)
Q: Can I use light coconut milk instead of full-fat?
A: While you can, the texture will be less creamy and the pops may be icier. Full-fat coconut milk provides the best creamy consistency.
Q: Can I use a different type of sugar?
A: Yes, you can substitute with other sugars like maple syrup or agave nectar. Just adjust the amount to your desired sweetness level. Remember that liquid sweeteners may affect the texture slightly.
Q: What if I don’t have a popsicle mold?
A: You can use small paper cups and insert the popsicle sticks after the mixture has partially frozen.
Q: How long can I store these popsicles?
A: Properly stored in the freezer, these popsicles will last for about 2-3 weeks.
Q: My popsicles are too hard to eat straight from the freezer. What can I do?
A: Let them sit at room temperature for a few minutes before serving to soften them slightly.
Final Thoughts
I hope these Cookies & Cream Pops bring you as much joy as they bring my family! They’re a simple yet satisfying treat that’s perfect for any occasion. Don’t be afraid to get creative with the variations and substitutions to make them your own. I’d love to hear your feedback and see your creations! Consider pairing these pops with a refreshing glass of almond milk or a light fruit salad for a complete and delicious dessert experience.