
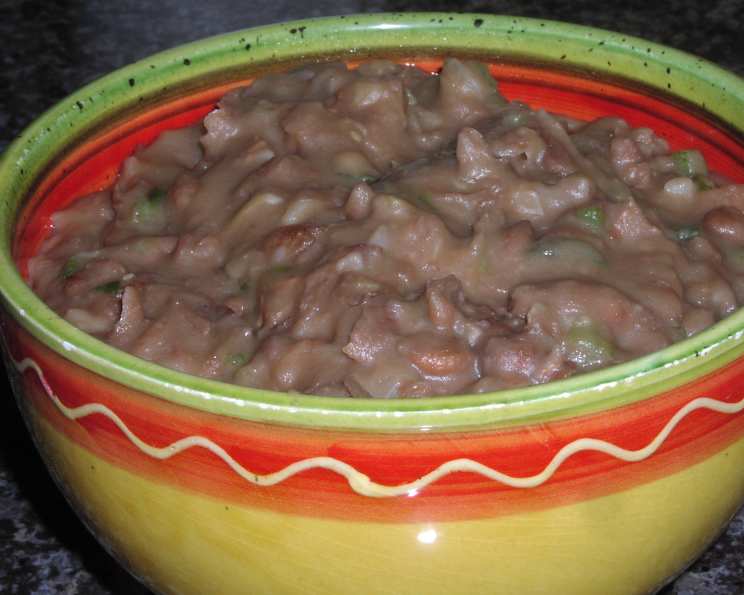
Cooking Class Refried Beans: A Taste of Authentic Comfort
The aroma of simmering beans always takes me back to my grandmother’s kitchen. She had a worn, cast-iron pot that seemed perpetually filled with some variety of legumes – pintos, kidneys, sometimes even black beans. On cool evenings, she’d mash them with a sturdy fork right in the pot, the satisfying thunk echoing through the house, a promise of simple, honest comfort. Those refried beans, served alongside her homemade tortillas and a dollop of sour cream, were the taste of home, of warmth, of pure, unadulterated love. This recipe, inspired by classic techniques, brings that same feeling to my kitchen, and hopefully, yours.
Recipe Overview
- Prep Time: 15 minutes (if using canned beans), 2 hours if starting with dried beans
- Cook Time: 30-75 minutes (depending on if dried or canned beans used)
- Total Time: 45 minutes – 2 hours 45 minutes
- Servings: 4
- Yield: About 4 cups
- Dietary Type: Vegan (if using vegetable shortening)
Ingredients
- 8 ounces pink beans or pinto beans
- 4 1/2 cups cold water
- 1/3 cup vegetable shortening, divided, plus 1 tablespoon vegetable shortening
- 1 small white onion, sliced
- 1 1/2 teaspoons salt
- 1 small white onion, finely chopped
- 1 small garlic clove, minced
Equipment Needed
- 3-liter saucepan
- Sieve or colander
- Heavy large skillet
- Bean masher or potato masher
Instructions
- Rinse the pink beans or pinto beans thoroughly in a sieve or colander under cold running water. Pick out any debris or blemished beans. This step ensures you’re starting with the cleanest possible product and removes any small stones or broken bean pieces.
- Place the rinsed beans, cold water, 1 tablespoon of vegetable shortening, and the sliced white onion in a 3-liter saucepan. Bring the mixture to a boil over high heat. Once boiling, reduce the heat to low. Cover the saucepan and simmer for one and a half hours or just until the beans are tender but not soft. This slow simmering allows the beans to absorb the flavors and become creamy.
If using canned beans, skip steps 1 and 2. - Stir in the salt. Cover the saucepan and simmer over very low heat for 30 to 45 minutes until the beans are very soft. Do not drain the beans; you’ll need the cooking liquid. This final simmering ensures the beans are sufficiently tender for easy mashing and helps develop the overall flavor.
- For the best flavor, refrigerate the beans (covered) overnight after completing step 3. The resting period allows the flavors to meld and intensify. If time is short, this step can be skipped, but it’s highly recommended.
- Heat the remaining 1/3 cup of vegetable shortening in a heavy large skillet over high heat until very hot. The hot skillet is crucial for achieving the right texture and preventing the beans from sticking.
- Add the finely chopped onion and minced garlic to the skillet. Reduce the heat to medium. Cook and stir for about 4 minutes, or until the onion is softened and translucent. Be careful not to brown the garlic, as it can become bitter.
- Increase the heat to high. Add 1 cup of the undrained beans to the skillet. Cook and stir, mashing the beans with a bean masher or potato masher. The high heat helps to evaporate the excess moisture and create a creamy texture.
- As the beans begin to dry out, add another 1 cup of undrained beans. Continue to cook and stir, mashing the beans with the bean masher or potato masher. Repeat this process until all the beans and cooking liquid have been added and the mixture is a coarse puree.
- Adjust the heat as needed to prevent the beans from sticking and burning. The total cooking time in the skillet will be around twenty minutes. Consistent stirring and adjusting the heat are essential for achieving the desired consistency and preventing scorching.
- The refried beans may be served as a side dish or used as an ingredient in another recipe, such as enchiladas, burritos, or tostadas.
Expert Tips & Tricks
- For extra flavor: Consider adding a dried chili pod (such as ancho or guajillo) to the beans while they simmer. Remove it before mashing.
- Spice it up: Add a pinch of cayenne pepper or a dash of hot sauce to the beans while mashing.
- Make-ahead magic: Refried beans can be made a day or two in advance and stored in the refrigerator. They actually taste better after the flavors have had time to meld.
- Prevent sticking: Use a heavy-bottomed skillet to prevent the beans from sticking and burning. A cast-iron skillet works particularly well.
- Consistency control: Adjust the amount of cooking liquid added to the skillet to achieve your desired consistency. For thicker beans, use less liquid; for thinner beans, use more.
- Substitute lard: For an even richer flavor, substitute the vegetable shortening with lard.
Serving & Storage Suggestions
Serve the refried beans hot as a side dish, garnished with chopped cilantro, crumbled cheese (if not vegan), or a dollop of sour cream or vegan crema. They are also a fantastic filling for tacos, burritos, quesadillas, and enchiladas.
Leftover refried beans can be stored in an airtight container in the refrigerator for up to 4 days. To reheat, simply microwave them or heat them in a skillet over medium heat, adding a little water or broth if needed to prevent them from drying out.
For longer storage, refried beans can be frozen for up to 3 months. Thaw them overnight in the refrigerator before reheating.
Nutritional Information
| Nutrient | Amount per Serving | % Daily Value |
|---|---|---|
| Calories | 210.7 kcal | N/A |
| Calories from Fat | N/A | 88% |
| Total Fat | 20.6 g | 31% |
| Saturated Fat | 5.9 g | 29% |
| Cholesterol | 0 mg | 0% |
| Sodium | 885 mg | 36% |
| Carbohydrate | 5.8 g | 1% |
| Dietary Fiber | 0.6 g | 2% |
| Sugars | 1.5 g | 5% |
| Protein | 2.8 g | 5% |
Note: Nutritional information is an estimate and may vary based on specific ingredients and cooking methods.
Variations & Substitutions
- Vegetarian Option: Ensure you use vegetable shortening or another plant-based fat.
- Spicy Refried Beans: Add a finely chopped jalapeño or serrano pepper to the skillet along with the onion and garlic.
- Black Refried Beans: Substitute black beans for the pink or pinto beans.
- Cheesy Refried Beans: Stir in shredded cheddar or Monterey Jack cheese at the end of cooking for a creamy, cheesy version.
- Vegan Cheesy Refried Beans: Use a vegan cheese alternative for a delicious plant-based option.
FAQs (Frequently Asked Questions)
Q: Can I use a different type of bean?
A: Yes, you can substitute other beans like black beans, kidney beans, or even great northern beans. Just adjust the cooking time accordingly, as different beans have varying cooking times.
Q: Can I use olive oil instead of vegetable shortening?
A: While you can use olive oil, vegetable shortening or lard provides a more authentic flavor and a slightly different texture. Olive oil will work in a pinch, but the flavor profile will be altered.
Q: How do I prevent the beans from sticking to the skillet?
A: Use a heavy-bottomed skillet and stir the beans frequently. Adjust the heat as needed to prevent scorching. Adding a little extra cooking liquid can also help.
Q: Can I make these in a slow cooker?
A: Yes! Combine all the ingredients in the slow cooker and cook on low for 6-8 hours, or on high for 3-4 hours, until the beans are tender. Mash them in the slow cooker or transfer them to a skillet for mashing.
Q: What if my beans are too watery?
A: Continue cooking the beans in the skillet over medium-high heat, stirring frequently, until the excess moisture evaporates and the beans reach your desired consistency.
Final Thoughts
These refried beans are more than just a simple side dish; they’re a taste of tradition, a hug in a bowl, a testament to the power of simple ingredients cooked with care. I encourage you to try this recipe and make it your own. Experiment with different spices and variations to create your perfect refried bean experience. Share your feedback and creations with friends and family, and let the warmth of this dish spread throughout your kitchen and beyond. Serve alongside tacos, enchiladas, or simply with warm tortillas for a truly satisfying meal. Enjoy!