
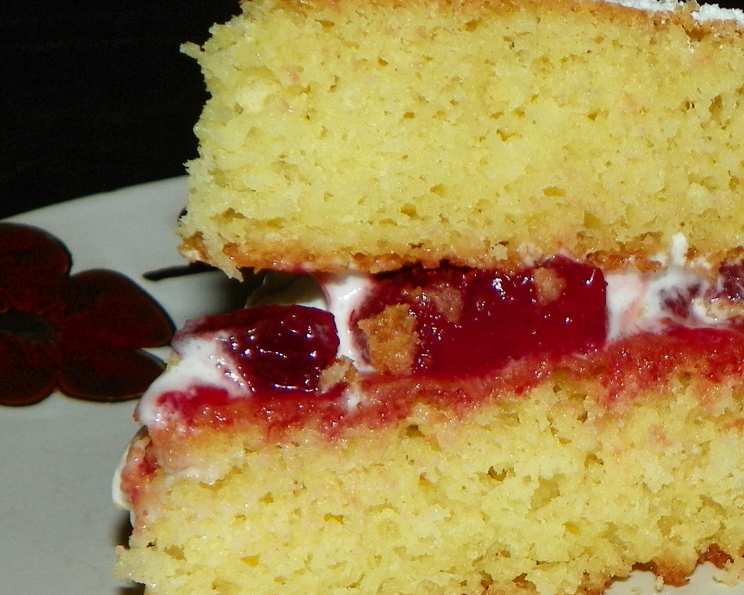
Copycat ‘Classic Sponge Cake!’
My grandmother, Nana Elsie, was a legend in our family for her sponge cakes. Every birthday, every anniversary, every Sunday tea, there it would be: a perfectly golden, cloud-light sponge, fragrant with vanilla and filled with sweet, tangy raspberry jam and a generous dollop of freshly whipped cream. The first time I tried to recreate her masterpiece, the result was a dense, slightly rubbery disc that barely resembled the airy treat I remembered. It took many attempts, and a healthy dose of Nana Elsie’s secret tips, whispered to me over the phone, to finally achieve that same melt-in-your-mouth perfection. This recipe is my tribute to her, a classic sponge cake that captures the magic of those childhood memories.
Recipe Overview
- Prep Time: 15 minutes
- Cook Time: 25-30 minutes
- Total Time: 40-45 minutes
- Servings: 8-10
- Yield: 1 Sponge Cake
- Dietary Type: Vegetarian
Ingredients
- 175g butter (plus extra for greasing)
- 175g caster sugar
- 3 eggs, beaten
- 1 pinch salt
- 175g self-raising flour
- 1 tablespoon icing sugar
- 3 tablespoons raspberry jam
- Fresh cream
Equipment Needed
- 2 x 8-inch round baking tins
- Mixing bowl
- Wooden spoon or hand-held mixer
- Sifter
- Metal spoon or spatula
- Round-bladed knife
- Clean tea towel or plate
Instructions
- Begin by preparing your baking tins. Grease two 8-inch round baking tins generously with butter. This will prevent the cakes from sticking and ensure easy removal after baking.
- In a large mixing bowl, cream together the butter and caster sugar. You can use a wooden spoon for this, or, for a faster and more consistent result, opt for a hand-held mixer.
- Continue to beat the mixture until it becomes pale in color, light, and fluffy in texture. This step is crucial for incorporating air into the batter, which contributes to the cake’s light and airy crumb.
- Gradually add the beaten eggs, a little at a time. Beat the mixture well after each addition to ensure the eggs are fully incorporated and the batter remains smooth. This prevents the batter from curdling.
- Sift together the self-raising flour and salt. Sifting ensures that the flour is evenly distributed and free of lumps, resulting in a lighter cake. The salt enhances the flavors of the other ingredients.
- Gently fold the sifted flour mixture into the wet ingredients using a metal spoon or spatula. Be careful not to overmix, as this can develop the gluten in the flour and result in a tough cake. Fold until just combined.
- Divide the batter evenly between the two prepared baking tins. Use a spatula to smooth the surface of the batter in each tin, ensuring an even thickness for uniform baking.
- Place both tins on the same shelf in the center of a preheated oven. This ensures that both cakes cook at the same rate. Preheat the oven to 180 degrees Celsius/350 degrees Fahrenheit/Gas Mark 4.
- Bake for 25-30 minutes, or until the cakes are golden brown and a toothpick inserted into the center comes out clean. Keep a close eye on the cakes during the last few minutes of baking to prevent them from burning.
- Once baked, remove the cakes from the oven and let them stand in the tins for 1 minute. This allows the cakes to cool slightly and firm up, making them easier to remove.
- Loosen the edges of the cakes from the tins using a round-bladed knife. This will prevent the cakes from sticking and tearing when you turn them out.
- Turn the cakes out onto a clean tea towel or plate to cool completely. Allow them to cool completely before assembling the cake, as warm cakes are more likely to break.
- Once the cakes are completely cool, it’s time to assemble. Sandwich the cakes together with raspberry jam and fresh cream. Spread a generous layer of jam on one cake layer and top with a layer of whipped cream. Carefully place the other cake layer on top.
- Finally, dust the top of the cake with icing sugar for a touch of sweetness and visual appeal.
Expert Tips & Tricks
- Room temperature ingredients: Using butter and eggs at room temperature is crucial for achieving a smooth and well-emulsified batter. This allows the ingredients to combine more easily and results in a lighter, more tender cake.
- Don’t overmix: Overmixing the batter develops the gluten in the flour, leading to a tough cake. Fold the flour in gently until just combined, and stop mixing as soon as the flour disappears.
- Even baking: To ensure even baking, use an oven thermometer to verify that your oven temperature is accurate. Also, rotate the baking tins halfway through baking to prevent one cake from browning faster than the other.
- Cake tester: If you don’t have a toothpick, you can use a skewer or even a clean knife to test for doneness. The cake is ready when the tester comes out clean or with just a few moist crumbs attached.
- Whipped cream stability: To stabilize whipped cream and prevent it from weeping, add a teaspoon of cornstarch or powdered sugar per cup of cream while whipping.
Serving & Storage Suggestions
Serve the classic sponge cake immediately for the best flavor and texture. It’s delicious on its own or accompanied by a cup of tea or coffee.
To store leftover sponge cake, place it in an airtight container at room temperature for up to 2 days, or in the refrigerator for up to 4 days. Be aware that the cake may dry out slightly during refrigeration. You can also freeze the cake for up to 2 months. Wrap it tightly in plastic wrap and then foil to prevent freezer burn. Thaw the cake overnight in the refrigerator before serving.
Nutritional Information
| Nutrient | Amount per Serving | % Daily Value |
|---|---|---|
| Calories | 377.3 kcal | N/A |
| Calories from Fat | 176 g | 47% |
| Total Fat | 19.6 g | 30% |
| Saturated Fat | 11.8 g | 58% |
| Cholesterol | 116.5 mg | 38% |
| Sodium | 481.8 mg | 20% |
| Total Carbohydrate | 46.4 g | 15% |
| Dietary Fiber | 0.7 g | 2% |
| Sugars | 28.5 g | N/A |
| Protein | 4.7 g | 9% |
Variations & Substitutions
- Lemon Sponge: Add the zest of one lemon to the batter for a bright, citrusy flavor. You can also replace the raspberry jam with lemon curd.
- Chocolate Sponge: Add 2 tablespoons of cocoa powder to the flour mixture for a chocolate sponge.
- Gluten-Free Sponge: Substitute the self-raising flour with a gluten-free self-raising flour blend.
- Vanilla Sponge: Add 1 teaspoon of vanilla extract to the batter for a classic vanilla flavor.
- Different Jam Flavors: Experiment with different jam flavors, such as strawberry, blackberry, or apricot.
FAQs (Frequently Asked Questions):
Q: Can I use margarine instead of butter?
A: While margarine can be used, butter provides a richer flavor and better texture. If using margarine, choose a high-quality brand with a high fat content.
Q: My cake sank in the middle. What went wrong?
A: This can happen if the oven temperature is too low, the batter was overmixed, or the cake was removed from the oven too soon. Ensure accurate oven temperature and avoid overmixing the batter.
Q: Can I make this cake ahead of time?
A: Yes, you can bake the cake layers a day in advance. Wrap them tightly in plastic wrap and store them at room temperature. Assemble the cake just before serving.
Q: How do I prevent the cream from melting?
A: Use a stable whipped cream or add a stabilizer like cornstarch or powdered sugar. Keep the assembled cake refrigerated until serving.
Q: Can I add fruit to the filling?
A: Absolutely! Sliced strawberries, raspberries, or blueberries would be delicious additions to the filling.
Final Thoughts
This classic sponge cake recipe is a journey back to simpler times, a taste of pure comfort and joy. I encourage you to give it a try and experience the magic for yourself. Don’t be afraid to experiment with different flavors and fillings to create your own signature sponge cake. And if you have any questions or feedback, please don’t hesitate to share! Perhaps serve it with a perfectly brewed Earl Grey tea for that full ‘Afternoon Tea’ experience. Happy baking!