
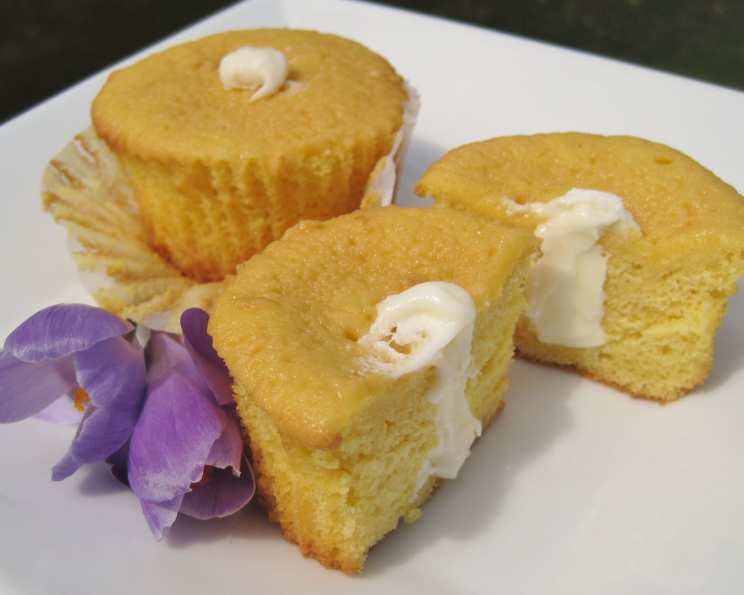
Homemade Hostess Twinkies: A Nostalgic Treat
My grandmother, bless her heart, always kept a box of Twinkies hidden in the pantry, ostensibly for my grandfather. But every so often, when she thought I needed a little cheering up, she’d sneak me one. The golden sponge, the impossibly creamy filling – it was pure magic. While I’ve grown up and developed a taste for more “sophisticated” desserts, that simple pleasure of a Twinkie still holds a special place in my heart. Today, we’re recreating that iconic treat at home!
Recipe Overview
- Prep Time: 30 minutes
- Cook Time: 45-50 minutes
- Total Time: 1 hour 15 minutes – 1 hour 20 minutes
- Servings: Varies, approximately 14-16 depending on size
- Yield: 1 10×14 inch pan
- Dietary Type: Not suitable for Vegan, Gluten-Free, or Dairy-Free diets
Ingredients
For the Cake:
- 2 cups flour
- 1 1/2 cups sugar
- 1 tablespoon baking powder
- 1/2 teaspoon salt
- 1/2 cup vegetable oil
- 3/4 cup cold water
- 2 teaspoons vanilla
- 7 egg yolks
- 7 egg whites
- 1/2 teaspoon cream of tartar
For the Filling:
- 6 tablespoons flour (rounded)
- 1 1/2 cups Butter Flavor Crisco (or other vegetable shortening)
- 1 1/2 cups sugar
- 1 cup cold milk (scant)
- 2 teaspoons vanilla
Equipment Needed
- Large mixing bowl
- Electric mixer
- 10×14 inch baking pan
- Whisk
- Spatula
- Measuring cups and spoons
Instructions
-
Preheat your oven to 350 degrees F (175 degrees C). This is crucial for even baking and that signature golden color.
-
Prepare the Cake Batter: In a large bowl, combine the flour, sugar, baking powder, and salt. This is your dry ingredient base.
-
Make a well in the center of the dry ingredients. Add the vegetable oil, cold water, and vanilla to the well.
-
Using a spoon, beat the wet and dry ingredients together until smooth. Set this mixture aside. This is your egg yolk batter.
-
In a separate, clean bowl (very important for proper whipping!), beat the egg whites with the cream of tartar until stiff peaks form. The cream of tartar helps to stabilize the egg whites, creating a lighter, airier texture.
-
Pour the beaten egg whites over the egg yolk batter.
-
Gently fold the egg whites into the batter until just combined. Be careful not to overmix, as this will deflate the egg whites and result in a dense cake.
-
Pour the batter into an ungreased 10×14 inch pan. An ungreased pan is important because it allows the cake to rise properly.
-
Bake for 45-50 minutes, or until a wooden skewer inserted into the center comes out clean. Keep a close eye on it, as oven temperatures can vary.
-
Cool the cake completely in the pan.
-
After the cake has cooled, invert the pan onto a wire rack with cups placed under each corner to elevate the cake. This allows air to circulate underneath, preventing sogginess.
-
Once completely cooled, run a knife around the edge of the pan to loosen the cake.
-
Carefully remove the cake from the pan and cut it in half lengthwise. This creates two layers for your Twinkies.
-
Prepare the Filling: In a large bowl, combine the flour, Butter Flavor Crisco, and sugar.
-
Beat the mixture on high speed for 5 minutes. This will create a light and fluffy base for the filling.
-
Gradually add the cold milk and vanilla to the mixture while continuing to beat on high speed.
-
Beat for another 5 minutes on high speed, until the filling is light, fluffy, and smooth.
-
Spread the filling evenly between the two cake layers.
-
Cut the filled cake into individual Twinkie-sized portions (approximately 3×1 inch).
-
Wrap each Twinkie separately in plastic wrap to maintain freshness.
Expert Tips & Tricks
- Don’t overmix the batter: Overmixing develops the gluten in the flour, leading to a tougher cake. Fold the egg whites in gently.
- Use room temperature egg yolks: Room temperature egg yolks incorporate more easily into the batter, resulting in a smoother texture.
- Crisco Alternative: If you can’t find Butter Flavor Crisco, regular vegetable shortening works well. You can also add a tiny drop of butter flavoring to the filling. Be careful not to add too much, as it can be overpowering.
- Filling Consistency: If your filling is too thin, add a tablespoon of powdered sugar at a time until you reach the desired consistency. If it’s too thick, add a tiny bit of milk.
- Injection Method: For a more authentic Twinkie experience, you can use a pastry bag fitted with a long tip to inject the filling into pre-made holes in the bottom of the sponge cakes.
Serving & Storage Suggestions
Serve your homemade Twinkies chilled or at room temperature. They are best enjoyed within 2-3 days of making them, as the sponge cake can dry out over time.
- Room Temperature: Store in an airtight container for up to 2 days.
- Refrigerator: Store in an airtight container in the refrigerator for up to 5 days.
- Freezer: For longer storage, wrap individual Twinkies tightly in plastic wrap and then place them in a freezer bag. They can be frozen for up to 2 months. Thaw in the refrigerator before serving.
Nutritional Information
Please note that these values are estimates and can vary depending on specific ingredients and portion sizes.
| Nutrient | Amount per Serving | % Daily Value |
|---|---|---|
| Calories | 450 kcal | 23% |
| Total Fat | 25g | 38% |
| Saturated Fat | 10g | 50% |
| Cholesterol | 100mg | 33% |
| Sodium | 200mg | 9% |
| Total Carbohydrate | 55g | 18% |
| Dietary Fiber | 1g | 4% |
| Sugars | 35g | N/A |
| Protein | 5g | 10% |
Variations & Substitutions
- Gluten-Free: Substitute the all-purpose flour with a gluten-free blend designed for baking. You might need to adjust the liquid slightly.
- Dairy-Free: Use a non-dairy milk alternative like almond milk or soy milk in the filling. Ensure the shortening you use is also dairy-free.
- Flavor Variations: Experiment with different extracts in the cake batter and filling. Lemon, almond, or even a hint of orange extract can add a unique twist.
- Mini Twinkies: Use a mini muffin tin to bake smaller, bite-sized Twinkies. Adjust the baking time accordingly.
FAQs (Frequently Asked Questions)
Q: Why is it important to use an ungreased pan for the cake?
A: An ungreased pan allows the cake batter to grip the sides of the pan as it rises, giving it the necessary structure and height. A greased pan can cause the cake to slide down the sides.
Q: Can I use regular butter instead of Butter Flavor Crisco?
A: While you can use butter, the texture and flavor will be different. Butter Flavor Crisco provides a more stable and “classic” Twinkie filling texture. If you use butter, ensure it’s very cold and beat it well with the other ingredients.
Q: My filling is too runny. What did I do wrong?
A: This could be due to using too much milk or not beating the filling long enough. Try chilling the filling for 30 minutes to see if it thickens. If not, add a tablespoon of powdered sugar at a time until you reach the desired consistency.
Q: How can I tell if the cake is done baking?
A: The best way to check for doneness is to insert a wooden skewer or toothpick into the center of the cake. If it comes out clean or with only a few moist crumbs attached, the cake is done.
Q: Why are my homemade Twinkies not as spongy as the store-bought ones?
A: Achieving the exact texture of store-bought Twinkies can be tricky. Make sure you’re not overmixing the batter and that you’re using the correct measurements. The cream of tartar is also essential for achieving a lighter texture.
Final Thoughts
There’s something wonderfully comforting about recreating a classic treat like the Hostess Twinkie at home. While it might not be exactly the same as the original (and perhaps that’s part of its charm!), this recipe offers a delightful trip down memory lane. Don’t be afraid to experiment with variations and make it your own. Whip up a batch, share them with friends and family, and enjoy the sweet taste of nostalgia! And if you have any tips or tricks of your own, please share them in the comments below. Happy baking!