
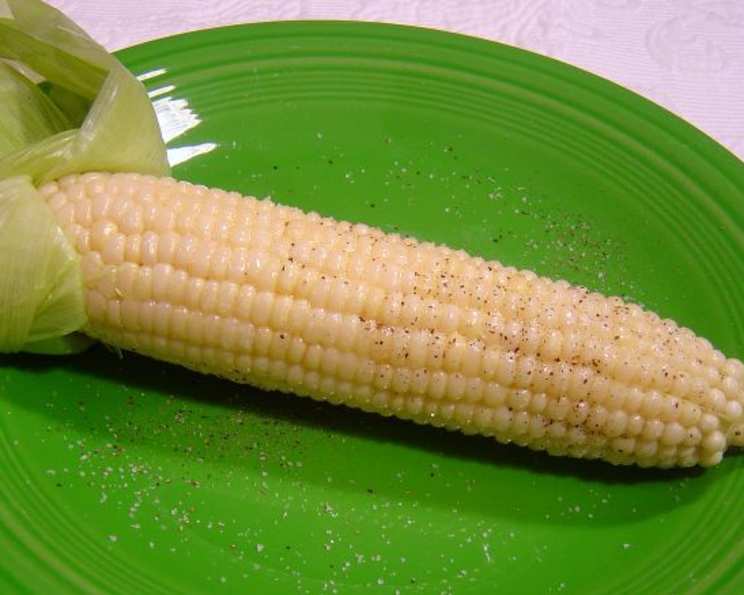
Corn on the Cob: Cooked in the Old Ways
I remember summers at my grandmother’s farm like they were yesterday. The air, thick with the smell of freshly turned earth and blooming honeysuckle, and the ever-present symphony of crickets chirping in the tall grass. But above all, I remember the corn. Not just any corn, but corn on the cob, cooked in its own husk, just as her great-great grandmother had done. The flavor was unbelievably sweet and intensely corn-y, a taste that simply can’t be replicated with modern methods. It was a true taste of summer, a taste of heritage, and a taste I’m thrilled to share with you.
Recipe Overview
- Prep Time: 5 minutes
- Cook Time: 10 minutes
- Total Time: 15 minutes
- Servings: 6
- Dietary Type: Vegetarian, Gluten-Free
Ingredients
- 6 ears unshucked corn (do not shuck)
- Butter, for serving
- Salt, for serving
- Boiling water, to cover corn
Equipment Needed
- Large pot
- Tongs
Instructions
- Bring a generous amount of water to a rolling boil in a large pot. Make sure the pot is large enough to accommodate all the corn and enough water to cover it completely.
- Carefully place the unshucked corn into the boiling water. Ensure that the corn is fully submerged. You may need to use a plate or a smaller pot lid to weigh it down and keep it submerged.
- Once the corn is in the pot, allow the water to return to a boil. Then, boil the corn for exactly 10 minutes. Set a timer to ensure accuracy. This cooking time is crucial to achieving perfectly cooked, tender kernels.
- After 10 minutes, carefully remove the corn from the pot using tongs. Be cautious, as the corn will be very hot, and the husks will contain steam.
- Once the corn is cool enough to handle, shuck it. Remove the husks and silk.
- Serve immediately with generous pats of butter and a sprinkle of salt.
Expert Tips & Tricks
- Selecting the Corn: Choose ears of corn that have bright green, tightly wrapped husks. The silk protruding from the top should be slightly sticky and light brown or golden. Avoid ears with dry, brown, or sparse silk. Feel the kernels through the husk; they should be plump and plentiful.
- Soaking the Corn (Optional): Some cooks like to soak the unshucked corn in cold water for about 30 minutes before boiling. This can help to hydrate the kernels and prevent the husks from burning during cooking. If you choose to soak, reduce the boiling time by 1-2 minutes.
- Flavor Infusion: For a deeper flavor, try adding aromatic herbs or spices to the boiling water. A few sprigs of thyme, rosemary, or a bay leaf can add a subtle but delicious complexity to the corn. You can also add a pinch of sugar to enhance the corn’s natural sweetness.
- Doneness Check: While 10 minutes is usually perfect, corn can vary in size and freshness. To check for doneness, pierce a kernel with a fork. It should be tender and release a milky liquid. If it’s still hard or starchy, continue boiling for another minute or two.
- Preventing Overcooking: Overcooked corn can become tough and lose its sweetness. It’s better to slightly undercook it than to overcook it. Remember that the corn will continue to cook slightly from its residual heat even after it’s removed from the boiling water.
- Grilling Option: For a smoky twist, you can grill the corn after boiling it. After shucking, brush the corn with melted butter and grill over medium heat for a few minutes, turning occasionally, until lightly charred.
Serving & Storage Suggestions
Serve the corn on the cob immediately while it’s still hot and the butter is melting into the kernels. This is when the flavor is at its absolute peak. Arrange the corn on a platter or individual plates. Provide small dishes of butter and salt for each person.
Leftover corn can be stored in the refrigerator, but its quality will decline over time. Ideally, consume it within 2-3 days. To store, remove the kernels from the cob. Place the kernels in an airtight container or freezer bag.
To reheat refrigerated corn kernels, you can microwave them for a minute or two, or sauté them in a pan with a little butter. You can also add them to soups, salads, or stir-fries.
Freezing cooked corn is also an option, although the texture may be slightly softer after thawing. To freeze, blanch the corn kernels in boiling water for 2-3 minutes, then plunge them into ice water to stop the cooking process. Drain well and pack into freezer bags or containers. Frozen corn can be stored for up to 8-12 months.
Nutritional Information
Here’s an approximate nutritional breakdown per ear of corn on the cob (without butter or salt):
| Nutrient | Amount per Serving | % Daily Value |
|---|---|---|
| Calories | 123 kcal | 6% |
| Total Fat | 2 g | 3% |
| Saturated Fat | 0.3 g | 2% |
| Cholesterol | 0 mg | 0% |
| Sodium | 15 mg | 1% |
| Carbohydrates | 27 g | 9% |
| Fiber | 4 g | 16% |
| Sugar | 6 g | – |
| Protein | 5 g | 10% |
Please note that these values are estimates and can vary depending on the size and type of corn. Adding butter and salt will significantly increase the fat and sodium content.
Variations & Substitutions
- Spicy Corn: Add a pinch of cayenne pepper or a dash of hot sauce to the butter for a spicy kick.
- Herb Butter: Mix softened butter with chopped fresh herbs like parsley, chives, or dill.
- Garlic Butter: Add minced garlic to the butter for a savory flavor.
- Citrus Corn: Squeeze fresh lime or lemon juice over the corn after shucking.
- Mexican Street Corn (Elote): After boiling, brush the corn with mayonnaise, sprinkle with cotija cheese, chili powder, and a squeeze of lime juice.
- Grilled Corn: For a smoky flavor, grill the shucked corn after boiling it for a few minutes, turning occasionally.
- Creamed Corn: Cut the kernels off the cob and simmer them in a mixture of milk, butter, and flour for a creamy side dish.
- Vegan Corn: Use a plant-based butter alternative for serving.
FAQs (Frequently Asked Questions)
Q: Why boil the corn in its husk?
A: Boiling the corn in its husk helps to trap the natural moisture and sweetness, resulting in a more flavorful and tender corn on the cob. It also protects the kernels from direct heat, preventing them from becoming dry or scorched.
Q: Can I use frozen corn for this recipe?
A: While fresh corn is always preferable, you can use frozen corn if necessary. However, skip the boiling in the husk and simply boil the frozen kernels for 3-5 minutes until heated through.
Q: How do I prevent the corn from becoming waterlogged?
A: Make sure the water is boiling vigorously before adding the corn. Avoid overcooking the corn, as this can make it mushy. Remove the corn from the water as soon as it’s done.
Q: Can I add salt to the boiling water?
A: Adding salt to the boiling water can actually toughen the corn. It’s best to salt the corn after it’s cooked, when serving with butter.
Q: How long can I store cooked corn on the cob?
A: Cooked corn on the cob is best eaten immediately. However, you can store it in the refrigerator for up to 2-3 days. Remove the kernels from the cob for better storage.
Final Thoughts
This simple, old-fashioned method of cooking corn on the cob truly unlocks its natural sweetness and flavor. It’s a testament to the fact that sometimes, the simplest techniques are the best. I urge you to try this recipe and experience the taste of summer as it was meant to be. Feel free to experiment with different butter and seasoning variations to find your perfect combination. And most importantly, share your creations with friends and family! This is a dish best enjoyed in good company.