
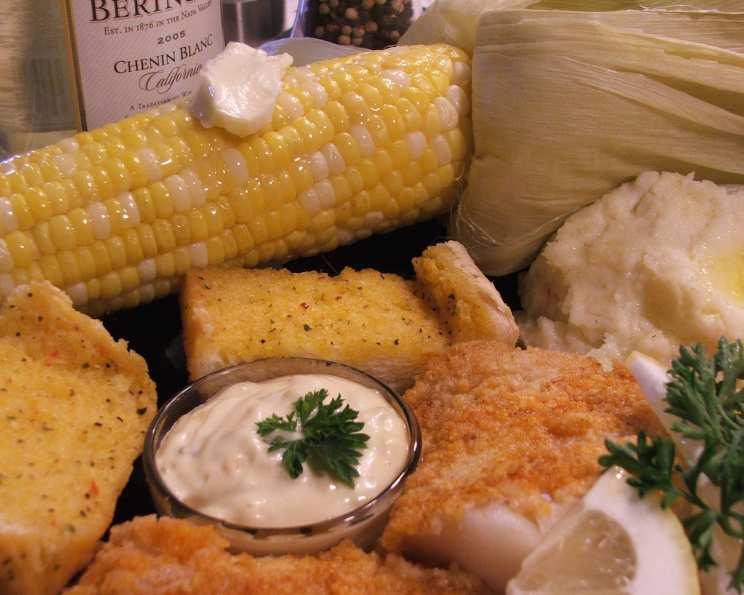
Corn on the Cob in Husk for the Firepit
There’s something magical about sitting around a crackling fire, the smell of wood smoke mingling with the anticipation of a simple, perfect meal. For me, that meal is often corn on the cob, cooked right in its husk over the embers. I remember one summer night in particular, gathered with friends around a bonfire on the beach. The sky was a canvas of stars, the waves providing a soothing soundtrack, and the corn, prepared exactly as this recipe details, was the sweetest, most satisfying thing I could have imagined. Each bite was an explosion of summer flavor, made even better by the company and the atmosphere. It’s a memory I cherish, and a tradition I’ve carried on every chance I get.
Recipe Overview
- Prep Time: 4 hours
- Cook Time: 40 minutes
- Total Time: 4 hours 40 minutes
- Servings: 4
- Dietary Type: Vegetarian, Gluten-Free
Ingredients
- 4 ears of corn
- 4 tablespoons of butter
- Salt, to taste
- Pepper, to taste
Equipment Needed
- Large cooler or container
- Grill or firepit
Instructions
-
Soak the corn in their husks in water for at least 4 hours, or ideally overnight. This is crucial for preventing the husks from burning too quickly and for steaming the corn kernels inside. A cooler filled with water works perfectly for this, or any large container that can fully submerge the ears of corn.
-
If you are using a grill, prepare it for medium heat. Alternatively, prepare your firepit, allowing the flames to die down to hot embers. You can also cook this directly on the barbecue grill, but the firepit gives it a wonderful smoky flavor.
-
Drain any excess water from the soaked corn. You don’t want them dripping wet, just nicely damp.
-
Place the corn directly on the grill grates or hot embers of the firepit.
-
Turn the corn over about every 15 minutes to ensure even cooking. This will prevent any one side from burning excessively and allow the corn to cook through completely. The cooking process should take approximately 40 minutes. The husks will char and blacken, but that’s perfectly normal and part of the cooking process.
-
To test for doneness, carefully peel back a small portion of the husk to reveal the kernels. They should be plump, juicy, and easily pierced with a fork.
-
Once the corn is cooked, carefully remove it from the grill or firepit. Be cautious, as the corn will be very hot.
-
Pull the husk back but don’t break it off completely. This will expose the corn cob. The silk should come off easily at this point. The husk now serves as a convenient handle.
-
Use the husk as a handle and roll the hot corn cob in butter. The heat from the corn will melt the butter beautifully, coating every kernel.
-
Season generously with salt and pepper to taste.
Expert Tips & Tricks
- Soaking Time is Key: Don’t skimp on the soaking time! This step is crucial for preventing the husks from burning up too quickly. The longer the corn soaks, the more moisture it retains, resulting in perfectly steamed kernels.
- Adding Flavor to the Soak: Consider adding herbs, spices, or even a splash of beer to the soaking water for extra flavor. Dried herbs like thyme or rosemary work well, as do spices like chili powder or smoked paprika.
- Indirect Heat is Your Friend: When using a grill, aim for indirect heat. This means placing the corn away from the direct flame to prevent scorching. If using a firepit, ensure the embers are glowing but not actively flaming.
- Charred Husks, Sweet Kernels: Don’t be alarmed by the charred husks. The corn inside will be perfectly steamed and incredibly sweet. The charring actually adds a smoky flavor to the corn.
- Compound Butter Upgrade: Elevate your corn on the cob by using compound butter. Mix softened butter with herbs, spices, garlic, or even a touch of honey for a burst of flavor.
- Alternative Cooking Method: If you don’t have a grill or firepit, you can also cook the corn in the oven. Preheat your oven to 350°F (175°C), place the soaked corn directly on the oven rack, and bake for 40-45 minutes.
Serving & Storage Suggestions
Serve the corn on the cob immediately while it’s hot and the butter is melted and delicious. The husk serves as a convenient handle, but be mindful that it can still be quite warm. You can also serve it with additional toppings like chili flakes, lime wedges, or cotija cheese for a Mexican-inspired twist.
Leftover corn can be stored in an airtight container in the refrigerator for up to 3 days. To reheat, you can microwave it for a minute or two, or wrap it in foil and warm it in the oven or on the grill. However, freshly cooked corn is always best!
Nutritional Information
| Nutrient | Amount per Serving | % Daily Value |
|---|---|---|
| Calories | 215 kcal | N/A |
| Calories from Fat | 119 kcal | N/A |
| Total Fat | 13.3 g | 20% |
| Saturated Fat | 7.5 g | 37% |
| Cholesterol | 30.5 mg | 10% |
| Sodium | 102.6 mg | 4% |
| Total Carbohydrate | 24.8 g | 8% |
| Dietary Fiber | 2.8 g | 11% |
| Sugars | 5.4 g | N/A |
| Protein | 4.1 g | 8% |
Note: Nutritional information is an estimate and may vary based on specific ingredients and portion sizes.
Variations & Substitutions
- Vegan Corn on the Cob: Substitute the butter with a plant-based butter alternative or olive oil. Nutritional yeast can add a cheesy flavor.
- Spicy Corn on the Cob: Add a pinch of cayenne pepper or a drizzle of hot sauce to the butter before rolling the corn.
- Mexican Street Corn (Elote) Inspired: After cooking, spread the corn with mayonnaise, sprinkle with cotija cheese, and drizzle with lime juice and chili powder.
- Herb-Infused Corn: Mix finely chopped fresh herbs like cilantro, parsley, or basil into the melted butter for an herbaceous twist.
- Smoked Paprika Butter: Add a smoky depth of flavor by mixing smoked paprika into the butter before rolling the corn.
FAQs (Frequently Asked Questions)
Q: Why do I need to soak the corn before grilling?
A: Soaking the corn in its husk helps to prevent the husk from burning too quickly and also steams the corn kernels inside, resulting in tender and juicy corn.
Q: Can I use frozen corn on the cob for this recipe?
A: While fresh corn is ideal, you can use frozen corn on the cob. Thaw it completely before soaking and grilling as directed.
Q: How do I know when the corn is done cooking?
A: The corn is done when the kernels are plump, juicy, and easily pierced with a fork. You can carefully peel back a portion of the husk to check.
Q: Can I add other seasonings besides salt and pepper?
A: Absolutely! Feel free to experiment with your favorite seasonings, such as garlic powder, onion powder, chili powder, or smoked paprika.
Q: Is it safe to eat the charred parts of the husk?
A: No, the charred parts of the husk are not meant to be eaten. Simply peel them away to reveal the cooked corn kernels.
Final Thoughts
There’s truly no better way to enjoy the simple pleasure of sweet summer corn than cooked over an open flame. The smoky flavor infused into each kernel, the satisfying pop with every bite, and the shared experience of gathering around the fire make this recipe a timeless classic. Don’t hesitate to experiment with different seasonings and butter variations to create your own signature corn on the cob. I encourage you to try this recipe and share it with your friends and family. Let me know what you think, and happy grilling!