
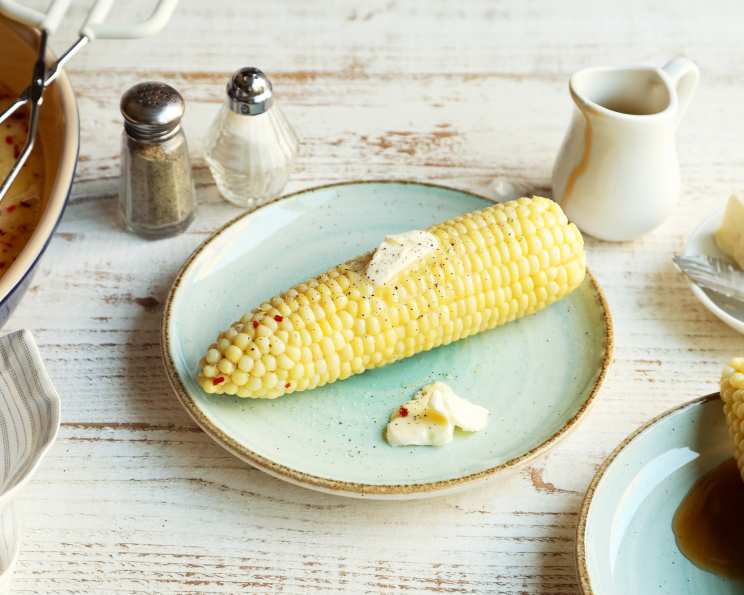
The Quintessential Summer Treat: Perfect Corn on the Cob
The aroma of corn on the cob always transports me back to summer evenings at my grandmother’s house. As children, we’d eagerly await the moment my grandfather emerged from the garden, his arms laden with freshly picked ears. The husks, still cool and damp from the earth, held the promise of sweet, juicy kernels bursting with sunshine. No matter how fancy the summer barbeque got, it was those simple ears of corn, dripping with butter and sprinkled with salt, that truly defined the season.
Recipe Overview
- Prep Time: 15 minutes
- Cook Time: 8 minutes
- Total Time: 23 minutes
- Servings: 12
- Yield: 12 ears of corn
- Dietary Type: Vegetarian
Ingredients
- 1 gallon water
- 1 quart milk
- 4 tablespoons butter
- 2 tablespoons sugar
- 1 teaspoon salt
- 1 teaspoon red pepper flakes (optional)
- 12 ears fresh corn, shucked and silk removed
- Soy sauce or maple syrup, for serving (optional)
Equipment Needed
- Large, heavy pot
- Tongs
Instructions
- In a large, heavy pot, combine the water, milk, butter, sugar, salt, and optional red pepper flakes.
- Bring the mixture to a rolling boil over high heat. A rolling boil means the bubbles are continuous and vigorous, even when stirred.
- Carefully add the shucked corn to the boiling water. Ensure the corn is mostly submerged. If necessary, you can break the ears in half to fit.
- Once the corn is in the pot, reduce the heat to a simmer. A simmer is a gentle boil, with small bubbles just breaking the surface.
- Cover the pot tightly with a lid. This helps to trap the heat and steam, ensuring even cooking.
- Cook the corn until the kernels are tender. This typically takes about 5 to 8 minutes, depending on the freshness and size of the corn. To test for doneness, pierce a kernel with a fork; it should be easily pierced and release a milky liquid.
- Remove the pot from the heat and let the corn stand in the hot cooking liquid until needed. This allows the corn to continue to absorb flavor and stay warm. You can leave it in the pot for up to 30 minutes without significantly affecting the texture.
- When ready to serve, drain the corn thoroughly.
- Serve hot. Enjoy plain or with your preferred condiments, such as butter, soy sauce, or maple syrup.
Expert Tips & Tricks
- Choosing the Right Corn: Look for ears of corn with bright green, tightly wrapped husks. The silk protruding from the top should be golden and slightly sticky. Feel the kernels through the husk; they should be plump and evenly spaced. Avoid ears with dry, brown husks or missing kernels.
- Shucking Like a Pro: To easily shuck corn, peel back the husks and remove the silk. For stubborn silk, use a clean vegetable brush or a damp paper towel to gently scrub it away.
- The Milk Secret: The addition of milk to the cooking liquid is not just an old wives’ tale. The milk’s sugars help to enhance the corn’s natural sweetness and neutralize any potential bitterness.
- Don’t Overcook: Overcooking corn will result in tough, chewy kernels. Cook it just until tender, about 5 to 8 minutes.
- Spice it Up: The optional red pepper flakes add a subtle kick to the corn. Adjust the amount to your preference, or try other spices like chili powder or smoked paprika.
- Charred Flavor: For a smoky flavor, grill the corn briefly after boiling. Simply drain the corn and place it on a hot grill for 2-3 minutes per side, until lightly charred.
- Butter Infusion: Melt the butter separately and infuse it with herbs like thyme, rosemary, or garlic for an extra layer of flavor.
Serving & Storage Suggestions
Serve the corn immediately after draining for the best flavor and texture. Offer a variety of toppings, such as melted butter, salt, pepper, herbs, and flavored salts. For a more elaborate presentation, skewer the corn on decorative sticks.
Leftover cooked corn can be stored in an airtight container in the refrigerator for up to 3 days. To reheat, you can steam it, microwave it, or grill it. Microwaving is the quickest method, but steaming or grilling will help to retain the corn’s texture.
Avoid freezing cooked corn on the cob, as it tends to become mushy when thawed. If you must freeze it, consider cutting the kernels off the cob first and freezing them in a single layer on a baking sheet before transferring them to a freezer bag.
Nutritional Information
| Nutrient | Amount per Serving | % Daily Value |
|---|---|---|
| Calories | 172 kcal | 9% |
| Total Fat | 8 g | 10% |
| Saturated Fat | 5 g | 25% |
| Cholesterol | 22 mg | 7% |
| Sodium | 290 mg | 13% |
| Total Carbohydrate | 23 g | 8% |
| Dietary Fiber | 2 g | 7% |
| Sugars | 5 g | N/A |
| Protein | 6 g | 12% |
Nutritional information is an estimate and may vary based on specific ingredients and cooking methods.
Variations & Substitutions
- Vegan Corn: Substitute the milk with unsweetened almond milk, soy milk, or coconut milk. Use a vegan butter alternative or olive oil instead of dairy butter.
- Mexican Street Corn (Elote): After boiling, grill the corn and brush it with mayonnaise, sprinkle with cotija cheese, chili powder, and a squeeze of lime juice.
- Grilled Corn with Herb Butter: Prepare an herb butter by combining softened butter with chopped fresh herbs like parsley, chives, and dill. Grill the corn and brush it generously with the herb butter.
- Spicy Corn on the Cob: Add a pinch of cayenne pepper or a dash of hot sauce to the cooking liquid for a spicy kick.
- Roasted Garlic Corn: Add a head of roasted garlic to the cooking liquid for a sweet and savory flavor.
FAQs (Frequently Asked Questions)
Q: Why add milk to the water when cooking corn on the cob?
A: Milk helps to sweeten the corn and neutralize any bitterness by providing additional sugars and altering the pH of the cooking liquid.
Q: How do I know when the corn is cooked perfectly?
A: The kernels should be bright yellow and easily pierced with a fork, releasing a milky liquid. Avoid overcooking, as this can make the kernels tough.
Q: Can I cook corn on the cob in the microwave?
A: Yes, you can microwave corn on the cob. Wrap each ear in a damp paper towel and microwave on high for 3-4 minutes, depending on the size.
Q: Can I grill corn on the cob without boiling it first?
A: Yes, but it will take longer to cook. Soak the corn in water for 30 minutes, then grill it over medium heat, turning occasionally, until the kernels are tender and slightly charred.
Q: How do I prevent the corn from drying out while cooking?
A: Keeping the pot covered while simmering helps to trap the steam and moisture, preventing the corn from drying out. Also, do not overcook the corn.
Final Thoughts
There’s truly nothing quite like the taste of perfectly cooked corn on the cob. With this simple recipe and a few helpful tips, you can easily create this summertime classic at home. Don’t be afraid to experiment with different flavors and toppings to find your perfect combination. Gather your loved ones, fire up the grill, and enjoy the sweet taste of summer! Share your creations and feedback—I’d love to hear how you make this recipe your own. Pair it with grilled chicken or ribs for a complete and satisfying meal.