
Golden Goodness: Mastering the Art of Corn Sticks
The scent of cornbread baking always takes me back to my grandmother’s kitchen. She’d hum softly, a cloud of flour dusting her apron, as she slid a cast iron pan into the oven. But the real treasure wasn’t the cornbread itself, but the crisp, golden brown corn sticks she’d meticulously craft in her well-seasoned pan. Each bite was a symphony of textures – a delightful crunch giving way to a tender, slightly sweet interior. Those corn sticks weren’t just food; they were edible sunshine, and a testament to simple ingredients transformed into something extraordinary.
Recipe Overview
- Prep Time: 10 minutes
- Cook Time: 25 minutes
- Total Time: 35 minutes
- Servings: Varies based on stick size
- Yield: Approximately 12-16 corn sticks, depending on mold size
- Dietary Type: Vegetarian (can be made vegan with substitutions)
Ingredients
- 1 cup cornmeal
- ½ cup wheat flour
- 1 tablespoon baking powder
- 1 teaspoon sugar
- ½ teaspoon salt
- ¼ teaspoon cayenne (optional, for a hint of spice)
- ¾ cup milk (dairy or non-dairy)
- 3 tablespoons melted lard (or melted butter, or vegetable oil for vegan option)
- 1 egg, lightly beaten (can be replaced with 1 tablespoon of flaxseed meal mixed with 3 tablespoons of water for a vegan substitute)
Equipment Needed
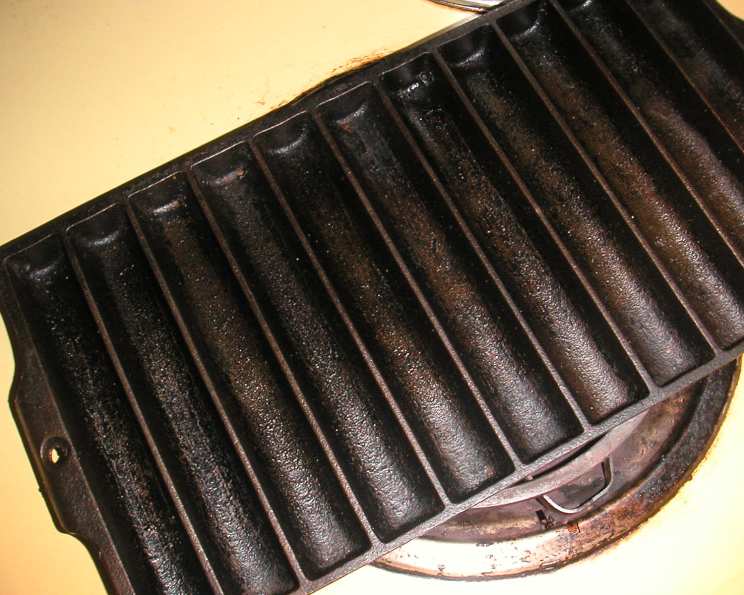
- Cast iron bread stick pan
- Mixing bowls
- Measuring cups and spoons
- Sifter or whisk
- Non-stick cooking spray
Instructions
-
Begin by preheating your oven to 375°F (190°C). Place your cast iron bread stick pan inside the oven while it preheats. This is a crucial step, as the hot pan ensures a beautifully crisp crust on your corn sticks.
-
In a large mixing bowl, sift together the cornmeal, wheat flour, baking powder, sugar, salt, and cayenne (if using). Sifting ensures that the dry ingredients are evenly distributed, preventing pockets of baking powder or salt in the finished product. If you don’t have a sifter, a whisk will also work to combine the dry ingredients thoroughly.
-
In a separate bowl, combine the wet ingredients: milk, melted lard (or your chosen substitute), and the lightly beaten egg (or flaxseed meal mixture).
-
Pour the wet ingredients into the dry ingredients.
-
Using a spoon or spatula, gently mix the wet and dry ingredients together until just combined. It’s important to avoid overmixing the batter, as this can develop the gluten in the flour and result in tough corn sticks. A few streaks of flour are perfectly fine at this stage.
-
Carefully remove the hot cast iron bread stick pan from the oven. Working quickly, spray each mold cavity with non-stick cooking spray. This will prevent the corn sticks from sticking to the pan and make them easier to remove.
-
Pour the batter into the prepared bread stick pan, filling each mold cavity about two-thirds full. The batter will rise slightly during baking.
-
Bake in the preheated oven for 25 minutes, or until the corn sticks are golden brown and a toothpick inserted into the center comes out clean. Keep a close eye on them during the last few minutes of baking to prevent burning.
-
Remove the pan from the oven and let the corn sticks cool in the pan for a few minutes before carefully removing them with a small spatula or knife.
-
Serve warm and enjoy!
Expert Tips & Tricks
- Hot Pan, Crisp Sticks: Preheating the cast iron pan is the secret to achieving that coveted crispy crust. Don’t skip this step!
- Don’t Overmix: Overmixing the batter leads to tough corn sticks. Mix until just combined, leaving a few streaks of flour.
- Spice It Up: Add a pinch of cayenne pepper for a subtle kick, or experiment with other spices like chili powder or smoked paprika.
- Buttermilk Boost: Substitute buttermilk for regular milk to add a tangy flavor and extra tenderness.
- Herb Infusion: Mix in fresh herbs like chopped chives, rosemary, or thyme for an aromatic twist.
- Make-Ahead Magic: The dry ingredients can be pre-mixed and stored in an airtight container. When ready to bake, simply add the wet ingredients.
- Pan Placement: For even browning, rotate the pan halfway through baking.
- Vegan Variation Success: Ensure your milk substitute is unsweetened and unflavored for the best results.
- Lard vs. Butter vs. Oil: Lard offers a traditional flavor and texture, but melted butter or vegetable oil work well as substitutes.
- Sweet Corn Enhancement: Add 1/2 cup of fresh or frozen corn kernels into the batter for added flavor.
- Troubleshooting: If your corn sticks are sticking to the pan, try using a generous amount of non-stick spray or greasing the pan with shortening before preheating.
Serving & Storage Suggestions
Serve your golden corn sticks warm alongside chili, soups, stews, or barbecued meats. They’re also delicious with a dollop of butter, honey, or jam. Leftover corn sticks can be stored at room temperature in an airtight container for up to 2 days. For longer storage, refrigerate them for up to a week. To reheat, simply warm them in a preheated oven at 350°F (175°C) for a few minutes, or microwave them briefly. For the best texture, avoid microwaving them for too long, as this can make them rubbery. You can also freeze them for up to 2 months. Wrap them individually in plastic wrap before placing them in a freezer-safe bag. Thaw them completely before reheating.
Nutritional Information
| Nutrient | Amount per Serving | % Daily Value |
|---|---|---|
| Calories | 301.7 kcal | N/A |
| Total Fat | 13.9 g | 21% |
| Saturated Fat | 5.4 g | 27% |
| Cholesterol | 68.4 mg | 22% |
| Sodium | 614.4 mg | 25% |
| Total Carbohydrate | 38.5 g | 12% |
| Dietary Fiber | 4.1 g | 16% |
| Sugars | 1.4 g | 5% |
| Protein | 7.6 g | 15% |
Note: Nutritional information is an estimate and may vary based on specific ingredients and portion sizes.
Variations & Substitutions
- Gluten-Free: Substitute the wheat flour with a gluten-free all-purpose flour blend.
- Vegan Corn Sticks: Use non-dairy milk, vegetable oil, and a flaxseed meal egg replacement.
- Cheese Lovers: Add shredded cheddar cheese or Monterey Jack cheese to the batter for a cheesy twist.
- Jalapeño Corn Sticks: Finely dice a jalapeño pepper (seeds removed for less heat) and add it to the batter for a spicy kick.
- Sweet Cornbread Sticks: Increase the amount of sugar to 2-3 tablespoons for a sweeter treat.
- Maple Glazed Corn Sticks: Brush the warm corn sticks with maple syrup for a delicious glaze.
- Corn and Herb Corn Sticks: Add corn kernels and your choice of herbs.
FAQs (Frequently Asked Questions)
Q: Why is my cast iron pan smoking when I preheat it?
A: This is normal, especially if the pan has been seasoned with oil. Ensure your oven is set to the correct temperature and that your kitchen is well-ventilated.
Q: Can I use a regular muffin tin if I don’t have a bread stick pan?
A: Yes, you can use a muffin tin, but the baking time may need to be adjusted. Check for doneness after about 20 minutes.
Q: How do I prevent my corn sticks from sticking to the pan?
A: Make sure to generously spray the pan with non-stick cooking spray or grease it with shortening before preheating.
Q: Can I freeze the corn stick batter?
A: It is best to bake the corn sticks first and then freeze them after they have cooled. The batter may not freeze well.
Q: What is the best way to reheat frozen corn sticks?
A: Thaw them completely and then reheat them in a preheated oven at 350°F (175°C) for a few minutes.
Final Thoughts
Corn sticks are more than just a side dish; they’re a taste of home, a comforting reminder of simpler times. Whether you’re serving them alongside a hearty bowl of chili or enjoying them as a quick snack, these golden delights are sure to please. Don’t be afraid to experiment with different variations and substitutions to create your own signature corn stick recipe. So, gather your ingredients, preheat your oven, and get ready to experience the joy of baking these crispy, flavorful treats. I encourage you to share your creations with friends and family and let me know what you think! And for an extra-special touch, try pairing them with a glass of sweet tea or a spicy margarita. Happy baking!