
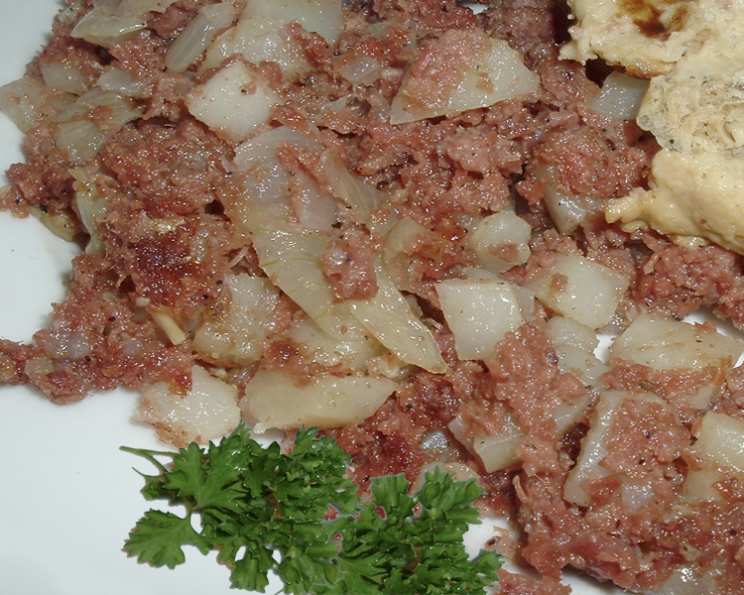
Corned Beef Hash: A Hearty Classic
Corned beef hash. The words alone conjure up images of cozy diners, the sizzle of cast iron, and the comforting aroma that filled my grandmother’s kitchen every Saturday morning. It wasn’t fancy, but it was honest food – a celebration of simple ingredients transformed into something truly special. I remember sneaking bites of the crispy edges while she wasn’t looking, a tiny rebel rewarded with the most delicious treasure. This isn’t just a recipe; it’s a memory, a feeling, a connection to a simpler time, and I’m thrilled to share it with you.
Recipe Overview
- Prep Time: 15 minutes
- Cook Time: 25 minutes
- Total Time: 40 minutes
- Servings: 4-6
- Dietary Type: Varies (see variations)
Ingredients
- 1 can corned beef (typically 12 ounces)
- 3-5 medium potatoes
- 1 medium onion
- Salt and pepper (to taste, but generous black pepper is recommended)
- Water (for cooking)
Equipment Needed
- Large iron skillet (or heavy-bottomed skillet)
- Cutting board
- Knife
- Vegetable peeler
Instructions
-
Begin by preparing the potatoes. Peel them thoroughly and then cut them into approximately 1-inch cubes. Uniform sizes ensure even cooking.
-
Next, chop the onion into a small dice. The smaller the dice, the less likely it is to overpower the other flavors.
-
Place your iron skillet (or heavy-bottomed skillet) over high heat. It’s crucial that the skillet is thoroughly heated before adding any ingredients. A hot skillet helps to prevent sticking, which is essential for achieving that coveted crispy exterior.
-
Crumble the corned beef directly into the preheated skillet. Add the diced potatoes and onions on top of the crumbled beef.
-
Cover the ingredients completely with water. The water is what cooks the potatoes and onions initially, and it will evaporate as the hash cooks down, concentrating the flavors.
-
Bring the mixture to a boil over high heat. Once boiling, reduce the heat to the lowest setting that maintains a very gentle simmer – barely a boil.
-
Cook the mixture until the potatoes and onions are tender and easily pierced with a fork. This usually takes around 20-25 minutes.
-
Stir the hash occasionally, especially as the water begins to evaporate, to prevent it from sticking to the bottom of the skillet and burning. Add more water if needed to prevent scorching before the potatoes and onions are fully cooked. You want the potatoes to be cooked through, but not completely mushy.
-
Once the potatoes are tender and most of the water has evaporated, leaving a thick, slightly greasy mixture, season generously with salt and pepper. I personally prefer a generous amount of freshly ground black pepper – it adds a wonderful depth of flavor and a pleasant bite.
-
Continue to cook, stirring infrequently, allowing the bottom of the hash to develop a crispy, browned crust. This is the key to a good corned beef hash – the crispy bits are what make it truly irresistible.
Expert Tips & Tricks
- Achieving Ultimate Crispiness: The secret to maximizing the crispy texture is to avoid stirring too frequently towards the end of the cooking process. Let the hash sit undisturbed in the hot skillet for a few minutes at a time to allow a crust to form on the bottom. Then, use a spatula to carefully scrape up the crispy bits and incorporate them into the rest of the hash.
- Corned Beef Quality Matters: The quality of the canned corned beef greatly impacts the final flavor. Opt for a higher-quality brand with less gristle and more meat. If you have leftover homemade corned beef, that works even better! Just shred it well before adding it to the skillet.
- Spice it Up: Don’t be afraid to experiment with different spices. A pinch of smoked paprika or a dash of Worcestershire sauce can add complexity and depth to the flavor profile.
- Make it Ahead: The hash can be prepared ahead of time and stored in the refrigerator for up to 24 hours. Before serving, simply reheat it in the skillet, adding a little oil if necessary, until heated through and crispy.
- A splash of cider vinegar or hot sauce can brighten the flavor as well
- If you want more onion flavor, consider using onion powder as well.
- Be careful with salt; corned beef is already salty.
Serving & Storage Suggestions
Corned beef hash is traditionally served as a breakfast or brunch dish. It’s fantastic on its own, but it’s even better topped with a fried egg, sunny-side up. The runny yolk adds a delicious richness that complements the savory hash perfectly. It can also be served alongside toast, biscuits, or even a dollop of sour cream or plain Greek yogurt.
Leftover corned beef hash should be stored in an airtight container in the refrigerator. It will keep for up to 3-4 days. To reheat, simply sauté it in a skillet over medium heat until heated through and crispy, or microwave on high for 1-2 minutes, stirring halfway through. Note that microwaving will make the hash less crispy. It can also be frozen for longer storage (up to 2 months), but the texture may be slightly softer after thawing.
Nutritional Information
(Estimated values per serving, based on 5 servings)
| Nutrient | Amount per Serving | % Daily Value |
|---|---|---|
| Calories | 280 kcal | 14% |
| Total Fat | 18g | 28% |
| Saturated Fat | 7g | 35% |
| Cholesterol | 75mg | 25% |
| Sodium | 800mg | 35% |
| Total Carbohydrate | 15g | 5% |
| Dietary Fiber | 2g | 8% |
| Sugars | 2g | |
| Protein | 12g | 24% |
| Note: Nutritional information is an estimate and may vary based on specific ingredients and portion sizes. |
Variations & Substitutions
- Sweet Potato Hash: Substitute some or all of the potatoes with sweet potatoes for a slightly sweeter and more vibrant hash.
- Vegetarian Hash: Replace the corned beef with cooked lentils or black beans for a vegetarian version. Add smoked paprika to mimic the smoky flavor of corned beef.
- Spicy Hash: Add diced jalapeños or a pinch of cayenne pepper for a spicy kick.
- Deluxe Hash: Include other vegetables like bell peppers, mushrooms, or zucchini for added flavor and nutrients.
- Healthy Hash: Use lean ground beef or turkey instead of corned beef to reduce the fat content.
FAQs (Frequently Asked Questions)
Q: Can I use fresh corned beef instead of canned?
A: Absolutely! If you have leftover cooked corned beef, shredding it and using it in this recipe will elevate the flavor to another level.
Q: How do I prevent the hash from sticking to the skillet?
A: Make sure your skillet is properly preheated before adding the ingredients, and don’t be afraid to use a little extra oil or fat. Also, avoid stirring too frequently, especially as the hash begins to brown.
Q: Can I add eggs directly into the hash while it’s cooking?
A: Yes, you can create little wells in the hash and crack eggs directly into them during the last few minutes of cooking. Cover the skillet to help the eggs cook evenly.
Q: Is it okay to use russet potatoes?
A: While Yukon Gold or red potatoes are preferred for their creamy texture, russet potatoes will also work. They may require a slightly longer cooking time.
Q: What if I don’t have an iron skillet?
A: A heavy-bottomed stainless steel or non-stick skillet will work as a substitute. Just be sure to monitor the hash closely and adjust the heat as needed to prevent sticking or burning.
Final Thoughts
Corned beef hash is more than just a simple dish; it’s a versatile canvas for culinary creativity. Whether you stick to the classic recipe or experiment with your own variations, I encourage you to embrace the simplicity and heartiness of this humble meal. Gather your ingredients, fire up your skillet, and prepare to create a dish that will warm your soul and leave you craving more. Don’t hesitate to share your creations and feedback – I’m always eager to hear how you make this classic your own. Pair this with some strong coffee, and you have a great start to the day!