
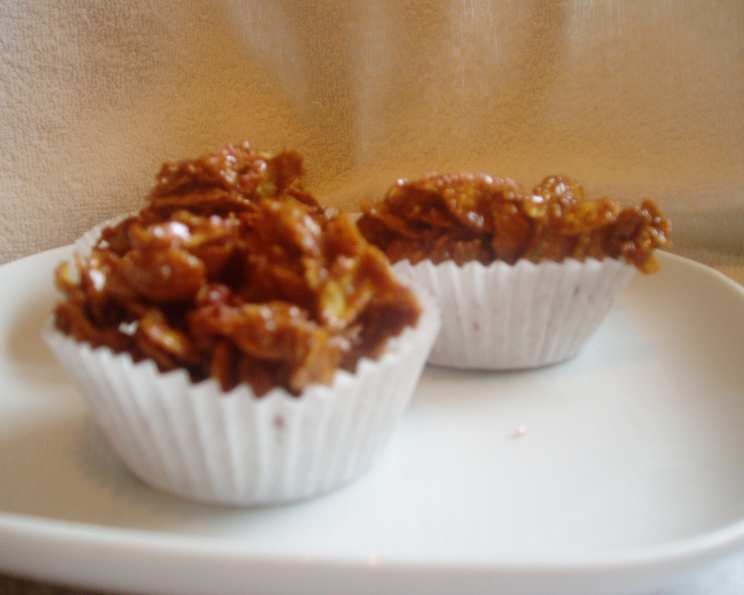
Cornflake Cakes: A Nostalgic Treat
The first time I ever made cornflake cakes was during a particularly rainy summer holiday at my grandmother’s house. Stuck indoors with nothing but a cupboard full of baking ingredients and a yearning for something sweet, my grandmother, a woman of endless culinary wisdom, produced this recipe. The kitchen transformed into a magical place, filled with the comforting aroma of melting chocolate and the satisfying crunch of cornflakes. Each bite was pure joy, a perfect blend of textures and flavors that chased away the gloom of the weather outside and created a lasting memory of simple pleasures. Even now, years later, making these cakes instantly transports me back to that cozy kitchen, filled with laughter and the love of family.
Recipe Overview
- Prep Time: 10 minutes
- Cook Time: 5 minutes
- Total Time: 15 minutes + setting time
- Servings: 18 cakes
- Yield: 18 cakes
- Dietary Type: Vegetarian
Ingredients
- 50g margarine
- 1 1/2 tablespoons golden syrup
- 175g milk chocolate
- 150g corn flakes
- 1 teaspoon vanilla extract
Equipment Needed
- Saucepan
- Mixing spoon
- Baking cases
- Fridge
Instructions
-
Begin by melting the margarine in a saucepan over a low heat. It is important to use low heat to prevent the margarine from burning, which will negatively impact the flavour of your cakes.
-
Add the golden syrup to the melted margarine, stirring constantly until the two are completely mixed together. This will ensure a smooth and even base for your chocolate mixture.
-
Introduce the milk chocolate and vanilla extract to the saucepan. Continue to stir until the chocolate is fully melted and blended into the margarine and golden syrup mixture. Once the mixture is smooth and glossy, remove it from the heat.
-
Now, add the corn flakes to the chocolate mixture. Gently stir until all the corn flakes are evenly coated in the chocolate. Be careful not to crush the corn flakes during this process. The goal is to have each flake generously covered in the chocolate mixture.
-
Spoon the chocolate-covered corn flakes into individual baking cases. Make sure each case is filled evenly to create uniform cakes.
-
Place the filled baking cases in the fridge to set. Allow the cakes to set completely before serving. This typically takes about 30 minutes to an hour.
Expert Tips & Tricks
- Chocolate Choice: While milk chocolate is traditional, feel free to experiment with dark or white chocolate for different flavor profiles. A combination of milk and dark chocolate can add depth.
- Margarine Matters: Using a good quality margarine will enhance the overall flavor. Avoid using low-fat spreads, as they tend to have a higher water content and can affect the texture.
- Cornflake Crunch: For an extra crunchy texture, lightly toast the corn flakes in a dry pan for a few minutes before adding them to the chocolate mixture. Keep a close eye on them as they can burn easily.
- Even Coating: Ensure that the corn flakes are thoroughly coated in the chocolate mixture. This will give each cake the perfect balance of chocolate and crunch.
- Setting Speed: If you’re short on time, you can place the cakes in the freezer for a faster setting time. Check them frequently to prevent them from becoming too hard.
- Flavor Boost: A pinch of sea salt added to the melted chocolate can enhance the sweetness and add a delightful contrast.
- Mix-Ins: Consider adding other ingredients such as chopped nuts, dried fruit, or mini marshmallows to the corn flake mixture for added texture and flavour.
Serving & Storage Suggestions
These cornflake cakes are best served chilled. They make a perfect afternoon treat, a delightful addition to a children’s party, or a simple dessert. Store any leftover cakes in an airtight container in the fridge to maintain their shape and texture. They will typically last for up to 3-4 days. While they can be stored at room temperature, they may become soft and lose their shape. Freezing is not recommended as it can affect the texture of the corn flakes.
Nutritional Information
| Nutrient | Amount per Serving | % Daily Value |
|---|---|---|
| Calories | 107.9 kcal | – |
| Calories from Fat | 46 kcal | 43% |
| Total Fat | 5.2 g | 7% |
| Saturated Fat | 1.8 g | 8% |
| Cholesterol | 2.2 mg | 0% |
| Sodium | 95.3 mg | 3% |
| Total Carbohydrate | 14.5 g | 4% |
| Dietary Fiber | 0.5 g | 2% |
| Sugars | 6.4 g | 25% |
| Protein | 1.3 g | 2% |
Note: Nutritional information is an estimate and can vary based on specific ingredients and quantities used.
Variations & Substitutions
- Gluten-Free: While corn flakes are typically gluten-free, always check the packaging to ensure they are certified gluten-free.
- Dairy-Free: Substitute the margarine with a dairy-free alternative. Use dairy-free chocolate to make the cakes completely dairy-free.
- Nutty Delight: Add chopped nuts like peanuts, almonds, or walnuts to the corn flake mixture for added flavor and texture.
- Fruity Twist: Incorporate dried cranberries, raisins, or chopped apricots for a fruity variation.
- Spiced Chocolate: Add a pinch of cinnamon or nutmeg to the melted chocolate for a warm and comforting flavor.
- White Chocolate Raspberry: Use white chocolate instead of milk chocolate and add freeze-dried raspberries for a tangy and visually appealing treat.
FAQs (Frequently Asked Questions)
Q: Can I use butter instead of margarine?
A: Yes, you can substitute margarine with butter, but the flavor will be slightly different. Butter will give a richer, more buttery taste.
Q: My chocolate is seizing up. What should I do?
A: This can happen if the chocolate gets too hot or if a drop of water gets into the mixture. Try adding a teaspoon of vegetable oil to smooth it out.
Q: How do I prevent the corn flakes from getting soggy?
A: Ensure that the chocolate mixture is not too hot when you add the corn flakes. Also, avoid crushing the corn flakes while mixing.
Q: Can I make these ahead of time?
A: Yes, these cakes can be made a day or two in advance. Store them in an airtight container in the fridge.
Q: What if I don’t have baking cases?
A: You can use parchment paper to line a muffin tin or simply spoon the mixture onto a parchment-lined baking sheet in small clusters.
Final Thoughts
These cornflake cakes are more than just a simple recipe; they’re a trip down memory lane, a connection to simpler times, and a delightful treat that’s guaranteed to bring a smile to anyone’s face. I urge you to give this recipe a try, and feel free to add your own personal twist. Share your creations and experiences with friends and family, and perhaps even create your own cherished memories around this classic treat. Pair it with a cup of tea or a cold glass of milk for the ultimate indulgence. Happy baking!