
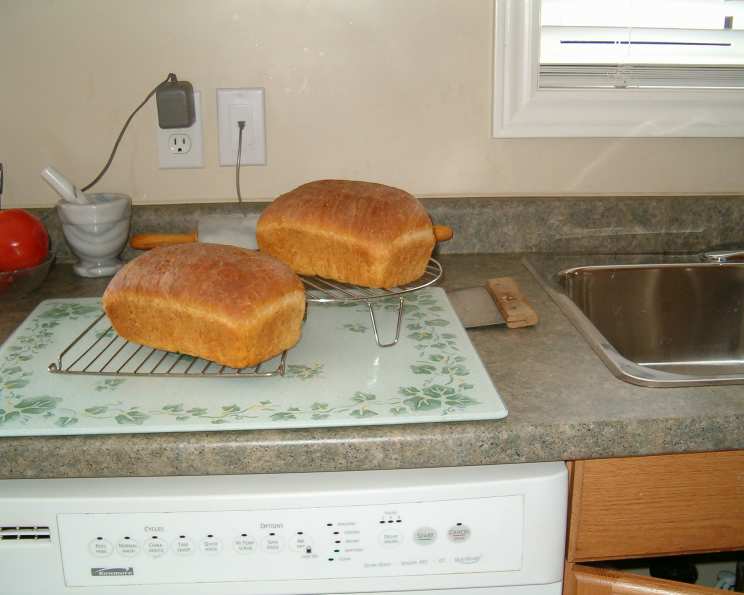
The Hearty Comfort of Homemade Country Bread
The smell of baking bread is, for me, the very essence of home. I remember watching my grandmother, her hands dusted with flour, expertly kneading dough on her wooden countertop. The warmth from the oven, the yeasty aroma filling the air – it was pure magic. This country bread recipe brings me right back to those cherished moments, a simple yet profound connection to tradition and the joy of creating something beautiful and nourishing with my own hands.
Recipe Overview
- Prep Time: 15 minutes
- Cook Time: 30 minutes
- Total Time: 3 hours 5 minutes (includes rising time)
- Yields: 2 loaves
- Dietary Type: Vegetarian
Ingredients
- 1 ⅓ cups water
- 1 tablespoon olive oil
- 1 tablespoon honey
- ½ teaspoon salt
- 1 teaspoon sugar
- 1 ½ cups white bread flour
- 1 ½ cups whole wheat flour
- 1 tablespoon vital wheat gluten
- 2 teaspoons yeast
Equipment Needed
- Bread machine (optional)
- Large mixing bowl (if not using a bread machine)
- Measuring cups and spoons
- Kitchen scale (optional, for precise measurements)
- Baking sheets
- Parchment paper (optional)
- Clean kitchen towels
Instructions
-
Prepare the Liquids (Bread Machine Method): If using a bread machine, begin by adding the water, olive oil, and honey to the bread machine pan. It is generally recommended to add liquids first to prevent the dry ingredients from sticking to the bottom of the pan.
-
Combine Dry Ingredients (Bread Machine Method): In a separate bowl, thoroughly mix together the white bread flour, whole wheat flour, salt, sugar, and vital wheat gluten. The vital wheat gluten is particularly important when using whole wheat flour, as it helps to create a stronger gluten network, resulting in a lighter and chewier bread.
-
Add Yeast (Bread Machine Method): Carefully add the yeast on top of the flour mixture in the bread machine pan. Ensure the yeast doesn’t come into direct contact with the salt or sugar, as this can inhibit its activation.
-
Bake in Bread Machine: Set the bread machine to the desired settings (typically a basic bread setting). The recipe calls for baking in the bread machine for 3 hours.
-
Dough Cycle Alternative: Alternatively, you can use the dough cycle on your bread machine. This cycle will mix and knead the dough, allowing it to rise before you shape and bake it in the oven.
-
Remove and Knead (If Using Dough Cycle): If using the dough cycle, carefully remove the dough from the bread machine pan once the cycle is complete.
-
Divide the Dough: Gently knead the dough on a lightly floured surface for a few minutes to develop the gluten further. Then, divide the dough in half.
-
Shape the Loaves: Form each half of the dough into a loaf shape. You can create round loaves or oblong loaves, depending on your preference.
-
Proof the Loaves: Place the shaped loaves on a baking sheet lined with parchment paper (optional). Cover the loaves with a clean kitchen towel and let them rise in a warm place for 1 hour. The loaves should almost double in size during this time.
-
Preheat the Oven: Preheat your oven to 375°F (190°C).
-
Bake the Loaves: Bake the loaves in the preheated oven for 30 minutes, or until they are golden brown and sound hollow when tapped on the bottom. If the tops of the loaves start to brown too quickly, you can tent them with aluminum foil.
-
Cool Completely: Remove the loaves from the oven and let them cool completely on a wire rack before slicing and serving. This will prevent the bread from becoming gummy.
Expert Tips & Tricks
- Use a Kitchen Scale: For consistent results, consider using a kitchen scale to measure your ingredients, especially the flour. This ensures accuracy, as the volume of flour can vary depending on how it’s packed.
- Kneading is Key: Proper kneading is essential for developing the gluten in the dough. If kneading by hand, aim for about 8-10 minutes of vigorous kneading.
- Warm Environment for Rising: Provide a warm, draft-free environment for the dough to rise. A slightly warm oven (turned off!) or a sunny windowsill works well.
- Add Seeds or Herbs: To customize your bread, try adding seeds (such as sesame, poppy, or sunflower seeds) or dried herbs (such as rosemary, thyme, or oregano) to the dough.
- Egg Wash for a Shiny Crust: For a beautiful, shiny crust, brush the loaves with an egg wash (1 egg beaten with 1 tablespoon of water) before baking.
- Steam for a Crusty Crust: To achieve a super crusty crust, place a pan of hot water on the bottom rack of the oven while the bread is baking. The steam will help create a crispier crust.
Serving & Storage Suggestions
This country bread is delicious served warm with butter, jam, or honey. It also makes excellent toast, sandwiches, and croutons.
To store leftover bread, wrap it tightly in plastic wrap or place it in an airtight container. It will last for 2-3 days at room temperature or up to a week in the refrigerator. For longer storage, you can freeze the bread for up to 3 months. Thaw it completely before slicing and serving. You can also revive slightly stale bread by sprinkling it with water and reheating it in the oven for a few minutes.
Nutritional Information
| Nutrient | Amount per Serving (estimated) | % Daily Value* |
|---|---|---|
| Calories | 760 kcal | N/A |
| Total Fat | 10g | 15% |
| Saturated Fat | 1.5g | 8% |
| Cholesterol | 0mg | 0% |
| Sodium | 592mg | 25% |
| Total Carbohydrate | 149g | 50% |
| Dietary Fiber | 13g | 52% |
| Sugars | 11g | N/A |
| Protein | 23g | 46% |
*Percent Daily Values are based on a 2,000 calorie diet. Your daily values may be higher or lower depending on your calorie needs. Note: This is an estimated calculation and may vary.
Variations & Substitutions
- Spelt Flour: Replace some of the white or whole wheat flour with spelt flour for a nutty flavor.
- Rye Flour: Add a touch of rye flour for a more rustic taste. Start with ¼ cup and adjust to your liking.
- Seed Mix: Incorporate a blend of seeds like pumpkin, sunflower, and flax seeds for added texture and nutrition.
- Herbs and Spices: Experiment with different herbs and spices such as rosemary, thyme, garlic powder, or onion powder to customize the flavor.
- Sweet Bread: Increase the honey or sugar slightly and add some dried fruit (like raisins or cranberries) for a sweeter bread.
- Olive Bread: Add chopped Kalamata olives to the dough for a savory olive bread.
- Gluten-Free Adaptation: A gluten-free bread flour blend can be used, but the results will vary significantly. Gluten-free bread typically has a different texture and may require modifications to the rising and baking times.
FAQs (Frequently Asked Questions)
Q: Why is vital wheat gluten necessary?
A: Vital wheat gluten improves the elasticity and structure of the dough, especially when using whole wheat flour. This results in a lighter and chewier bread.
Q: Can I make this recipe without a bread machine?
A: Yes! Combine the wet ingredients in a large bowl, then add the dry ingredients. Knead the dough for 8-10 minutes until smooth and elastic. Let it rise in a warm place for 1-1.5 hours, or until doubled in size. Punch down the dough, divide it in half, shape into loaves, and let rise again for 1 hour before baking.
Q: How do I know when the bread is done baking?
A: The bread is done when it is golden brown and sounds hollow when tapped on the bottom. An internal temperature of 200-210°F (93-99°C) confirms doneness.
Q: My bread is dense and heavy. What did I do wrong?
A: Possible causes include using old yeast, not kneading the dough enough, or not letting it rise sufficiently. Make sure your yeast is fresh, knead the dough properly, and allow enough time for rising in a warm environment.
Q: Can I freeze this bread?
A: Yes, this bread freezes very well. Wrap it tightly in plastic wrap or place it in a freezer-safe bag. It can be stored in the freezer for up to 3 months. Thaw completely before slicing and serving.
Final Thoughts
Baking country bread at home is an incredibly rewarding experience. The process itself is therapeutic, and the aroma that fills your kitchen is simply divine. Don’t be intimidated by the process – even if your first loaf isn’t perfect, it will still be delicious. Experiment with different variations and make it your own. Share your creations with friends and family, and savor the simple joy of homemade bread. It’s a gift from your kitchen to your heart.