
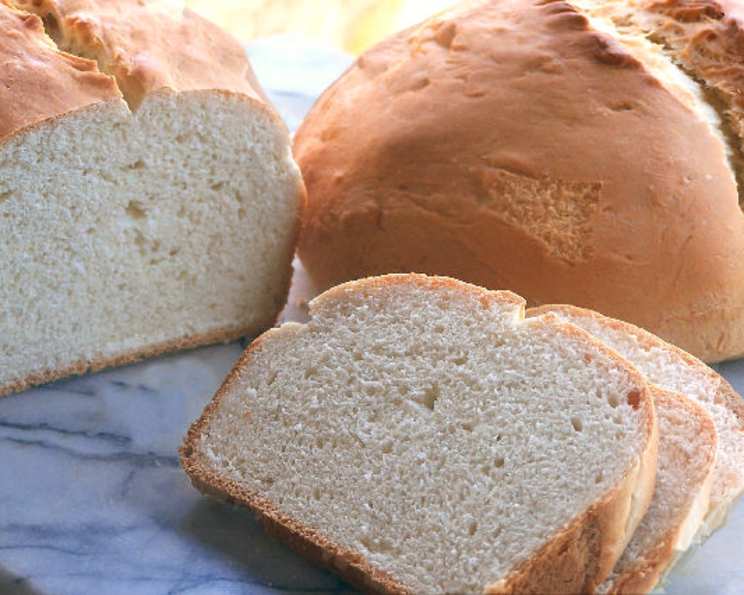
Country-Style White Bread: A Midwestern Classic
The aroma still lingers in my mind – the comforting scent of warm bread wafting through my grandmother’s farmhouse kitchen. Every Sunday, after church, she’d present a perfectly golden loaf of white bread, its crust singing softly as it cooled. I remember sneaking a still-warm slice, slathered with butter that melted instantly into the soft, pillowy interior. That simple pleasure, that taste of home, is what I aim to recapture with every loaf of this country-style white bread. It’s more than just bread; it’s a connection to simpler times, to family, and to the heartland.
Recipe Overview
- Prep Time: 1 hour 55 minutes (including starter)
- Cook Time: 30-40 minutes
- Total Time: 2 hours 25-35 minutes
- Yields: 2 loaves
- Serves: Approximately 24 slices (12 per loaf)
- Dietary Type: Vegetarian
Ingredients
For the Starter:
- 1 cup warm water
- 1 teaspoon active dry yeast (or 2/3 teaspoon rapid rise yeast)
- 1 cup all-purpose flour
For the Dough:
- 3/4 cup warm water
- 3 tablespoons honey
- 2 teaspoons active dry yeast (or 1 1/3 teaspoon rapid rise yeast)
- 1/4 cup vegetable shortening, plus 1 teaspoon vegetable shortening
- 4 3/4 cups all-purpose flour
- 1 tablespoon salt
Equipment Needed
- Medium bowl
- Heavy-duty stand mixer
- Measuring cups and spoons
- Clean kitchen towel or proofing basket
- Sharp knife or lame
- Baking stone (optional, for free-form loaf)
- Loaf pans (optional, for traditional loaf shape)
- Digital probe thermometer
Instructions
-
Prepare the Starter: In a medium bowl, combine the warm water and yeast for the starter. Stir to dissolve the yeast. Add the flour and stir until thoroughly mixed, forming a shaggy dough. Cover the bowl with a cloth and let it rest at room temperature for 30 minutes. This crucial step activates the yeast and gives the bread a richer flavor.
-
Combine Dough Ingredients: In the bowl of a heavy-duty stand mixer, combine the warm water, honey, and yeast for the dough. Stir to mix thoroughly. Let this mixture sit for a few minutes to allow the yeast to bloom.
-
Mix the Dough: Add the vegetable shortening, flour, salt, and the prepared starter to the mixer bowl. Using the dough hook attachment, mix the ingredients on low speed until the dough comes together.
-
Knead the Dough: Increase the mixer speed to medium-low and continue kneading the dough for 8-10 minutes, or until it is smooth and elastic. This is a critical step for developing the gluten, which gives the bread its structure.
-
Test for Elasticity (Windowpane Test): To test the dough for elasticity, pinch off a small piece and gently stretch it between your thumbs and fingers into a square. If the center stretches and becomes thin and translucent, like a windowpane, without tearing, the dough is ready. If it breaks easily, continue kneading for a few more minutes and test again.
-
First Rise: Remove the dough from the mixing bowl and divide it into two equal halves. Form each half into a smooth ball. At this point, you can wrap one of the dough balls tightly in plastic wrap and freeze it for later use.
-
Rest: Place the dough ball(s) on a lightly floured counter or in a proofing basket. Cover loosely with a warm, damp cloth and let rest at room temperature for 30 minutes.
-
Preheat Oven: While the dough is resting, preheat your oven to 400ºF (200ºC). If you are using a baking stone for a free-form loaf, place it in the oven to preheat as well.
-
Shape the Loaves: After the rest period, gently form each dough ball into a loaf shape. You can create a free-form loaf by gently stretching and folding the dough, or you can place it in a greased loaf pan for a more traditional shape.
-
Second Rise: Cover the shaped loaf (or loaves) with a warm, damp cloth and let rest for another 30 minutes. This allows the dough to rise further, creating a light and airy texture.
-
Score the Loaves: Just before baking, use a sharp knife or lame to score the top of each loaf with a few shallow slashes. This allows the bread to expand properly in the oven and prevents it from cracking.
-
Bake the Bread: Spritz the loaf (or loaves) with some water. This creates steam in the oven, which helps to develop a crisp, golden crust. Place the loaf (or loaves) in the preheated oven (on the baking stone if using one).
-
Baking Time: Bake for 30-40 minutes, or until the crust is golden brown and the internal temperature of the bread reaches about 195ºF (90ºC). Use a digital probe thermometer to check the temperature by inserting it into the center of the loaf.
-
Cooling: Remove the bread from the oven and immediately remove it from the pan (if using one). Let the bread cool on a wire rack for at least 30 minutes before slicing and serving. This allows the internal structure to set properly.
Expert Tips & Tricks
- Use a thermometer: A digital probe thermometer is your best friend for ensuring perfectly baked bread. Don’t rely solely on visual cues, especially when baking in a new oven.
- Adjust flour as needed: Humidity levels can affect the amount of flour needed. Start with the recommended amount, but add a little more if the dough is too sticky.
- Freezing dough: Freezing one of the dough halves is a great way to have fresh bread on hand with minimal effort. Thaw the dough overnight in the refrigerator before shaping and baking as directed.
- Crispier crust: For an extra-crisp crust, try brushing the loaves with an egg wash (1 egg beaten with 1 tablespoon of water) before baking.
- Even baking: Rotate the baking sheet halfway through the baking time for even browning.
Serving & Storage Suggestions
This country-style white bread is delicious served warm with butter, jam, or honey. It’s also perfect for sandwiches, toast, or as an accompaniment to soups and stews.
Store leftover bread in an airtight container at room temperature for up to 3 days. For longer storage, wrap the bread tightly in plastic wrap and freeze for up to 2 months. To reheat frozen bread, thaw it overnight in the refrigerator and then warm it in a low oven (300ºF/150ºC) for about 10-15 minutes, or until heated through. You can also slice the bread and toast it directly from frozen.
Nutritional Information
| Nutrient | Amount per Serving (1 slice) | % Daily Value |
|---|---|---|
| Calories | 139 kcal | 7% |
| Total Fat | 2.65 g | 4% |
| Saturated Fat | 0.7 g | 4% |
| Cholesterol | 0 mg | 0% |
| Sodium | 292 mg | 12% |
| Total Carbohydrate | 25.2 g | 8% |
| Dietary Fiber | 1 g | 4% |
| Sugars | 2.25 g | N/A |
| Protein | 3.3 g | 7% |
Nutritional information is an estimate and may vary based on specific ingredients and portion sizes.
Variations & Substitutions
- Whole Wheat Bread: Substitute up to half of the all-purpose flour with whole wheat flour for a nuttier flavor and added fiber.
- Herb Bread: Add 1-2 tablespoons of chopped fresh herbs, such as rosemary, thyme, or oregano, to the dough for a flavorful twist.
- Cheese Bread: Incorporate 1 cup of shredded cheese, such as cheddar, mozzarella, or Parmesan, into the dough.
- Sweet Bread: Add 1/4 cup of sugar or brown sugar to the dough for a slightly sweeter bread. You can also add dried fruits, such as raisins or cranberries.
- Dairy-Free: Substitute the vegetable shortening with coconut oil or olive oil.
- Vegan: Ensure the honey is replaced with a vegan sweetener like agave or maple syrup.
FAQs (Frequently Asked Questions)
Q: Why do I need to use a starter?
A: The starter adds complexity and depth of flavor to the bread. It also helps to improve the texture and rise.
Q: Can I use rapid rise yeast for both the starter and the dough?
A: Yes, you can use rapid rise yeast in place of active dry yeast. Use 2/3 teaspoon of rapid rise yeast for every 1 teaspoon of active dry yeast.
Q: My dough isn’t rising. What am I doing wrong?
A: Several factors can affect dough rising. Make sure your yeast is fresh and active, and that your water is warm but not too hot. The room temperature should also be warm enough to promote rising.
Q: How do I get a crispier crust?
A: Spritzing the loaf with water before baking creates steam in the oven, which helps to develop a crispier crust. You can also try brushing the loaf with an egg wash before baking.
Q: Can I bake this bread in a Dutch oven?
A: Yes, you can bake this bread in a Dutch oven for an even crustier loaf. Preheat the Dutch oven in the oven before placing the dough inside.
Final Thoughts
This country-style white bread recipe is a labor of love, but the reward is a truly exceptional loaf that’s perfect for any occasion. Don’t be intimidated by the multiple steps – each one contributes to the final flavor and texture. I encourage you to try it, experiment with variations, and make it your own. Share it with friends and family, and experience the joy of baking and sharing homemade bread. Consider pairing it with a hearty bowl of soup or a simple salad for a complete and satisfying meal. And of course, I’d love to hear your feedback and see your baking creations! Happy baking!