
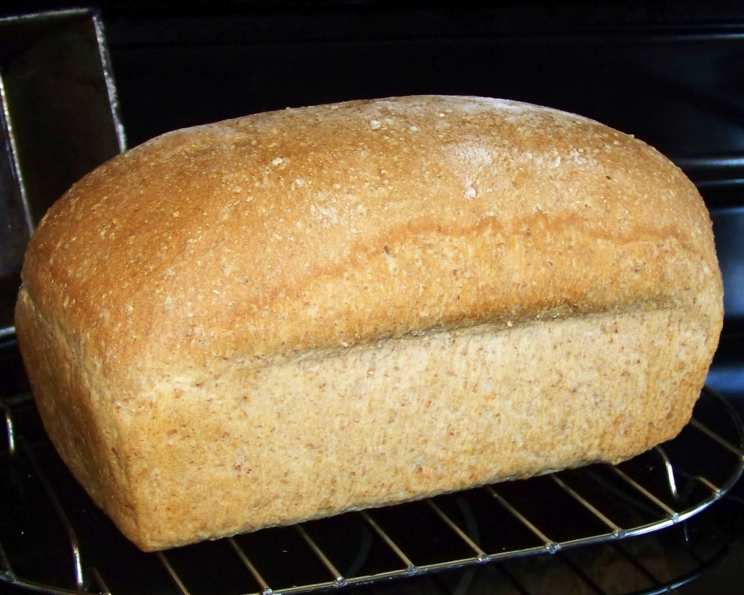
Cracked Wheat Bread: A Hearty Loaf from Your Bread Machine
The smell of freshly baked bread always takes me back to my grandmother’s kitchen. She had a simple, well-loved bread machine that hummed quietly on the counter, churning out loaves of goodness every week. The aroma of warm yeast and toasted grain filled the air, a comforting promise of homemade sandwiches and warm toast slathered with butter. This cracked wheat bread recipe, adapted from a booklet that came with my own bread machine years ago, is a tribute to those memories – a simple, hearty loaf that brings a touch of that comforting nostalgia into my own home.
Recipe Overview
- Prep Time: 10 minutes
- Cook Time: 35 minutes (oven baking, if using dough cycle)
- Total Time: approximately 3 hours (including bread machine cycles and rise time)
- Yields: 1 loaf
- Serves: 16
- Dietary Type: Vegetarian
Ingredients
- 11 ounces water
- 1 1/2 teaspoons salt
- 1 1/2 tablespoons butter
- 2 tablespoons honey
- 2 1/4 cups bread flour (or 2 1/4 cups all-purpose flour)
- 1 1/4 cups whole wheat flour
- 1/2 cup cracked wheat (or Red River Cereal)
- 2 1/4 teaspoons active dry yeast
Equipment Needed
- Bread machine
- Measuring cups and spoons
- Loaf pan (if using dough cycle)
- Oven (if using dough cycle)
- Wire rack
Instructions
-
Begin by adding the ingredients to your bread machine’s bucket. It’s crucial to follow the order recommended by the manufacturer of your bread machine, as this ensures proper mixing and yeast activation. Generally, liquids go in first, followed by dry ingredients, with the yeast added last, often in a small well on top of the flour.
-
Select your desired setting on the bread machine. You have two primary options:
-
Regular Setting: If you choose this, the bread machine will handle the entire process from mixing and kneading to rising and baking. Simply press “start” and let the machine work its magic. Once the cycle is complete, carefully remove the finished bread from the bucket.
-
Dough Setting: This setting will only mix, knead, and perform the first rise. After the dough cycle is finished (typically around 1 1/2 to 2 hours), carefully remove the dough from the bread machine bucket.
-
-
If you selected the dough setting, you will need to shape and bake the loaf yourself. Gently dump the dough onto a lightly floured countertop. This prevents sticking and makes it easier to work with.
-
Knead the dough a few times to release any trapped air bubbles. This step helps create a more even texture in the final loaf. Don’t over-knead; just a few turns will suffice.
-
Shape the dough into a loaf. You can do this by gently stretching and folding the dough, tucking the edges underneath to create a smooth, even surface.
-
Place the shaped loaf into a greased loaf pan. This prevents the bread from sticking and ensures easy removal after baking.
-
Let the dough rise in a warm place until it has doubled in size, or at least become noticeably bigger. This typically takes about 1 hour, but the exact time will depend on the temperature of your environment. A slightly warm oven (turned off!) can provide an ideal environment for rising.
-
Preheat your oven to 400ºF (200ºC).
-
Bake the loaf for 35 minutes, or until it is golden brown and sounds hollow when tapped on the bottom. The internal temperature should reach 200-210°F (93-99°C) for optimal doneness.
-
Once baked, remove the loaf from the oven and let it cool in the pan for a few minutes before transferring it to a wire rack to cool completely. This prevents the bottom from becoming soggy.
Expert Tips & Tricks
- The right flour is important. Bread flour has a higher protein content than all-purpose flour, resulting in a chewier texture. However, all-purpose flour works fine if you don’t have bread flour on hand.
- Use warm water (around 105-115°F/40-46°C) to activate the yeast properly. Too hot, and you’ll kill the yeast; too cold, and it won’t activate.
- Don’t skip the salt! Salt not only enhances the flavor but also controls the yeast activity and strengthens the gluten.
- If the top of the loaf is browning too quickly during baking, tent it loosely with aluminum foil to prevent burning.
- For a richer flavor, try using melted coconut oil instead of butter.
- Adding a tablespoon of vital wheat gluten to the flour can improve the texture of the bread, especially when using whole wheat flour.
- To ensure even baking, rotate the loaf pan halfway through the baking time.
- To get a richer, sweeter flavor use molasses instead of honey.
Serving & Storage Suggestions
This cracked wheat bread is delicious served warm with butter or your favorite spread. It’s also perfect for sandwiches, toast, or dipping in soups and stews.
- Storage: Store the cooled bread in an airtight container at room temperature for up to 3 days. For longer storage, wrap tightly in plastic wrap and freeze for up to 2 months.
- Reheating: To reheat, wrap the bread in foil and bake in a preheated oven at 350°F (175°C) for about 10-15 minutes, or until warmed through. You can also toast individual slices.
- Freezing: To prevent freezer burn, wrap the bread in plastic wrap, then foil, then place in a freezer bag, removing excess air.
Nutritional Information
| Nutrient | Amount per Serving | % Daily Value* |
|---|---|---|
| Calories | 121.4 kcal | N/A |
| Calories from Fat | 14 g | 12% |
| Total Fat | 1.6 g | 2% |
| Saturated Fat | 0.8 g | 3% |
| Cholesterol | 2.9 mg | 0% |
| Sodium | 229.5 mg | 9% |
| Total Carbohydrate | 23.9 g | 7% |
| Dietary Fiber | 1.7 g | 6% |
| Sugars | 2.2 g | N/A |
| Protein | 3.5 g | 7% |
*Percent Daily Values are based on a 2,000 calorie diet. Your daily values may be higher or lower depending on your calorie needs.
Variations & Substitutions
- Sweeten it up: Add a handful of raisins, dried cranberries, or chopped dates to the dough for a sweeter loaf.
- Add some seeds: Mix in sunflower seeds, pumpkin seeds, or flax seeds for added texture and nutrients.
- Spice things up: Incorporate a teaspoon of cinnamon or nutmeg for a warm, comforting flavor.
- Herbaceous twist: Add a tablespoon of dried rosemary or thyme for a savory variation.
- Gluten-free version: While this recipe is not inherently gluten-free, you can experiment with gluten-free bread flour blends, keeping in mind that the texture may differ. Always check the ingredients of your flour to make sure it has xanthan gum for proper gluten-like texture.
- For a darker, richer flavor use brown sugar instead of honey.
FAQs (Frequently Asked Questions)
Q: Can I use instant yeast instead of active dry yeast?
A: Yes, you can. Use the same amount (2 1/4 teaspoons) and add it directly to the flour; there’s no need to proof it first.
Q: What if my bread machine doesn’t have a dough setting?
A: You can use the regular bread setting, but keep an eye on the crust. If it starts to get too dark, reduce the baking time or tent it with foil.
Q: My bread is sinking in the middle. What went wrong?
A: This could be due to too much yeast, too much liquid, or the dough being over-proofed. Make sure to measure ingredients accurately and adjust the rising time accordingly.
Q: Can I make this bread without a bread machine?
A: Yes, you can! Mix the ingredients in a bowl, knead for about 8-10 minutes, let rise, shape, and bake as instructed in the “dough setting” instructions.
Q: What kind of cracked wheat should I use?
A: You can use any type of cracked wheat, but Red River Cereal is a popular choice. If you can’t find cracked wheat, you can substitute it with rolled oats for a slightly different texture.
Final Thoughts
This cracked wheat bread recipe is more than just a set of instructions; it’s an invitation to create a comforting and nourishing loaf that fills your home with warmth and the delicious aroma of freshly baked bread. Don’t be afraid to experiment with variations and substitutions to make it your own. Whether you’re enjoying it as a simple slice of toast or using it to create a hearty sandwich, I hope this bread brings you as much joy as it brings me. So, dust off that bread machine, gather your ingredients, and embark on a baking adventure. And don’t forget to share your creations and feedback – I’d love to hear how it turns out! This bread pairs perfectly with a hearty stew, a bowl of chili, or a simple cheese and charcuterie board. Enjoy!