
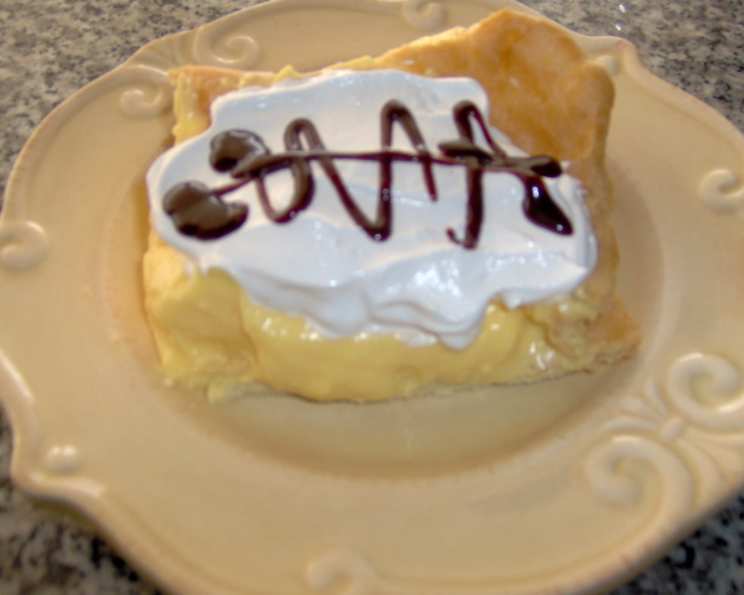
Decadent Cream Puff Dessert: A Potluck Treasure
The memory still makes me smile – the crowded church hall, the overflowing tables laden with homemade goodness, and the star of the dessert spread: this Cream Puff Dessert. It wasn’t just the creamy layers and chocolate drizzle that captivated everyone, but the sheer generosity of spirit in sharing such a delightful creation. Mrs. Henderson, the sweet lady who brought it, beamed as everyone raved, a testament to the power of simple ingredients transformed into something truly special. That day, I knew I had to get my hands on this recipe, and I’m thrilled to share it with you now.
Recipe Overview
- Prep Time: 20 minutes
- Cook Time: 30 minutes
- Total Time: 50 minutes + refrigeration
- Servings: 12-15
- Yield: One 9×13 inch pan
- Dietary Type: Not Gluten-Free
Ingredients
- 1 cup water
- 1/2 cup oleo (margarine)
- 1 cup flour
- 4 eggs
Filling:
- 8 ounces cream cheese
- 3 cups milk
- 2 (3 1/2 ounce) boxes French vanilla instant pudding
Topping:
- 16 ounces Cool Whip
- 16 ounces Hershey’s Chocolate Syrup
Equipment Needed
- 9×13 inch baking pan
- Saucepan
- Mixing bowl
- Electric mixer or whisk
- Spatula
Instructions
- Preheat your oven to 400 degrees Fahrenheit.
- In a saucepan, bring the water and oleo to a boil over medium-high heat. Make sure the oleo is fully melted before the water boils.
- Remove the saucepan from the heat and immediately stir in the flour all at once. Stir vigorously until a smooth dough forms and pulls away from the sides of the pan. This step is crucial for the right consistency.
- Let the dough cool slightly for a few minutes. This prevents the eggs from cooking when you add them.
- Using an electric mixer or a sturdy whisk, beat in the eggs one at a time, ensuring each egg is fully incorporated before adding the next. The dough will initially look curdled, but continue beating until it becomes smooth and glossy. This might take a few minutes.
- Grease a 9×13 inch baking pan thoroughly to prevent sticking.
- Spread the batter evenly in the prepared pan.
- Bake at 400 degrees Fahrenheit for 30 minutes. The crust should be golden brown and puffed up. Avoid opening the oven door during baking, as this can cause the crust to collapse.
- Remove the crust from the oven and let it cool completely. This is very important for the filling to set properly.
Filling:
- In a large mixing bowl, combine the cream cheese, milk, and French vanilla instant pudding.
- Beat with an electric mixer until the mixture is smooth and well combined. Make sure there are no lumps of cream cheese remaining.
- Spread the filling evenly over the cooled crust.
- Top with the Cool Whip, spreading it gently to create a smooth, even layer.
- Drizzle the Hershey’s Chocolate Syrup over the Cool Whip. You can create a decorative pattern or simply drizzle it randomly.
- Refrigerate the dessert for at least 2 hours before serving to allow the filling to set completely.
Expert Tips & Tricks
- For a richer flavor, use salted butter instead of oleo. The salt enhances the sweetness of the dessert.
- To prevent the crust from becoming soggy, you can brush it with melted white chocolate after it has cooled. This creates a moisture barrier.
- If you don’t have French vanilla pudding, regular vanilla pudding works just fine. You can also experiment with other flavors like chocolate or butterscotch.
- Make sure the cream cheese is softened to room temperature before mixing the filling. This will ensure a smooth and creamy texture.
- Don’t overbake the crust, as it will become dry and hard. It should be golden brown and puffed up.
- For a more intense chocolate flavor, you can add a tablespoon of cocoa powder to the flour mixture.
Serving & Storage Suggestions
Serve the Cream Puff Dessert chilled. It’s best to drizzle the chocolate syrup just before serving to prevent it from becoming too diluted. This dessert is perfect for potlucks, parties, or any special occasion.
Store any leftovers in an airtight container in the refrigerator. It will keep for up to 3 days. The crust may soften slightly over time, but it will still taste delicious. Freezing is not recommended as the texture of the filling and Cool Whip may change.
Nutritional Information
| Nutrient | Amount per Serving | % Daily Value |
|---|---|---|
| Calories | 602.3 kcal | N/A |
| Calories from Fat | 245g | 41% |
| Total Fat | 27.3 g | 42% |
| Saturated Fat | 18.8 g | 93% |
| Cholesterol | 121.8 mg | 40% |
| Sodium | 510.4 mg | 21% |
| Total Carbohydrate | 79.9 g | 26% |
| Dietary Fiber | 1.7 g | 6% |
| Sugars | 57.5 g | 229% |
| Protein | 10.1 g | 20% |
Variations & Substitutions
- Gluten-Free: Use a gluten-free flour blend specifically designed for baking. You may need to adjust the amount of liquid slightly to achieve the right dough consistency.
- Dairy-Free: Substitute the cream cheese with a dairy-free cream cheese alternative, the milk with almond or soy milk, and the Cool Whip with a dairy-free whipped topping.
- Lower Sugar: Use sugar-free pudding mix and a reduced-sugar chocolate syrup. You can also use a smaller amount of chocolate syrup or omit it altogether.
- Seasonal Variations: Add seasonal fruit to the filling, such as berries in the summer or apples in the fall.
- Nutty Twist: Sprinkle chopped nuts over the Cool Whip for added texture and flavor.
FAQs (Frequently Asked Questions)
Q: Can I make the crust ahead of time?
A: Yes, you can bake the crust a day in advance and store it in an airtight container at room temperature.
Q: Why did my crust collapse?
A: This can happen if the oven door is opened during baking or if the crust is not baked long enough. Make sure to bake it until it’s golden brown and puffed up.
Q: Can I use a different type of pudding?
A: Absolutely! Feel free to experiment with different pudding flavors to customize the dessert to your liking. Chocolate, butterscotch, or even pistachio pudding would be delicious.
Q: How do I prevent the chocolate syrup from sinking into the Cool Whip?
A: Drizzle the chocolate syrup just before serving to keep it from sinking into the Cool Whip.
Q: Can I use homemade whipped cream instead of Cool Whip?
A: Yes, homemade whipped cream can be used, but it may not hold its shape as well as Cool Whip. If using homemade whipped cream, stabilize it with a little gelatin or cornstarch to prevent it from weeping.
Final Thoughts
This Cream Puff Dessert is more than just a recipe; it’s a reminder of community, shared joy, and the simple pleasures of life. I encourage you to try this recipe, share it with your loved ones, and create your own memories around this delightful treat. Whether you’re bringing it to a potluck or enjoying it at home, I hope it brings a smile to your face. Don’t hesitate to experiment with variations and make it your own. And, of course, I’d love to hear your feedback and see your creations! Happy baking!