
Unlock the Magic: Crafting Your Own Sourdough Starter
My earliest memory of sourdough is not of a perfectly crusty loaf, but of a science experiment gone right (and delightfully edible!). My grandmother, a woman who could coax life out of anything, had a perpetual bubbling jar on her counter. As a child, I was both fascinated and slightly repulsed by its tangy aroma, a smell that promised something mysterious and ancient. She’d let me stir it occasionally, a privilege I took with utmost seriousness, convinced I was helping her brew some sort of magical potion. Now, decades later, I realize that’s not too far from the truth. That bubbling jar held the key to incredible flavor and texture, a connection to baking traditions stretching back millennia.
Recipe Overview
- Prep Time: 30 minutes over several days
- Cook Time: 0 minutes
- Total Time: 3-7 days
- Yields: 1 Cup Starter
- Dietary Type: Vegan
Ingredients
- ¼ cup canned pineapple juice (room temperature)
- 1 cup bottled water (80 – 85 degrees F)
- 1 cup bread flour
- 2 tablespoons dark rye flour
Equipment Needed
- Large clean glass bowl or jar (at least 3 times the volume of the ingredients)
- Plastic wrap
Instructions
Please note that the process is simple, but will take anywhere from 3-5 days to develop. Be patient; the results are worth it!
-
Day One: Pour 2 tablespoons of pineapple juice into a large clean glass bowl or jar. (Use a bowl or jar that will hold 3 times the volume, as the starter will double in bulk during the fermentation process.).
Stir in 2 tablespoons bread flour.
Cover container with plastic wrap and set in a warm draft-free area; 70-80 degrees Fahrenheit is perfect. Hotter temperatures (95-100 degrees) will kill it.
Stir at least twice daily. -
Day Two: To the starter container add 2 tablespoons pineapple juice and two tablespoons bread flour and stir thoroughly. Cover with plastic wrap and set in warm place.
Stir at least twice daily. -
Day Three: To the starter container stir in 2 tablespoons WATER and two tablespoons RYE flour and stir thoroughly. Cover and set in a warm place.
-
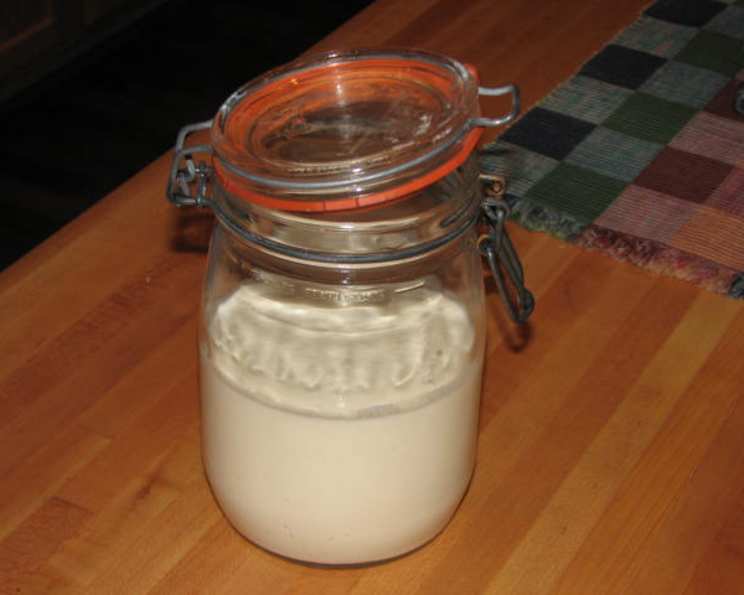
Repeat Day Three if necessary, using bread flour — When your starter develops a bubbly froth, usually about 3 to 4 days, it is done. You have succeeded — this can take up to 7 days in some areas. The presence of bubbles indicates activity, meaning the yeasts are thriving.
-
The starter is now ready to use or may be stored in the refrigerator in a covered jar.
-
The starter will get better with time, so take good care of it!
-
If the starter is not used at least every 14 days, then it must be ‘fed’.
-
To feed, pour 2 or 3 tablespoons of the starter into a clean glass bowl (discarding or giving away the rest).
-
Stir in 1/2 cup of lukewarm water and 1/2 cup of flour into the starter.
-
Cover bowl with plastic wrap or towel and place in a warm draft-free place for 12 to 24 hours, stirring at least every 12 hours.
-
After 24 hours, the starter should have a pleasant sour (yeasty/beer) aroma and is ready for use or may be poured into a clean glass or plastic container, with a lid, and refrigerated for future use. The starter should be used every 7 – 10 days.
-
When Ready To Bake: Remove two tablespoons of starter, add equal amounts of flour and water to obtain the amount of starter required for the recipe (plus slightly more to replenish the starter). As an example, if the recipe calls for one cup of starter, remove a couple tablespoons of the active starter, stir in a little more than one cup of bottled water and 1 cup of flour. Adjust the water/flour as needed, the consistency should be similar to pancake batter.
Expert Tips & Tricks
- Temperature is key: Maintaining a consistent temperature between 70-80°F is crucial for the yeast and bacteria to thrive. If your kitchen is cooler, consider using your oven with the light on (but the oven off!) to create a warmer environment. Alternatively, a seedling heat mat can be used to gently warm the starter.
- Don’t be afraid to discard: Discarding part of the starter during feeding is essential. If you don’t, you’ll end up with an enormous amount of starter! Find creative ways to use the discard, such as in pancakes, waffles, or crackers.
- Observe and learn: Pay close attention to the starter’s appearance and smell. A healthy starter should have a slightly tangy, sour aroma. If it smells moldy or off, it’s best to start over. Look for signs of activity: bubbles, a doubling in size after feeding, and a frothy texture.
- Patience is a virtue: Sourdough starter development takes time and patience. Don’t be discouraged if it doesn’t bubble up immediately. Keep feeding it regularly, and it will eventually become active. Some starters can take longer to mature than others.
- Use quality ingredients: Starting with good quality flour is important. Bread flour has a higher protein content than all-purpose flour, which will help develop gluten and create a stronger starter. The dark rye flour adds flavor and helps with the initial fermentation process.
Serving & Storage Suggestions
Once your starter is active, you can use it in a variety of recipes, from sourdough bread and pizza crust to pancakes and waffles. The possibilities are endless!
- Storage: Store your starter in the refrigerator in a covered jar or container. Make sure the lid is not airtight; the starter needs to breathe.
- Feeding: Feed your starter at least once every 7-10 days if stored in the refrigerator. If you’re not baking regularly, you can feed it less frequently, but it’s important to maintain its activity.
- Reviving: If your starter has been dormant in the refrigerator for a while, it may need a few feedings to become active again. Simply take it out of the refrigerator, discard a portion, and feed it as usual. Repeat this process until it’s bubbly and active.
- Freezing: You can also freeze your sourdough starter for long-term storage. To thaw, place it in the refrigerator overnight, then feed it a few times to revive it.
Nutritional Information
Note: Nutritional information will vary based on flour type and hydration level. The table below is a very rough estimate for a small portion of active starter.
| Nutrient | Amount per Serving | % Daily Value |
|---|---|---|
| Calories | 25 kcal | 1% |
| Total Fat | 0.1g | 0% |
| Saturated Fat | 0g | 0% |
| Cholesterol | 0mg | 0% |
| Sodium | 1mg | 0% |
| Total Carbohydrate | 5g | 2% |
| Dietary Fiber | 0.5g | 2% |
| Sugars | 0.1g | 0% |
| Protein | 1g | 2% |
Variations & Substitutions
- Gluten-Free Starter: While traditional sourdough starters rely on glutenous flours, you can create a gluten-free version using a blend of gluten-free flours like rice flour, tapioca starch, and sorghum flour.
- Different Flours: Experiment with different types of flours, such as whole wheat, spelt, or even einkorn, to create unique flavor profiles in your starter.
- Sweet Sourdough: For a sweeter starter, you can add a small amount of honey or maple syrup during the initial stages. This can help encourage yeast activity.
FAQs (Frequently Asked Questions)
Q: Why use pineapple juice in the beginning?
A: Pineapple juice has a lower pH, which helps prevent unwanted bacteria and mold from growing in the early stages of starter development, giving the good bacteria and yeast a chance to establish themselves.
Q: How do I know when my starter is ready to bake with?
A: A mature starter will double in size within 4-8 hours after feeding. It should be bubbly, active, and have a slightly tangy aroma. The “float test” is another good indicator: Drop a spoonful of starter into a glass of water. If it floats, it’s ready to use!
Q: My starter smells like alcohol. Is that normal?
A: A strong alcohol smell indicates that your starter is hungry. This means that the yeast has consumed all the available sugars and is producing alcohol as a byproduct. Feed it immediately!
Q: Can I use tap water instead of bottled water?
A: It’s best to use bottled or filtered water, as tap water can contain chlorine or other chemicals that can inhibit yeast activity. If you must use tap water, let it sit out for 24 hours to allow the chlorine to dissipate.
Q: My starter is separating and has a liquid layer on top. What should I do?
A: This liquid layer, called “hooch,” is a sign that your starter is hungry and needs to be fed. Simply pour off the hooch and feed the starter as usual. The hooch is just a byproduct of fermentation and is harmless.
Final Thoughts
Creating your own sourdough starter is an incredibly rewarding experience. It’s a journey that connects you to the traditions of baking and allows you to create unique and flavorful breads and other baked goods. Don’t be afraid to experiment, be patient, and most importantly, have fun! Once you’ve mastered the art of sourdough starter, the possibilities are truly endless. I urge you to embark on this baking adventure, and I can’t wait to hear about your bubbly creations! Share your experiences and tips with fellow bakers, and let’s celebrate the magic of sourdough together. Consider pairing your first sourdough loaf with a hearty soup or a creamy cheese board – the perfect complements to that tangy, satisfying flavor.