
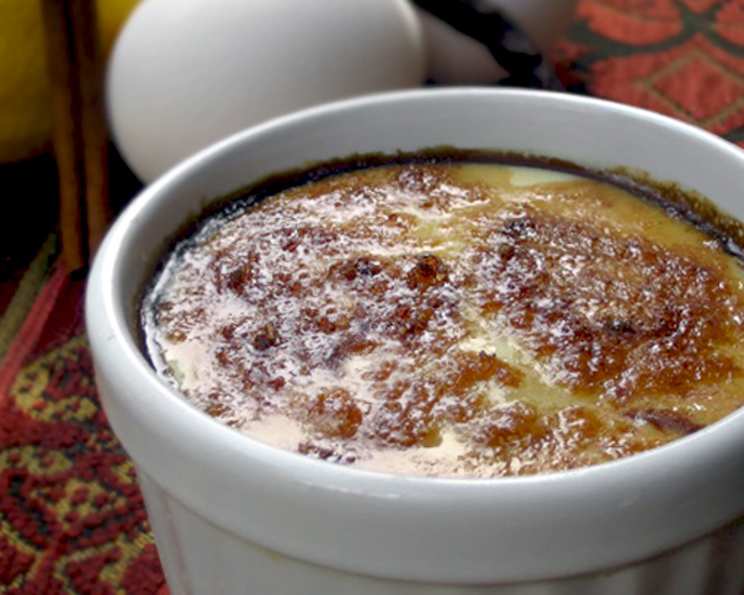
Crema Catalana: A Taste of Barcelona in Your Kitchen
The first time I tasted Crema Catalana was on a small, sun-drenched terrace in Barcelona. The air hummed with the sounds of the city – the distant chatter of voices, the gentle clinking of glasses, and the melodic strumming of a guitar. The dessert arrived, a simple terracotta ramekin filled with a golden custard, its surface glistening under a brittle, caramelized sugar crust. One crack of the spoon, and the magic began: a symphony of textures and flavors – the delicate coolness of the custard against the satisfying snap of the burnt sugar. It was more than just a dessert; it was a moment, an experience, a memory etched in my culinary heart. Now, I’m going to show you how to recreate that magic at home.
Recipe Overview
- Prep Time: 15 minutes
- Cook Time: 15 minutes (custard) + 3 minutes (caramelizing)
- Total Time: 6 hours 18 minutes (includes chilling time)
- Servings: 6
- Yield: 6 ramekins
- Dietary Type: Gluten-Free
Ingredients
- 1 liter milk
- 1 vanilla bean, split and scraped
- 1 cinnamon stick
- 1 small lemon, zest of, sliced into strips
- 2 slices orange zest, 4 x 2 cm
- 8 egg yolks
- ½ cup caster sugar
- 4 tablespoons cornflour
- 3 tablespoons soft brown sugar
Equipment Needed
- Saucepan
- Whisk
- Bowl
- Strainer
- 6 x 1-cup ramekins
- Grill (broiler)
Instructions
- Infuse the milk: In a saucepan, combine the milk, scraped vanilla bean (both the pod and the seeds), cinnamon stick, lemon zest, and orange zest. Bring the mixture to a boil over medium heat, then immediately reduce the heat to low and simmer for 5 minutes. This allows the flavors to meld beautifully into the milk.
- Strain the infused milk: Remove the saucepan from the heat and strain the milk mixture through a fine-mesh sieve into a heatproof bowl. This step is crucial for removing the solids and ensuring a smooth, velvety custard. Set the infused milk aside to cool slightly.
- Whisk the egg yolks and sugar: In a separate bowl, whisk the egg yolks and caster sugar together for approximately 5 minutes, until the mixture becomes pale and creamy. This incorporates air and creates a light, airy base for the custard. The mixture should ribbon when the whisk is lifted.
- Incorporate the cornflour: Add the cornflour to the egg yolk and sugar mixture and whisk until well combined. Ensure there are no lumps of cornflour remaining. This step is essential for thickening the custard to the desired consistency.
- Temper the egg mixture: Gradually add the warm infused milk mixture to the egg yolk mixture, whisking continuously to prevent the eggs from scrambling. This process, known as tempering, gently raises the temperature of the eggs, ensuring a smooth and creamy custard.
- Cook the custard: Pour the tempered mixture back into the saucepan. Cook over low to medium heat, stirring constantly with a whisk, for 5-10 minutes, or until the mixture thickens and coats the back of a spoon. Be patient and continue stirring; the custard will thicken as it heats. Do not allow the mixture to boil, as this will cause it to curdle.
- Pour into ramekins: Once the custard has thickened to the desired consistency, remove it from the heat and pour it evenly into six 1-cup ramekins.
- Chill the custard: Cover the ramekins with plastic wrap, pressing the wrap directly onto the surface of the custard to prevent a skin from forming. Refrigerate for at least 6 hours, or preferably overnight, to allow the custard to set completely.
- Caramelize the sugar: When ready to serve, remove the ramekins from the refrigerator. Sprinkle the surface of each custard evenly with soft brown sugar.
- Caramelize under the grill: Preheat your grill (broiler) to high heat. Place the ramekins on a baking sheet and carefully position them under the grill. Grill for approximately 3 minutes, or until the brown sugar melts and caramelizes into a crisp, golden-brown crust. Watch carefully to prevent the sugar from burning.
- Serve immediately: Remove the ramekins from under the grill and let them cool for a minute or two before serving. The contrast between the cool custard and the warm, brittle sugar crust is part of the magic of Crema Catalana, so serve immediately.
Expert Tips & Tricks
- Vanilla bean paste substitution: If you don’t have a vanilla bean, you can substitute with 1 teaspoon of high-quality vanilla bean paste. Add it along with the egg yolks.
- Preventing a skin: The plastic wrap trick is key. Press it directly onto the custard’s surface before chilling to avoid a rubbery skin forming.
- Even caramelization: For perfectly even caramelization, ensure the brown sugar is spread thinly and evenly across the surface of the custard. A small kitchen torch can also be used for caramelizing.
- Temperature control: Watch the broiler very carefully. Sugar burns quickly. If you see it browning too fast, move the ramekins further from the heat source.
Serving & Storage Suggestions
Crema Catalana is best served immediately after caramelizing the sugar, while the crust is still warm and crisp. The contrast between the cool custard and the brittle sugar is part of its charm. If you have leftovers (though unlikely!), store them in the refrigerator for up to 2 days. However, the caramelized sugar will soften over time, so it’s best to caramelize just before serving. Re-caramelizing is not recommended, as it can overcook the custard.
Nutritional Information
| Nutrient | Amount per Serving | % Daily Value |
|---|---|---|
| Calories | 320 kcal | 16% |
| Total Fat | 15g | 23% |
| Saturated Fat | 8g | 40% |
| Cholesterol | 250mg | 83% |
| Sodium | 100mg | 4% |
| Total Carbohydrate | 35g | 12% |
| Dietary Fiber | 0g | 0% |
| Sugars | 25g | – |
| Protein | 10g | 20% |
Note: Nutritional information is an estimate and may vary based on specific ingredients and preparation methods.
Variations & Substitutions
- Citrus Variations: Experiment with different citrus zests. Lime or grapefruit zest can add a refreshing twist.
- Spice it Up: Add a pinch of ground cardamom or star anise to the milk for a more exotic flavor profile.
- Dairy-Free Option: While traditionally made with dairy milk, you can try using full-fat coconut milk for a dairy-free version. Be aware that this will alter the flavor slightly.
- Liqueur Infusion: Add a tablespoon of your favorite liqueur, such as Grand Marnier or Cointreau, to the custard mixture for an extra layer of flavor.
FAQs (Frequently Asked Questions)
Q: Can I make Crema Catalana ahead of time?
A: Yes, you can prepare the custard up to 2 days in advance and store it in the refrigerator. However, it’s best to caramelize the sugar just before serving for the best texture.
Q: What if I don’t have a grill (broiler)?
A: A kitchen torch is the best alternative for caramelizing the sugar. If you don’t have either, you can try using the top rack of your oven at a very high temperature, but watch it extremely carefully to prevent burning.
Q: Can I use a different type of sugar for the caramelized topping?
A: While caster sugar is used in the custard itself, soft brown sugar is ideal for caramelizing because it melts and caramelizes more evenly and provides a richer flavor.
Q: My custard curdled. What did I do wrong?
A: Overheating the custard is the most common cause of curdling. Be sure to cook it over low to medium heat, stirring constantly, and never allow it to boil.
Q: How do I store leftover Crema Catalana?
A: Store leftovers in the refrigerator, covered with plastic wrap, for up to 2 days. The caramelized sugar will soften, but the custard will still be delicious.
Final Thoughts
Crema Catalana is more than just a dessert; it’s a celebration of simple ingredients transformed into something truly special. With its creamy custard and brittle caramelized crust, it’s a textural and flavor delight that will transport you to the sun-kissed streets of Barcelona. Don’t be intimidated by the chilling time – it’s mostly hands-off! So, gather your ingredients, put on some Spanish guitar music, and give this recipe a try. I encourage you to share your creations and experiences, and perhaps even pair it with a glass of chilled Cava for the full Barcelona experience. ¡Buen provecho!