
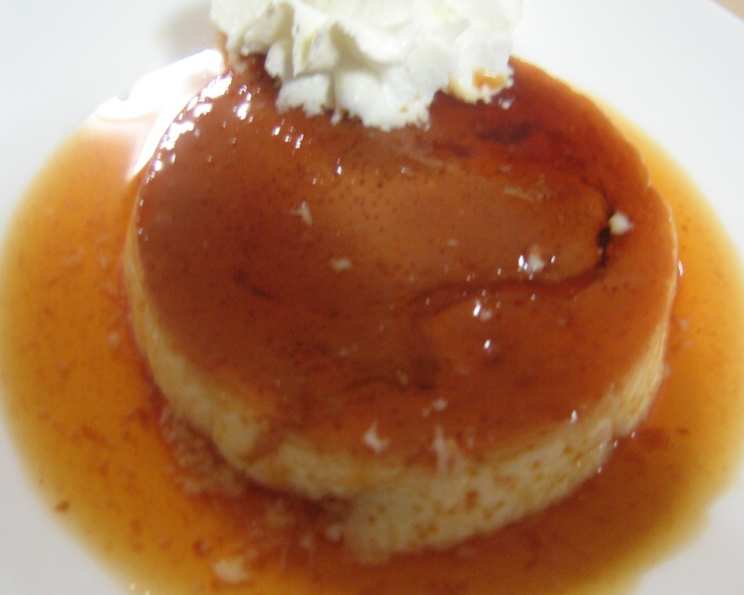
Crème Caramel: A Silky Smooth Classic
The first time I tasted crème caramel, I was probably seven years old, perched precariously on a stool in my grandmother’s bustling kitchen. The golden custard, trembling gently on a small plate, looked like a treasure. The bittersweet caramel, a dark amber river flowing around its base, hinted at something complex and sophisticated. That first bite, the cool, velvety custard dissolving on my tongue with the contrasting sharpness of the caramel, was pure magic. It wasn’t just a dessert; it was a memory in the making, a moment of pure, unadulterated joy that has stayed with me ever since.
Recipe Overview
- Prep Time: 20 minutes
- Cook Time: 40 minutes
- Total Time: 4 hours 60 minutes
- Servings: 8
- Yield: 8 ramekins
- Dietary Type: Gluten-Free
Ingredients
- 1 cup sugar
- 2 tablespoons cold water
- 2 large eggs
- 2 large egg whites
- 3 cups low-fat milk (1%)
- 1 teaspoon vanilla extract
Equipment Needed
- 2-quart saucepan
- Large bowl
- Wire whisk
- Eight 6-ounce custard cups or ramekins
- Large roasting pan (approximately 17″ by 11 1/2″)
- Small spatula
- Wire rack
Instructions
- Preheat your oven to 350 degrees F (175 degrees C). Simultaneously, bring a 4-quart saucepan of water to a boil over high heat. This boiling water will be used for the water bath later in the recipe.
- In a 2-quart saucepan, combine 2/3 cup of the sugar with the cold water. Cook over medium heat until the sugar melts and transforms into a light caramel color. Swirl the pan occasionally to ensure even heating and prevent burning. This process requires patience and close attention; the sugar can go from golden to burnt very quickly.
- As soon as the caramel reaches the desired color, immediately pour it evenly into eight 6-ounce custard cups or ramekins. Work quickly, as the caramel will harden rapidly.
- In a large bowl, using a wire whisk, beat the eggs, egg whites, and the remaining 1/3 cup of sugar together until thoroughly blended. Avoid over-whisking, as this can incorporate too much air into the custard.
- Gradually whisk in the low-fat milk (1%) and vanilla extract until everything is well combined and the mixture is smooth.
- Carefully pour the custard mixture evenly into the prepared custard cups or ramekins, on top of the hardened caramel.
- Place the filled cups in a large roasting pan (approximately 17″ by 11 1/2″). Then, carefully pour the boiling water into the roasting pan until it reaches halfway up the sides of the custard cups. This water bath (bain-marie) is crucial for gentle, even cooking and prevents the custard from curdling.
- Bake in the preheated oven for 40 minutes, or until the center of the custard is just set. The custard should jiggle slightly when gently shaken, but not be liquid. Overbaking will result in a rubbery texture.
- Remove the custard cups from the water bath in the roasting pan and transfer them to a wire rack to cool.
- Once cooled to room temperature, cover the custard cups with plastic wrap and refrigerate for at least 4 hours, or preferably overnight, until thoroughly chilled. This chilling period allows the flavors to meld and the custard to firm up completely.
- To serve, run a small spatula around the inside edge of each custard cup to carefully loosen the custard from the sides.
- Invert each crème caramel onto a dessert plate, tapping the bottom of the cup gently to help release the custard. Leave the inverted cup on the plate for several minutes to allow the caramel syrup to drip from the cup onto the custard, creating a beautiful and delicious sauce.
Expert Tips & Tricks
- Caramel Consistency: Achieving the perfect caramel color is key. Don’t rush the process and watch it carefully. If the caramel starts to smoke, it’s burning and will taste bitter. Start over.
- Water Bath Essentials: Ensure the water level in the water bath is consistent throughout baking. If the water evaporates too much, carefully add more boiling water to maintain the level.
- Doneness Test: A slight jiggle in the center of the custard is your best indicator of doneness. If you use a knife inserted into the center, it should come out mostly clean, but a little wet is fine.
- Preventing Bubbles: If you want an ultra-smooth surface, skim off any bubbles that form on top of the custard mixture before baking. You can also gently tap the filled ramekins on the counter to release any trapped air.
- Controlling Sweetness: Using low-fat milk already significantly reduces the caloric content, feel free to experiment with sugar alternatives like stevia, but the texture may change.
Serving & Storage Suggestions
Crème caramel is best served chilled and inverted onto a dessert plate, allowing the caramel sauce to cascade down the sides. Garnish with a sprig of fresh mint or a few berries for an elegant presentation.
Leftover crème caramel should be stored in the refrigerator, covered tightly with plastic wrap, for up to 3 days. It is not recommended to freeze crème caramel, as freezing can alter the texture of the custard.
Nutritional Information
| Nutrient | Amount per Serving | % Daily Value |
|---|---|---|
| Calories | 159.4 kcal | N/A |
| Calories from Fat | N/A | 12% |
| Total Fat | 2.1 g | 3% |
| Saturated Fat | 1 g | 4% |
| Cholesterol | 57.5 mg | 19% |
| Sodium | 71.6 mg | 2% |
| Total Carbohydrate | 29.8 g | 9% |
| Dietary Fiber | 0 g | 0% |
| Sugars | 30 g | N/A |
| Protein | 5.6 g | 11% |
Variations & Substitutions
- Flavor Infusion: Infuse the milk with other flavors while heating. Try adding a cinnamon stick, lemon zest, or even a few cardamom pods for a unique twist. Remove the flavorings before adding the milk to the egg mixture.
- Coffee Crème Caramel: Add a tablespoon or two of strong brewed coffee to the custard mixture for a delightful coffee-flavored dessert.
- Citrus Zest: Add grated orange or lemon zest to the custard base for a subtle citrus flavor that complements the caramel beautifully.
- Dairy-Free Option: While this recipe uses low-fat milk, it can be adapted to be dairy-free by using almond milk or another plant-based milk alternative. The texture may be slightly different, but the flavor will still be delicious.
FAQs (Frequently Asked Questions)
Q: Why is a water bath necessary for crème caramel?
A: A water bath provides gentle and even heat, preventing the custard from curdling or becoming rubbery. It ensures a smooth, creamy texture.
Q: How can I tell if the crème caramel is done?
A: The center of the custard should jiggle slightly when gently shaken. It should not be liquid. Overbaking will result in a dry, rubbery texture.
Q: Can I make crème caramel ahead of time?
A: Yes, crème caramel is best made ahead of time. It needs to chill for at least 4 hours, or preferably overnight, to allow the flavors to meld and the custard to fully set.
Q: What if my caramel burns?
A: Unfortunately, burnt caramel will taste bitter and ruin the entire dish. If your caramel burns, you need to start over with fresh sugar and water.
Q: How do I prevent air bubbles in my crème caramel?
A: Skim off any bubbles that form on top of the custard mixture before baking. You can also gently tap the filled ramekins on the counter to release any trapped air.
Final Thoughts
Crème caramel is more than just a dessert; it’s an experience. It’s the perfect ending to a special meal or a delightful treat to enjoy on its own. Don’t be intimidated by the delicate nature of this classic dessert. With a little patience and attention to detail, you can create a truly memorable crème caramel that will impress your friends and family. So, gather your ingredients, preheat your oven, and get ready to embark on a culinary journey that will transport you to a world of creamy, caramel-y goodness. And, of course, don’t hesitate to share your creations and feedback – I’d love to hear about your crème caramel adventures!