
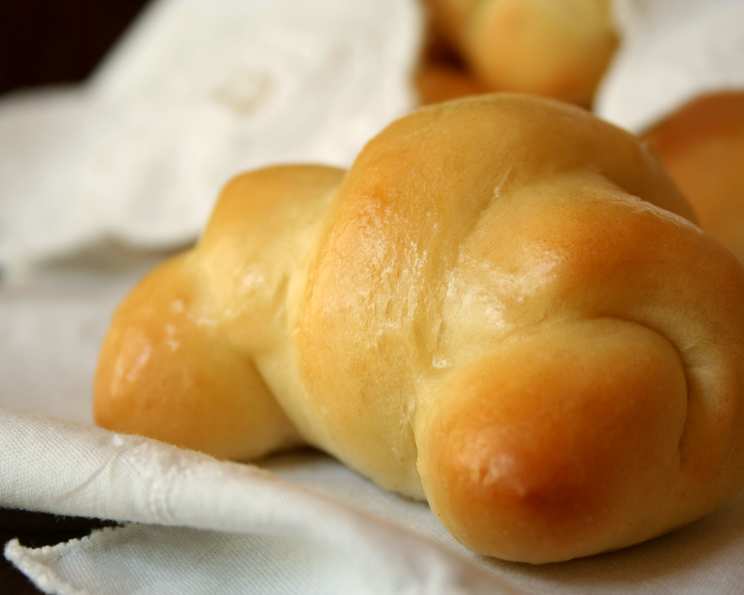
Homemade Crescent Rolls: A Taste of Nostalgia
The aroma of warm, yeasty bread baking in the oven is a powerful time machine. It instantly transports me back to my grandmother’s kitchen, where a basket of golden-brown crescent rolls always graced the table. Their buttery fragrance mingled with the comforting scent of simmering sauces, creating an atmosphere of pure bliss. Each bite was a perfect balance of soft, pillowy interior and slightly crisp, golden exterior. These weren’t just rolls; they were edible hugs, reminders of family and love baked into every tender layer.
Recipe Overview
- Prep Time: 45 minutes
- Cook Time: 10-12 minutes
- Total Time: 1 hour 55 minutes + Rise Time
- Yields: 48 rolls
- Serves: 24
- Dietary Type: Vegetarian
Ingredients
- 2 (1/4 ounce) packages active dry yeast
- 1 tablespoon sugar, plus 1/2 cup sugar
- 1 cup warm water
- 1 cup milk, scalded (2 min. in microwave)
- 3 eggs, beaten
- 6 tablespoons unsalted butter, melted & cooled
- 1 teaspoon salt
- 7 cups flour (I use Gold Medal Bread Flour)
Equipment Needed
- Large Mixing Bowl
- Measuring Cups and Spoons
- Whisk
- Greased Bowl
- Lightly Floured Board
- Cookie Sheet
- Plastic Wrap or Flour Sack Tea Towel
Instructions
-
In a small bowl, dissolve the yeast and 1 tablespoon of sugar in the warm water. Let stand for 5 minutes, or until foamy. This process, known as proofing, ensures the yeast is active and will help the dough rise properly. If the yeast doesn’t foam, it’s likely expired and you’ll need to start with a fresh batch.
-
In a large mixing bowl, combine the melted and cooled butter, salt, scalded milk, and the remaining 1/2 cup of sugar. The milk should be warm, not hot, to avoid killing the yeast later. Scalding the milk helps to improve the texture of the rolls by denaturing some of the milk proteins.
-
Add 2 cups of the flour to the milk mixture and mix well, ensuring there are no lumps. This step helps to create a smooth and consistent base for the dough.
-
Add the proofed yeast mixture and beaten eggs to the bowl. Beat well to incorporate all ingredients. The eggs add richness and moisture to the dough, contributing to a soft and tender final product.
-
Gradually add the remaining flour, or enough to make a soft dough. The exact amount of flour needed may vary depending on the humidity and the type of flour used. The dough should be soft and slightly sticky, but not so sticky that it’s unmanageable.
-
Cover the dough with a clean cloth or plastic wrap and let it rest for 20 minutes. This resting period allows the gluten in the flour to relax, making the dough easier to knead.
-
Turn the dough out onto a lightly floured surface and knead for about 5-7 minutes, or until it’s smooth and elastic. Kneading develops the gluten structure, which gives the rolls their characteristic chewiness.
-
Place the kneaded dough in a greased bowl, turning to coat all sides. This prevents the dough from drying out as it rises.
-
Cover the bowl and let the dough rise in a warm place until doubled in bulk. This process can take anywhere from 1 to 2 hours, depending on the temperature of the room. A warm environment encourages the yeast to ferment and produce carbon dioxide, which causes the dough to rise.
-
Punch down the risen dough to release the air. This step helps to redistribute the yeast and ensures a more even texture in the final product.
-
Divide the dough into thirds. This makes it easier to manage and roll out.
-
On a lightly floured surface, roll each portion of dough into a 12-inch diameter circle.
-
Cut each circle into 16 pie-shaped pieces. A pizza cutter or sharp knife works well for this.
-
Starting with the widest end, roll up each piece into a crescent shape. Gently stretch the dough as you roll to create a tighter, more uniform shape.
-
Place the crescent rolls on a greased cookie sheet, leaving plenty of room between each roll. These rolls need room to expand, so don’t crowd them.
-
Cover the rolls lightly with plastic wrap or a floured sack tea towel and let them rise for 1 hour. This final rise allows the rolls to become light and airy before baking.
-
Bake in a preheated 375ºF (190ºC) oven for 10-12 minutes, or until golden brown. Keep a close eye on them, as baking times can vary depending on your oven.
Expert Tips & Tricks
- For a richer flavor, use butter instead of shortening to grease the bowl and cookie sheets.
- To achieve a perfectly golden-brown crust, brush the rolls with melted butter or an egg wash before baking.
- If your dough is too sticky, add a little more flour, one tablespoon at a time, until it becomes manageable.
- If you don’t have time for a full rise, you can speed up the process by placing the dough in a warm oven (turned off) with a pan of hot water.
- For make-ahead convenience, you can shape the rolls and refrigerate them overnight before the final rise. Just be sure to let them come to room temperature before baking.
- If your rolls are browning too quickly, tent them with foil during the last few minutes of baking.
Serving & Storage Suggestions
Serve these warm, homemade crescent rolls as a delightful accompaniment to any meal. They’re perfect with soups, stews, salads, or simply enjoyed with butter and jam.
To store leftovers, allow the rolls to cool completely and then place them in an airtight container. They will keep at room temperature for 1-2 days, in the refrigerator for up to a week, or in the freezer for up to 2 months.
To reheat, wrap the rolls in foil and warm them in a 350°F (175°C) oven for about 10 minutes, or until heated through. You can also reheat them in the microwave, but they may become slightly softer.
Nutritional Information
| Nutrient | Amount per Serving | % Daily Value |
|---|---|---|
| Calories | 193.7 kcal | N/A |
| Calories from Fat | 38 g | 20% |
| Total Fat | 4.2 g | 6% |
| Saturated Fat | 2.3 g | 11% |
| Cholesterol | 32.3 mg | 10% |
| Sodium | 112.5 mg | 4% |
| Total Carbohydrate | 33.3 g | 11% |
| Dietary Fiber | 1.1 g | 4% |
| Sugars | 4.8 g | N/A |
| Protein | 5.2 g | 10% |
Note: Nutritional information is an estimate and may vary based on specific ingredients and preparation methods.
Variations & Substitutions
- Garlic Herb Rolls: Add 1-2 tablespoons of minced garlic and 1-2 tablespoons of your favorite dried herbs (such as rosemary, thyme, or oregano) to the dough before kneading.
- Cheese-Filled Rolls: Before rolling up the crescent shapes, sprinkle a small amount of shredded cheese (such as cheddar, mozzarella, or Parmesan) over the dough.
- Sweet Rolls: Brush the rolls with melted butter and sprinkle with cinnamon sugar before baking. Drizzle with a simple glaze after baking for an extra touch of sweetness.
- Whole Wheat Rolls: Substitute up to half of the all-purpose flour with whole wheat flour for a more nutritious and nutty-flavored roll.
- Dairy-Free Rolls: Use a non-dairy milk alternative, such as almond milk or soy milk, in place of the scalded milk. Ensure the butter substitute used is also dairy-free.
FAQs (Frequently Asked Questions)
Q: Can I use instant yeast instead of active dry yeast?
A: Yes, you can. Use the same amount, but you don’t need to proof it in water first. Simply add it to the dry ingredients.
Q: Why is it important to scald the milk?
A: Scalding the milk denatures certain proteins that can weaken the gluten structure, resulting in a softer and more tender roll.
Q: Can I freeze the dough after it has risen?
A: Yes, you can freeze the dough after the first rise. Punch it down, wrap it tightly in plastic wrap, and then place it in a freezer bag. Thaw it in the refrigerator overnight before shaping and baking.
Q: My rolls are not rising properly. What could be the problem?
A: There are several possibilities: the yeast may be old or inactive, the liquid may be too hot or too cold, or the room temperature may be too cool. Make sure your yeast is fresh, your liquids are warm but not hot, and your dough is placed in a warm place to rise.
Q: Can I use a stand mixer to make the dough?
A: Absolutely! Use the dough hook attachment and follow the same steps as outlined in the instructions.
Final Thoughts
These homemade crescent rolls are more than just a recipe; they’re an invitation to create lasting memories in your own kitchen. Don’t be intimidated by the process – each step is simple and rewarding. Gather your ingredients, embrace the aroma of baking bread, and share these delightful rolls with your loved ones. I encourage you to try this recipe and make it your own. Feel free to experiment with different variations, and please share your feedback! These rolls pair perfectly with a hearty bowl of soup or a simple salad, making them a welcome addition to any table. Happy baking!