
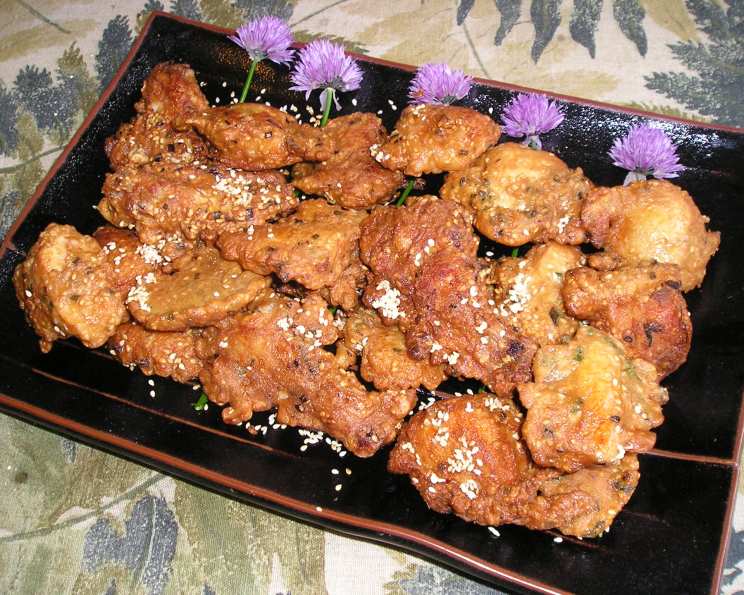
Crispy Mochiko Chicken: A Taste of Aloha in Every Bite
I can still remember the first time I tasted Mochiko Chicken. It was at a potluck during a family reunion in Oahu, and the aroma alone drew me in. The golden, crispy exterior gave way to juicy, flavorful chicken that had a subtly sweet and savory taste. Every bite was a little piece of paradise, a reminder of warm breezes, friendly faces, and the comforting feeling of home. I knew I had to learn how to make it myself. This recipe captures the magic I experienced that day, bringing the taste of the islands to your kitchen.
Recipe Overview
- Prep Time: 20 minutes + Overnight Marinating
- Cook Time: 15-20 minutes
- Total Time: Overnight + 35-40 minutes
- Servings: 4-6
- Yield: Approximately 2 lbs
- Dietary Type: Varies (See Variations & Substitutions)
Ingredients
- 2 – 2 ½ lbs boneless, skinless chicken, cleaned and cut into bite-sized pieces
- 4 tablespoons mochiko sweet rice flour (glutinous rice flour, do not substitute regular flour or regular rice flour)
- 4 tablespoons cornstarch
- 4 tablespoons soy sauce
- 2 tablespoons hoisin sauce (optional)
- ½ teaspoon salt
- ¼ cup green onion, chopped
- 2 eggs, beaten
- 2 cloves garlic, minced
- 7 tablespoons sesame seeds, roasted (use to taste)
- Oil, for deep frying (vegetable, canola, or peanut oil work well)
Equipment Needed
- Large Mixing Bowl
- Measuring Spoons and Cups
- Deep Fryer or Large Pot
- Slotted Spoon or Spider
- Paper Towels
- Plate or Wire Rack
Instructions
-
Prepare the Marinade: In a large mixing bowl, combine the mochiko sweet rice flour, cornstarch, soy sauce, hoisin sauce (if using), salt, green onion, beaten eggs, and minced garlic. Whisk until the marinade is smooth and well combined. The mochiko is crucial here; it gives the chicken its signature crispy texture.
-
Marinate the Chicken: Add the bite-sized chicken pieces to the marinade. Toss to ensure each piece is thoroughly coated. Cover the bowl tightly with plastic wrap or transfer the mixture to a resealable bag.
-
Refrigerate Overnight: Place the marinated chicken in the refrigerator and let it marinate for at least 8 hours, or preferably overnight. This allows the flavors to fully penetrate the chicken and tenderize it. The longer it marinates, the more flavorful it will be.
-
Prepare for Frying: The next day, remove the marinated chicken from the refrigerator and let it sit at room temperature for about 30 minutes. This helps to ensure even cooking.
-
Coat with Sesame Seeds: Pour the roasted sesame seeds onto a shallow plate. Take each piece of marinated chicken and gently press it into the sesame seeds, coating it on all sides. This adds a delightful nutty flavor and enhances the crispy texture.
-
Heat the Oil: Pour enough oil into a deep fryer or a large, heavy-bottomed pot to reach a depth of about 3 inches. Heat the oil to 350°F (175°C). Use a thermometer to monitor the temperature; maintaining the correct temperature is essential for achieving the perfect crispy texture.
-
Fry the Chicken: Carefully add the chicken pieces to the hot oil in batches, being careful not to overcrowd the fryer or pot. Overcrowding can lower the oil temperature and result in soggy chicken.
-
Cook Until Golden Brown: Fry the chicken for approximately 4-6 minutes per batch, or until it is golden brown and cooked through. Use a slotted spoon or spider to turn the chicken occasionally to ensure even cooking on all sides.
-
Drain on Paper Towels: Once the chicken is cooked, remove it from the oil with a slotted spoon or spider and place it on a plate lined with paper towels to drain off any excess oil.
-
Serve Immediately: Serve the Crispy Mochiko Chicken immediately while it’s hot and crispy.
Expert Tips & Tricks
- Don’t Skip the Mochiko: This is the key ingredient! Regular rice flour or wheat flour will not provide the same crispy, slightly chewy texture.
- Temperature Control: Maintaining the oil temperature is crucial. If the oil is too cool, the chicken will absorb too much oil and become soggy. If the oil is too hot, the outside will burn before the inside is cooked.
- Batch Cooking: Avoid overcrowding the fryer. Cook the chicken in batches to maintain the oil temperature and ensure even cooking.
- Double Frying (Optional): For extra crispy chicken, you can double fry it. After the first fry, let the chicken cool slightly, then fry it again for 1-2 minutes to achieve an even crispier exterior.
- Flavor Boost: Add a pinch of ginger powder or five-spice powder to the marinade for an extra layer of flavor.
- Make-Ahead Prep: The marinade can be prepared up to 2 days in advance and stored in the refrigerator. This allows the flavors to meld even further.
Serving & Storage Suggestions
Serve the Crispy Mochiko Chicken hot and fresh as an appetizer, main course, or a snack. It pairs wonderfully with steamed rice, macaroni salad, or Asian slaw. For a dipping sauce, consider sweet chili sauce, sriracha mayo, or a simple soy sauce with sesame oil.
Leftovers can be stored in an airtight container in the refrigerator for up to 3 days. To reheat, bake in a preheated oven at 350°F (175°C) for about 10-15 minutes, or until heated through and crispy. You can also reheat it in an air fryer for a crispier result. Microwaving is not recommended as it can make the chicken soggy.
Nutritional Information
(Estimated, per serving)
| Nutrient | Amount per Serving | % Daily Value |
|---|---|---|
| Calories | 650 kcal | 33% |
| Total Fat | 35g | 54% |
| Saturated Fat | 6g | 30% |
| Cholesterol | 200mg | 67% |
| Sodium | 1200mg | 50% |
| Carbohydrates | 30g | 10% |
| Fiber | 2g | 8% |
| Sugar | 5g | 10% |
| Protein | 50g | 100% |
Variations & Substitutions
- Gluten-Free: This recipe is naturally gluten-free, thanks to the mochiko sweet rice flour. However, be sure to use a gluten-free soy sauce or tamari to ensure the entire dish is gluten-free.
- Spicy: Add a pinch of red pepper flakes or a dash of sriracha to the marinade for a spicy kick.
- Sweet: Increase the amount of hoisin sauce or add a tablespoon of honey or brown sugar to the marinade for a sweeter flavor.
- Vegetarian “Chicken”: Substitute the chicken with firm tofu or seitan, cut into bite-sized pieces. Marinate and fry as directed.
- Air Fryer: For a healthier option, you can air fry the chicken instead of deep frying. Preheat your air fryer to 375°F (190°C), spray the chicken with oil, and cook for 12-15 minutes, flipping halfway through, until golden brown and crispy.
FAQs (Frequently Asked Questions)
Q: Can I use regular rice flour instead of mochiko?
A: No, mochiko sweet rice flour is essential for the unique crispy, slightly chewy texture of Mochiko Chicken. Regular rice flour will not produce the same result.
Q: How long should I marinate the chicken?
A: Marinate the chicken for at least 8 hours, or preferably overnight. The longer it marinates, the more flavorful and tender it will be.
Q: Can I bake the chicken instead of frying?
A: While frying is recommended for the best crispy texture, you can bake it at 400°F (200°C) for about 20-25 minutes, or until cooked through. However, the texture will be different.
Q: How do I keep the chicken crispy after frying?
A: Drain the chicken on paper towels and serve it immediately. Avoid stacking the chicken, as this can trap steam and make it soggy.
Q: Can I freeze the cooked Mochiko Chicken?
A: While you can freeze it, the texture may change upon thawing and reheating. Freeze in a single layer on a baking sheet, then transfer to a freezer bag. Reheat in the oven or air fryer for best results.
Final Thoughts
Crispy Mochiko Chicken is more than just a recipe; it’s a taste of Aloha, a connection to the warmth and flavors of the Hawaiian islands. Don’t be intimidated by the frying; the results are well worth the effort. Gather your ingredients, follow the steps, and get ready to create a dish that will transport you to paradise with every bite. I encourage you to experiment with the variations, share your creations, and spread the joy of this delicious dish! Pair it with a refreshing tropical drink for the full experience!