
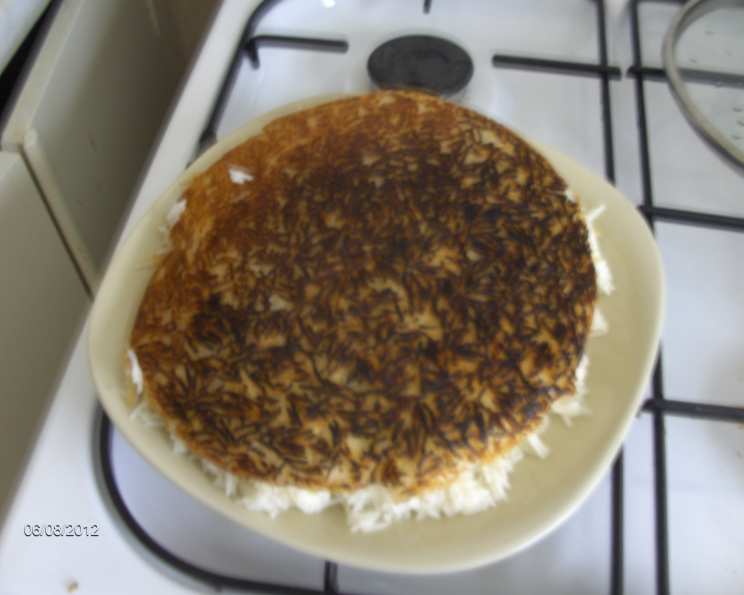
The Golden Jewel: Mastering the Art of Crispy Tahdig
I remember the first time I saw tahdig. It wasn’t in a restaurant or a cookbook, but at a potluck hosted by a dear friend’s Iranian grandmother. Amidst a table laden with vibrant stews and fragrant kebabs, a simple platter of rice, turned upside down to reveal a shimmering, golden crust, held my gaze. The collective gasp of delight as the crisp shards were broken off and shared was infectious. That day, I understood that tahdig wasn’t just rice; it was a symbol of celebration, family, and the joy of sharing good food.
Recipe Overview
- Prep Time: 15 minutes
- Cook Time: 35 minutes
- Total Time: 50 minutes
- Servings: 6-8
- Yield: 1 pot
- Dietary Type: Gluten-Free
Ingredients
- 3 cups long grain white rice
- 1/2 cup melted butter
- 1/4 teaspoon salt (or to taste)
- 2 quarts water
- 1 cup water
Equipment Needed
- Large stock pot or Dutch oven
- Colander
- Wooden spoon
- Kitchen towel
Instructions
- Begin by bringing the 2 quarts of water and salt to a rolling boil in your large stock pot or Dutch oven. This ensures the rice cooks evenly and absorbs the salt effectively.
- While the water heats, thoroughly rinse the long grain white rice under cold running water. Continue rinsing until the water runs mostly clear. This step removes excess starch, preventing the rice from becoming gummy.
- Once the water is boiling, gently add the rinsed rice to the pot. Boil for approximately 10 minutes, or until the rice is about half-cooked. The grains should still have a firm core. This parboiling process is crucial for achieving the perfect tahdig texture.
- Carefully drain the partially cooked rice in a colander, reserving it for later.
- Now, return the stock pot or Dutch oven to the stovetop. Pour about 1/4 cup of the melted butter into the bottom of the pot. Tilt the pot to ensure the bottom is evenly coated and the butter extends approximately 2 inches up the sides. This generous coating of butter is what creates the signature crispy crust.
- Gently pour the half-cooked rice back into the pot. Aim to create a nice mound in the center, minimizing contact with the sides of the pot. This helps to promote even cooking and browning of the tahdig.
- Using the end of a wooden spoon, carefully create 5 or 6 holes evenly spaced around the mound of rice. These holes allow steam to escape and help distribute the remaining butter and water throughout the rice.
- Pour the remaining melted butter over the top of the rice, ensuring it seeps into the holes you created. Then, drizzle 1/4 cup of the extra water into the holes as well. This added moisture helps to steam the rice and create a tender interior.
- Cover the pot with a clean kitchen towel. This towel will absorb the steam, preventing it from condensing and dripping back onto the rice, which can make it soggy. Place the pot lid securely on top of the towel.
- Cook the rice over very low heat, checking it after approximately 15 minutes. If you notice the rice is browning too quickly, carefully add the remaining extra water a little bit at a time. This will help to slow down the browning process and prevent the tahdig from burning.
- Continue cooking the rice until it is fully cooked and the tahdig has formed a beautiful golden-brown crust, about 20 more minutes. The total cooking time will depend on your stovetop and the thickness of your pot, so keep a close eye on it.
- Once the rice is cooked, remove the pot from the heat and let it rest for 5-10 minutes before inverting onto a serving platter. This allows the tahdig to release from the bottom of the pot more easily.
Expert Tips & Tricks
- Rice Selection: While long-grain white rice is traditional, you can experiment with basmati rice for a slightly different flavor and texture. Just be sure to adjust the cooking time accordingly.
- Butter is Best: While some may be tempted to substitute margarine or oil for butter, the flavor and browning capabilities of butter are unmatched when it comes to creating the perfect tahdig.
- Patience is Key: The key to a perfectly crispy tahdig is low and slow cooking. Avoid the temptation to crank up the heat, as this will only result in a burnt crust and undercooked rice.
- Saffron Infusion: For an extra touch of flavor and aroma, bloom a pinch of saffron threads in a tablespoon of warm water and drizzle it over the rice before cooking.
- Don’t Peek Too Much: Resist the urge to constantly lift the lid and check on the rice, as this will release the steam and lengthen the cooking time.
Serving & Storage Suggestions
To serve tahdig, carefully invert the pot onto a large serving platter. The golden-brown crust should be facing upwards, revealing the beautiful, crispy tahdig. Garnish with fresh herbs like parsley or cilantro for a pop of color.
Leftover tahdig can be stored in an airtight container in the refrigerator for up to 3 days. To reheat, gently warm it in a low oven or in a skillet over medium heat. You can also microwave it, but the crust will lose some of its crispness. Freezing is not recommended as it will significantly alter the texture.
Nutritional Information
| Nutrient | Amount per Serving | % Daily Value |
|---|---|---|
| Calories | 473 kcal | 24% |
| Total Fat | 15.9 g | 24% |
| Saturated Fat | 9.9 g | 49% |
| Cholesterol | 40.7 mg | 13% |
| Sodium | 247.2 mg | 10% |
| Total Carbohydrate | 74 g | 24% |
| Dietary Fiber | 1.2 g | 4% |
| Sugars | 0.1 g | 0% |
| Protein | 6.8 g | 13% |
Variations & Substitutions
- Vegetarian/Vegan: While traditionally made with butter, you can substitute a high-quality vegan butter alternative. Coconut oil also works, though it will impart a subtle coconut flavor.
- Herb Infusions: Experiment with adding fresh herbs like dill, cilantro, or parsley to the rice for a burst of flavor.
- Spiced Tahdig: Add a pinch of turmeric, cumin, or cardamom to the rice for a warm and aromatic twist.
- Layered Tahdig: For a more elaborate presentation, layer the rice with sliced vegetables like potatoes, carrots, or zucchini before cooking. These vegetables will also become crispy and delicious.
FAQs (Frequently Asked Questions)
Q: Why is it important to rinse the rice before cooking?
A: Rinsing the rice removes excess starch, which prevents the rice from becoming sticky and gummy. This results in a lighter, fluffier texture.
Q: How do I prevent the tahdig from burning?
A: Cooking the rice over very low heat and adding small amounts of water as needed will help prevent burning. Keep a close eye on the rice and adjust the heat as necessary.
Q: Can I use a different type of pot for making tahdig?
A: A heavy-bottomed pot, such as a Dutch oven or a non-stick pot, is ideal for making tahdig as it helps to distribute heat evenly and prevent sticking.
Q: What should I do if the tahdig sticks to the bottom of the pot?
A: Let the pot sit for 5-10 minutes after cooking to allow the tahdig to release. If it still sticks, try placing the pot briefly in a sink filled with cold water.
Q: What can I serve with tahdig?
A: Tahdig is a versatile side dish that pairs well with a variety of Iranian stews, kebabs, and grilled meats. It’s also delicious served with yogurt and fresh herbs.
Final Thoughts
Tahdig might seem intimidating at first, but with a little practice and patience, you’ll be rewarded with a culinary masterpiece that’s sure to impress. Don’t be afraid to experiment with different variations and flavors to create your own signature tahdig. So, gather your ingredients, embrace the process, and get ready to experience the golden jewel of Persian cuisine. I encourage you to try this recipe and share your creations! Let me know in the comments how it turns out and what you paired it with. Enjoy!