
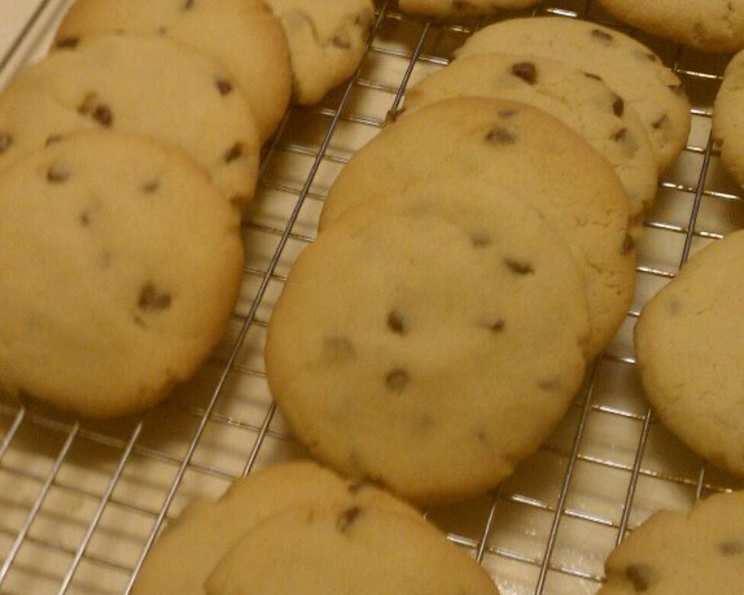
Grandma’s Crumbly Chocolate Chip Cookies
The scent of these cookies still instantly transports me back to Grandma’s cozy kitchen. I can almost feel the warmth of the oven, hear the gentle clinking of her mixing bowls, and see her hands, dusted with flour, deftly shaping each cookie. This wasn’t just baking; it was love made edible, a legacy passed down through generations. What set these apart from any other chocolate chip cookies were their unique, almost sandy texture and their delicate sweetness—a far cry from the chewy, overly-sugary versions you often find today.
Recipe Overview
- Prep Time: 15 minutes
- Cook Time: 10-12 minutes
- Total Time: 25-27 minutes
- Servings: 24-36 cookies
- Yield: 2-3 dozen cookies
- Dietary Type: Not specified
Ingredients
- 1 cup white sugar
- 1 cup brown sugar
- 1 cup shortening
- 1 cup vegetable oil
- 1 egg, beaten
- 1 tablespoon milk
- 1 teaspoon cream of tartar
- 1 teaspoon salt
- 1 teaspoon vanilla
- 1 teaspoon baking soda
- 8 ounces chocolate chips
- 3 3⁄4 cups flour
Equipment Needed
- Mixing bowls
- Cookie sheets
- Fork
- Measuring cups and spoons
- Oven
Instructions
- Preheat your oven to 350 degrees Fahrenheit (175 degrees Celsius). Ensure your oven rack is positioned in the center for even baking.
- In a large mixing bowl, combine the white sugar, brown sugar, shortening, and vegetable oil. Mix these ingredients thoroughly until they are well combined and the mixture appears light and fluffy. This is a crucial step as it ensures the proper texture of the cookies.
- Add the beaten egg and milk to the mixture. Continue mixing until everything is fully incorporated. Make sure the egg is well-beaten before adding to prevent streaks in the dough.
- In a separate bowl, whisk together the cream of tartar, salt, vanilla, baking soda, and flour. This ensures that the leavening agents are evenly distributed throughout the dry ingredients.
- Gradually add the dry ingredients to the wet ingredients, mixing until just combined. Be careful not to overmix the dough, as this can result in tough cookies.
- Gently fold in the chocolate chips, distributing them evenly throughout the cookie dough.
- Roll the dough into cookie-sized balls. Aim for consistent sizes to ensure even baking.
- Place the cookie dough balls on an ungreased cookie sheet, leaving some space between each cookie for spreading.
- Flatten each cookie with a fork. Dip the fork in water between impressions to prevent it from sticking to the dough. Create a checkerboard pattern on top of each cookie by pressing the fork down twice in a crisscross fashion. This helps to create the signature crumbly texture.
- Bake in the preheated oven for 10-12 minutes, or until the edges are lightly browned. Keep a close watch on the cookies, as baking times may vary depending on your oven.
- Remove the cookies from the oven and let them cool on the cookie sheet for a few minutes before transferring them to a wire rack to cool completely. This allows them to firm up slightly and prevents them from breaking.
Expert Tips & Tricks
- For extra crumbly cookies: Don’t overmix the dough. Overmixing develops the gluten in the flour, resulting in a tougher cookie.
- Even baking: Rotate the cookie sheets halfway through the baking time for more even browning.
- Temperature control: Use an oven thermometer to ensure your oven is accurately calibrated. Even a slight temperature difference can affect the texture of the cookies.
- Make ahead: The dough can be made ahead of time and stored in the refrigerator for up to 24 hours. Let it come to room temperature slightly before baking.
- Crispy edges: For crispier edges, bake the cookies slightly longer.
Serving & Storage Suggestions
Serve these cookies warm or at room temperature. They pair perfectly with a glass of cold milk, a cup of hot coffee, or a scoop of vanilla ice cream. Store leftover cookies in an airtight container at room temperature for up to 3 days. For longer storage, freeze the cookies in a freezer-safe bag or container for up to 2 months. To reheat, simply thaw at room temperature or warm briefly in a low oven.
Nutritional Information
| Nutrient | Amount per Serving | % Daily Value |
|---|---|---|
| Calories | 343.6 kcal | N/A |
| Calories from Fat | 187 g | 55% |
| Total Fat | 20.9 g | 32% |
| Saturated Fat | 5.1 g | 25% |
| Cholesterol | 7.8 mg | 2% |
| Sodium | 156.8 mg | 6% |
| Total Carbohydrate | 38.4 g | 12% |
| Dietary Fiber | 1.1 g | 4% |
| Sugars | 22.4 g | 89% |
| Protein | 2.7 g | 5% |
Note: Nutritional information is an estimate and may vary based on specific ingredients and portion sizes.
Variations & Substitutions
- Nutty Delight: Add 1/2 cup of chopped walnuts or pecans to the dough for a nutty flavor and added texture.
- Spice it Up: Incorporate 1/2 teaspoon of ground cinnamon or nutmeg for a warm, spiced cookie.
- Different Chocolate: Experiment with different types of chocolate chips, such as dark chocolate, white chocolate, or even peanut butter chips.
- Citrus Zest: Add the zest of one orange or lemon to the dough for a bright, citrusy twist.
- Gluten-Free: Substitute the all-purpose flour with a gluten-free blend for a gluten-free version. You may need to adjust the liquid slightly to achieve the right consistency.
FAQs (Frequently Asked Questions)
Q: What makes these cookies so crumbly?
A: The high proportion of shortening and oil, combined with the use of cream of tartar, contributes to the cookies’ tender and crumbly texture. Avoid overmixing the dough to maintain this texture.
Q: Can I use butter instead of shortening and oil?
A: While you can substitute butter, it will alter the texture of the cookies. The cookies will be chewier and less crumbly.
Q: Why do I need to flatten the cookies with a fork?
A: Flattening the cookies helps them to spread evenly during baking and creates the characteristic checkerboard pattern on top, which also contributes to the texture.
Q: Can I freeze the cookie dough?
A: Yes, you can freeze the cookie dough for up to 2 months. Roll the dough into balls, place them on a baking sheet, and freeze until solid. Then, transfer the frozen dough balls to a freezer-safe bag or container. Bake from frozen, adding a few extra minutes to the baking time.
Q: My cookies are spreading too thin. What am I doing wrong?
A: This could be due to several factors, such as using too much liquid, not chilling the dough, or using butter that is too soft. Try chilling the dough for 30 minutes before baking, and make sure your oven is accurately calibrated.
Final Thoughts
These cookies are more than just a recipe; they’re a connection to the past, a warm hug in cookie form. I encourage you to give them a try and experience the unique texture and flavor that sets them apart. Share them with loved ones, and perhaps they’ll become a cherished tradition in your own family, just as they are in mine. And please, let me know how they turn out – I’d love to hear your experience!