
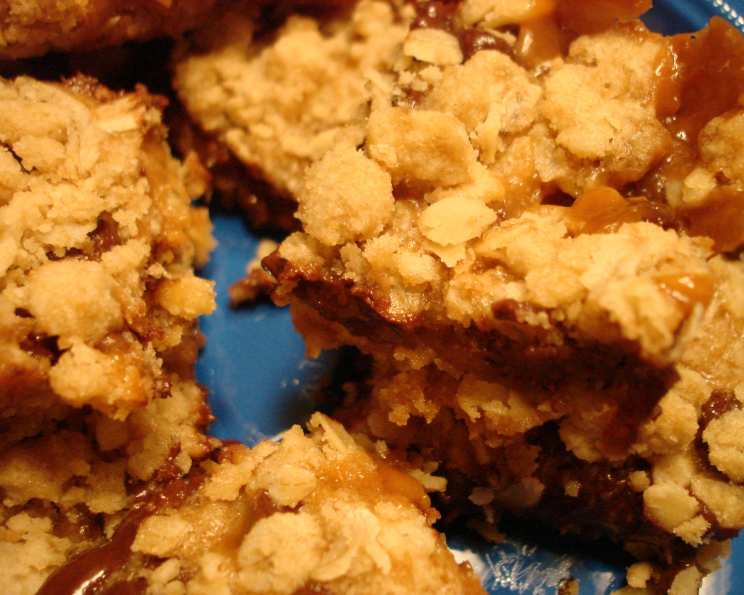
Crunchy Caramel Chocolate Layer Bars: A Sweet Memory
I can almost smell the waft of warm caramel and chocolate mingling in the air. These Crunchy Caramel Chocolate Layer Bars instantly transport me back to my childhood. My grandmother, a true queen of the kitchen, used to bake these for every family gathering. They were always the first thing to disappear from the dessert table, a testament to their irresistible combination of buttery crust, gooey caramel, rich chocolate, and that satisfying crunchy topping. Baking these bars now feels like a delicious way to connect with her memory, and I’m so excited to share this treasure with you.
Recipe Overview
- Prep Time: 15 minutes
- Cook Time: 25 minutes
- Total Time: 40 minutes
- Servings: 10-12
- Yield: 1 8-inch square pan of bars
- Dietary Type: Not specified
Ingredients
- 1 cup flour
- ¼ teaspoon salt
- ¼ teaspoon baking soda
- ½ cup brown sugar, packed
- ¾ cup quick-cooking oats
- ½ cup butter
- 24 caramels
- 2 tablespoons cream
- 2 tablespoons flour
- ½ cup semi-sweet chocolate chips
Equipment Needed
- 8-inch square baking pan
- Mixing bowls
- Measuring cups and spoons
- Microwave-safe bowl
- Microwave
- Knife or pastry blender
- Oven
- Cooling rack
Instructions
-
Preheat your oven to 350 degrees F (175 degrees C).
-
In a mixing bowl, combine the flour, salt, baking soda, brown sugar, and quick-cooking oats.
-
Cut in the butter using a pastry blender or knife until the mixture becomes crumbly. You can also use your fingers, but be sure to work quickly to keep the butter cold. Cold butter is key to a tender, crumbly crust.
-
Press all but one cup of the crumbly mixture into the bottom of an ungreased 8-inch square pan. Press it firmly and evenly to create a solid base.
-
Bake the crust at 350 degrees F (175 degrees C) for 10 minutes. This par-baking ensures that the crust is sturdy enough to support the caramel and chocolate layers.
-
While the crust is baking, prepare the caramel layer. In a microwave-safe bowl, combine the caramels and cream.
-
Heat the caramel and cream mixture in the microwave on low power, stirring frequently, until the caramels are completely melted and the mixture is smooth. This usually takes about 1-2 minutes, but microwave power varies, so keep a close eye on it to prevent burning.
-
Blend in the 2 tablespoons of flour into the melted caramel mixture. This will help to thicken the caramel and prevent it from being too runny. Ensure the flour is fully incorporated for a smooth texture.
-
Once the crust is out of the oven, carefully spread the caramel mixture evenly over the baked crust. Work quickly, as the caramel will start to set as it cools.
-
Sprinkle the semi-sweet chocolate chips evenly over the caramel layer.
-
Sprinkle the remaining one cup of the crumbly mixture over the chocolate chips. This will create a delicious, crunchy topping.
-
Bake the bars at 350 degrees F (175 degrees C) for another 12-15 minutes, or until the topping is lightly browned. Keep a close eye on them during the last few minutes to prevent burning.
-
Cool the bars completely in the pan on a wire rack before cutting them into squares. This is essential for clean cuts and to allow the caramel to set properly.
-
Cut into squares and enjoy!
Expert Tips & Tricks
- Salted Caramel Upgrade: For a more sophisticated flavor, use salted caramels instead of regular caramels. The touch of salt enhances the sweetness and adds a delightful complexity.
- Crust Variation: If you prefer a slightly softer crust, you can add a tablespoon of melted butter to the crumb mixture before pressing it into the pan.
- Perfect Caramel Consistency: Achieving the right caramel consistency is crucial. If your caramel seems too thick, add a teaspoon more of cream. If it’s too thin, microwave it for a few more seconds, stirring constantly.
- Chocolate Chunk Option: Substitute chocolate chips with roughly chopped chocolate chunks for a more intense chocolate experience.
- Prevent Sticking: Line the baking pan with parchment paper, leaving an overhang, before pressing in the crust. This makes it incredibly easy to lift the bars out after they’ve cooled.
Serving & Storage Suggestions
These Crunchy Caramel Chocolate Layer Bars are best served at room temperature. They can be stored in an airtight container at room temperature for up to 3 days. For longer storage, keep them in the refrigerator for up to a week. You can also freeze the bars for up to 2 months. Wrap them individually in plastic wrap and then place them in a freezer-safe container. To thaw, let them sit at room temperature for a few hours. They are delicious on their own, but also pair well with a scoop of vanilla ice cream or a dollop of whipped cream. Serve with a cup of coffee or a glass of cold milk.
Nutritional Information
| Nutrient | Amount per Serving | % Daily Value |
|---|---|---|
| Calories | 339 kcal | N/A |
| Calories from Fat | 136 kcal | N/A |
| Total Fat | 15.1 g | 23% |
| Saturated Fat | 8.6 g | 42% |
| Cholesterol | 29.4 mg | 9% |
| Sodium | 221.1 mg | 9% |
| Total Carbohydrate | 49.6 g | 16% |
| Dietary Fiber | 1.5 g | 5% |
| Sugars | 31.2 g | N/A |
| Protein | 4 g | 8% |
Note: Nutritional information is an estimate and may vary based on specific ingredients and serving sizes.
Variations & Substitutions
- Gluten-Free Option: Substitute the all-purpose flour with a gluten-free blend. Ensure the blend contains xanthan gum for proper binding.
- Nutty Delight: Add chopped nuts, such as pecans or walnuts, to the crumb mixture for added texture and flavor.
- White Chocolate Variation: Use white chocolate chips instead of semi-sweet chocolate chips for a sweeter, creamier flavor.
- Spice It Up: Add a pinch of cinnamon or nutmeg to the crumb mixture for a warm, spiced flavor.
- Dairy-Free: Use dairy-free butter and cream alternatives to make these bars dairy-free. Look for vegan caramels as well.
FAQs (Frequently Asked Questions)
Q: Can I use pre-made caramel candies for this recipe?
A: Yes, you can use pre-made caramel candies as long as they melt smoothly. Unwrap them and follow the melting instructions in the recipe.
Q: What if my caramel layer is too hard after baking?
A: This could be due to overbaking. Make sure to bake the bars for the recommended time and temperature. If it’s still hard, you can try warming individual bars slightly in the microwave before serving.
Q: Can I make these bars ahead of time?
A: Absolutely! These bars are great for making ahead. Store them in an airtight container at room temperature or in the refrigerator until ready to serve.
Q: My crust is too crumbly and won’t stay together. What did I do wrong?
A: Ensure that your butter is cold and cut into the flour mixture thoroughly. If the mixture is still too dry, you can add a tablespoon of melted butter to help it bind together.
Q: How do I get clean cuts when slicing the bars?
A: Make sure the bars are completely cooled before cutting. Use a sharp knife and wipe it clean between each cut for the neatest results. You can also chill the bars in the refrigerator for an hour before cutting.
Final Thoughts
I hope you’re as excited as I am to try these Crunchy Caramel Chocolate Layer Bars! They’re more than just a dessert; they’re a slice of nostalgia, a comforting indulgence, and a reminder that the simplest ingredients can create the most extraordinary flavors. Don’t hesitate to experiment with variations to make them your own. I’d love to hear your thoughts and see your creations, so please share your feedback and pictures. These bars pair perfectly with a scoop of vanilla ice cream or a warm cup of coffee. Happy baking!