
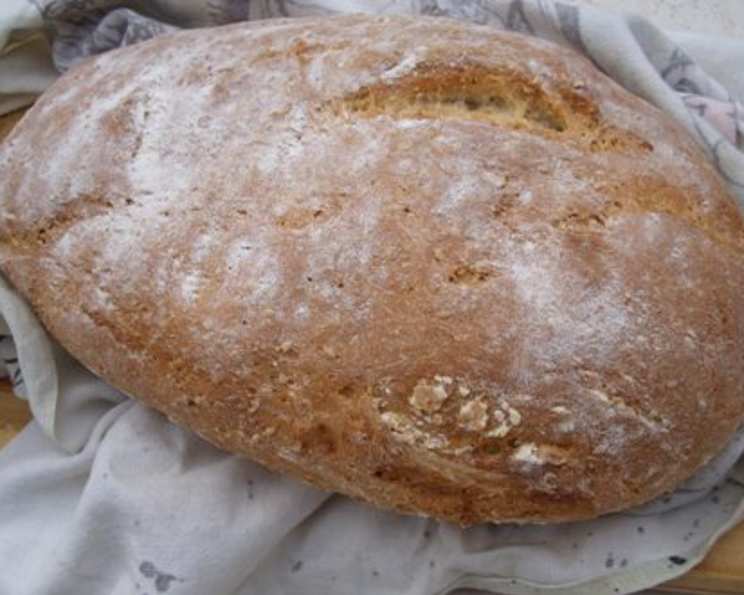
Crunchy Farmhouse Bread: A Taste of Rustic Simplicity
The aroma of baking bread has always been a siren song to me, a comforting reminder of simpler times. My grandmother, a woman of few words but boundless love, always had a loaf of rustic bread cooling on her countertop. It wasn’t fancy, but it was honest – a hearty, satisfying bread that spoke of the earth and the hands that nurtured it. I remember sneaking slices, still warm, the crunchy crust giving way to a soft, chewy interior. This Crunchy Farmhouse Bread recipe, with its wholesome grains and satisfying texture, takes me right back to her kitchen, filled with the warmth of family and the simple joy of good food.
Recipe Overview
- Prep Time: 3 hours (includes rising time)
- Cook Time: 45 minutes
- Total Time: 3 hours 45 minutes
- Servings: 12-16 slices
- Yield: 1 loaf
- Dietary Type: Vegetarian
Ingredients
- 1/2 teaspoon granulated sugar
- 1 cup warm water (not too hot, about 105-115°F)
- 2 teaspoons active dry yeast
- 2 tablespoons liquid honey
- 2 tablespoons butter, melted
- 1 egg, beaten
- 2 1/2 cups all-purpose flour (approximately, plus more for dusting)
- 3/4 cup whole wheat flour
- 1/4 cup quick-cooking rolled oats
- 1/4 cup cornmeal
- 1/4 cup natural bran
- 1/4 cup millet (or sesame seeds as a substitute)
- 1 teaspoon salt
Equipment Needed
- Large mixing bowl
- Measuring cups and spoons
- Wooden spoon
- Floured surface
- Greased bowl
- Plastic wrap
- Greased baking sheet
- Clean kitchen towel
- Serrated knife
- Wire rack
Instructions
-
In a large bowl, dissolve the sugar in the warm water.
-
Sprinkle in the active dry yeast. Let it stand for 10 minutes, or until it becomes frothy. This step is crucial; if the yeast doesn’t froth, it’s likely dead, and your bread won’t rise properly.
-
Whisk in the liquid honey, melted butter, and beaten egg. Make sure the butter isn’t too hot when you add the egg, or it could cook the egg slightly.
-
With a wooden spoon, stir in 2 cups of the all-purpose flour, the whole wheat flour, rolled oats, cornmeal, natural bran, millet (or sesame seeds), and salt until the mixture is smooth.
-
Gradually stir in enough of the remaining all-purpose flour to form a slightly sticky dough. You might not need all of the flour; the amount can vary depending on the humidity.
-
Turn the dough out onto a lightly floured surface.
-
Knead the dough for 8 to 10 minutes, or until it becomes smooth and elastic. As you knead, dust the surface with as much of the remaining flour as necessary to prevent the dough from sticking. Proper kneading is essential for developing the gluten, which gives the bread its structure.
-
Place the kneaded dough in a greased bowl, turning it to grease all over. This prevents the dough from drying out as it rises.
-
Cover the bowl with plastic wrap.
-
Let the dough rise in a warm, draft-free place until it has doubled in bulk, about 1-1/2 hours. A warm oven (turned off) or a sunny spot works well.
-
After the first rise, punch down the dough to release the trapped air.
-
Turn the dough out onto a lightly floured surface.
-
Knead the dough into a round loaf. To shape it, stretch the dough down all around and pinch it underneath to create a smooth top surface.
-
Dust the top of the loaf with flour.
-
Place the loaf on a greased baking sheet.
-
Cover it with a clean kitchen towel.
-
Let the loaf rise again until it has doubled in bulk, about 45 to 60 minutes.
-
Using a serrated knife, slash a shallow grid pattern on top of the loaf. This allows the bread to expand properly in the oven and creates a visually appealing crust.
-
Bake the loaf in the center of a preheated oven at 375°F (190°C) for 45 minutes, or until it is golden brown and sounds hollow when tapped on the bottom. The internal temperature should reach around 200-210°F.
-
Remove the loaf from the pan.
-
Let it cool completely on a wire rack before slicing. This prevents the bread from becoming gummy.
Bread Machine Instructions:
-
Choose the whole grain setting on your bread machine.
-
Add the ingredients to the bread machine pan in the following order (unless your manufacturer’s instructions say otherwise): Wet ingredients first (warm water, liquid honey, melted butter, beaten egg), then sugar and salt, followed by dry ingredients (all-purpose flour, whole wheat flour, rolled oats, cornmeal, natural bran, millet).
-
Sprinkle the yeast over the top, ensuring it doesn’t touch the liquid.
-
Select the appropriate setting and start the machine.
-
Let the baked loaf cool completely on a rack before slicing.
Expert Tips & Tricks
- For an extra crunchy crust, lightly mist the loaf with water before placing it in the oven. You can also place a pan of hot water on the bottom rack of the oven to create steam, which will help the crust develop.
- If you don’t have millet, you can substitute sesame seeds, flax seeds, or sunflower seeds.
- To enhance the flavor, try adding a tablespoon of molasses to the dough.
- If your kitchen is cold, you can speed up the rising process by placing the bowl of dough in a slightly warmed oven (turned off) or in a warm water bath.
- Don’t over-knead the dough, as this can result in a tough bread.
- The best way to check for doneness is to use an instant-read thermometer. The internal temperature of the bread should be around 200-210°F.
Serving & Storage Suggestions
Serve this Crunchy Farmhouse Bread warm, sliced, and with a generous spread of butter or your favorite jam. It’s also delicious toasted or used for sandwiches. Store the cooled loaf in a breadbox or airtight container at room temperature for up to 3 days. For longer storage, wrap the loaf tightly in plastic wrap and freeze it for up to 2 months. To reheat, thaw the frozen bread at room temperature and then warm it in a preheated oven at 350°F (175°C) for about 10-15 minutes.
Nutritional Information
| Nutrient | Amount per Serving (approx.) | % Daily Value (approx.) |
|---|---|---|
| Calories | 150 kcal | 8% |
| Total Fat | 3g | 4% |
| Saturated Fat | 1g | 5% |
| Cholesterol | 15mg | 5% |
| Sodium | 150mg | 7% |
| Total Carbohydrate | 28g | 10% |
| Dietary Fiber | 2g | 7% |
| Sugars | 2g | – |
| Protein | 4g | 8% |
Note: Nutritional information is an estimate and may vary based on specific ingredients and serving size.
Variations & Substitutions
- Gluten-Free Version: Substitute the all-purpose and whole wheat flours with a gluten-free flour blend. You may need to adjust the amount of liquid to achieve the right dough consistency.
- Dairy-Free Version: Replace the butter with a dairy-free butter substitute or olive oil.
- Vegan Version: Replace the butter with a dairy-free butter substitute or olive oil, and use a flax egg (1 tablespoon of ground flaxseed mixed with 3 tablespoons of water, let sit for 5 minutes) instead of the egg.
- Seed Variations: Experiment with different seeds like poppy seeds, sunflower seeds, or pumpkin seeds for added flavor and texture.
- Herb Infusion: Add fresh or dried herbs like rosemary, thyme, or oregano to the dough for a savory twist.
FAQs (Frequently Asked Questions)
Q: Why is my dough not rising?
A: Several factors can affect dough rising, including old or inactive yeast, water that is too hot or too cold, and a cold environment. Make sure your yeast is fresh and that the water is warm (105-115°F). Also, ensure the dough is placed in a warm, draft-free location.
Q: How do I know when the bread is done?
A: The bread is done when it is golden brown and sounds hollow when tapped on the bottom. The internal temperature should reach around 200-210°F when measured with an instant-read thermometer.
Q: Can I use instant yeast instead of active dry yeast?
A: Yes, you can. Use the same amount of instant yeast (2 teaspoons), and you can add it directly to the flour without proofing it in water first.
Q: My bread is too dense. What did I do wrong?
A: Dense bread can be caused by several factors, including not enough kneading, not enough rising time, or too much flour. Make sure you knead the dough for the recommended time and allow it to rise properly. Also, avoid adding too much flour, as this can make the bread tough.
Q: Can I make this bread ahead of time?
A: Yes, you can prepare the dough ahead of time and let it rise in the refrigerator overnight. In the morning, punch down the dough, shape it into a loaf, and let it rise again before baking.
Final Thoughts
I hope this Crunchy Farmhouse Bread brings as much joy to your kitchen as it does to mine. There’s something truly special about the simple act of baking bread, and the aroma of a freshly baked loaf is a gift in itself. Don’t be afraid to experiment with different variations and substitutions to make it your own. And please, share your creations and feedback! This bread pairs perfectly with a hearty soup, a simple salad, or just a pat of butter and a cup of coffee. Happy baking!