
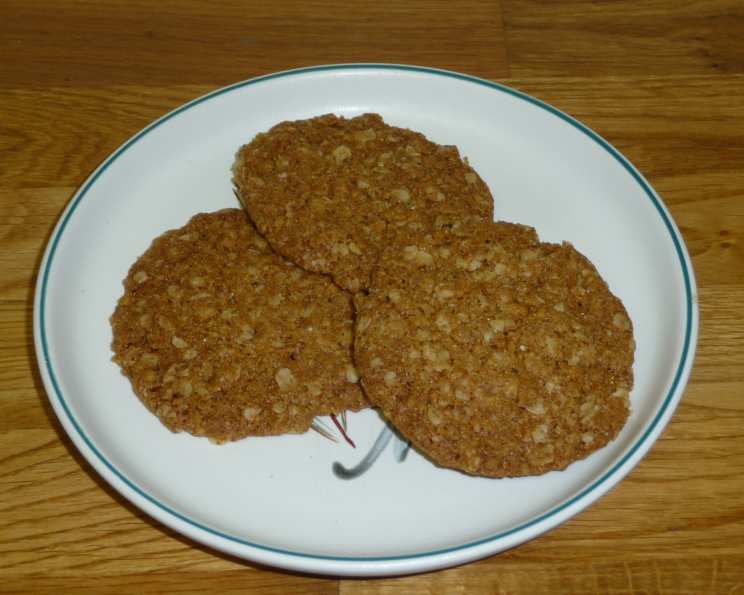
The Irresistible Crunch of Homemade Oat Biscuits
The scent of baking is, for me, a direct portal to childhood. I can still picture my grandmother’s bustling kitchen, sunlight streaming through the window as she deftly transformed simple ingredients into comforting treats. These oat biscuits, with their satisfying crunch and subtle sweetness, evoke those cherished memories. I remember sneaking one, still warm from the oven, the buttery aroma a delightful secret between us. The simplicity of the ingredients belies the incredible flavor and texture – a testament to the magic that can happen when oats, sugar, and a little bit of love combine in a hot oven.
Recipe Overview
- Prep Time: 15 minutes
- Cook Time: 25-30 minutes
- Total Time: 40-45 minutes
- Yields: 18-20 biscuits
- Dietary Type: Vegetarian
Ingredients
- 85 g stone ground whole wheat flour
- ½ teaspoon bicarbonate of soda
- 85 g caster sugar
- 85 g rolled oats
- 85 g butter
- 1 tablespoon milk
- 1 tablespoon golden syrup
Equipment Needed
- 2 baking trays
- Silicon or parchment paper
- Mixing bowl
- Saucepan
- Fish slice
- Wire rack
Instructions
-
Pre-heat your oven to a cool temperature: 300°F (150°C, gas mark 2). This gentle heat is key to achieving the perfect crunchy texture.
-
Prepare your baking trays. Cover both trays with either silicon or parchment paper. This will prevent the biscuits from sticking and makes for easy cleanup.
-
In a mixing bowl, stir together the stone ground whole wheat flour, bicarbonate of soda, rolled oats, and caster sugar. Ensure the ingredients are evenly distributed for a consistent bake.
-
In a saucepan, over gentle heat, melt together the butter, golden syrup, and milk. Stir continuously to prevent burning and ensure a smooth, homogenous mixture.
-
Pour the melted butter mixture into the dry flour mixture.
-
Mix well until all the dry ingredients are thoroughly incorporated and a slightly sticky dough forms. Don’t overmix.
-
Take a rounded teaspoon of the mixture.
-
Roll it gently in your hands to form a small ball. The size is important for even cooking.
-
Place the balls of mixture onto the prepared baking trays, ensuring they are spaced 4 inches apart. These biscuits spread significantly during baking, so ample space is crucial.
-
Slightly flatten the balls with your fingers. A gentle press is all that’s needed.
-
Bake for 25 to 30 minutes. Keep a close eye on them; they should be a lovely golden brown.
-
Once baked, cool the biscuits on the trays for 2 to 3 minutes. This allows them to firm up slightly, making them easier to handle.
-
Use a fish slice to carefully lift the biscuits off the lining paper.
-
Place the biscuits on a wire rack to cool completely. This ensures they retain their crispness.
-
Once fully cooled, store the biscuits in an air-tight tin to maintain their delightful crunch.
Expert Tips & Tricks
- Butter Temperature Matters: Use butter straight from the fridge. The colder butter will help prevent excessive spreading during baking.
- Golden Syrup Substitute: If you don’t have golden syrup, light corn syrup or honey can be used as a substitute, although the flavor profile will be slightly different.
- Even Baking: Ensure your oven is properly preheated and calibrated for even baking. Rotating the baking sheets halfway through can also help achieve consistent results.
- Texture Variation: For a chewier biscuit, slightly underbake them. For maximum crunch, extend the baking time by a few minutes, but watch carefully to avoid burning.
- Add-Ins: Feel free to add a handful of chopped nuts, dried fruit, or chocolate chips to the dough for extra flavor and texture.
Serving & Storage Suggestions
These oat biscuits are wonderful served simply with a cup of tea or coffee. They also make a delightful addition to a cheese board or can be enjoyed as a light snack.
To store, place the cooled biscuits in an airtight container. They will keep well at room temperature for up to 5 days. If you live in a humid climate, storing them in the refrigerator can help maintain their crispness for longer, up to a week. These biscuits can be frozen for up to 2 months. Ensure they are completely cooled before freezing, and thaw them at room temperature before serving.
Nutritional Information
| Nutrient | Amount per Serving | % Daily Value |
|---|---|---|
| Calories | 74 kcal | 4% |
| Total Fat | 4.2 g | 6% |
| Saturated Fat | 2.5 g | 12% |
| Cholesterol | 10.2 mg | 3% |
| Sodium | 70 mg | 2% |
| Total Carbohydrate | 8.9 g | 3% |
| Dietary Fiber | 0.5 g | 2% |
| Sugars | 5.1 g | 10% |
| Protein | 0.7 g | 1% |
Variations & Substitutions
- Gluten-Free Option: Substitute the stone ground whole wheat flour with a gluten-free flour blend. Be sure to choose a blend that contains xanthan gum for binding.
- Dairy-Free Version: Use a plant-based butter alternative, such as coconut oil or vegan butter sticks, and a non-dairy milk, like almond or soy milk. Ensure the plant-based butter has a high fat content for the best texture.
- Spice it Up: Add a pinch of cinnamon, nutmeg, or ginger to the dry ingredients for a warm, comforting flavor.
- Nutty Goodness: Incorporate chopped almonds, walnuts, or pecans into the dough for added crunch and flavor.
- Citrus Zest: Add the zest of an orange or lemon to the batter for a bright, refreshing twist.
FAQs (Frequently Asked Questions)
Q: Why are my oat biscuits spreading too much?
A: Overspreading can be caused by using butter that is too soft or by not chilling the dough adequately. Ensure the butter is cold and consider refrigerating the dough for 30 minutes before baking.
Q: Can I use quick oats instead of rolled oats?
A: While you can substitute quick oats, the texture of the biscuits will be different. Rolled oats provide a heartier, chewier texture, whereas quick oats will result in a finer, more delicate biscuit.
Q: How do I prevent my biscuits from burning on the bottom?
A: To prevent burning, ensure your oven rack is positioned in the center of the oven. You can also place another baking sheet underneath the one with the biscuits to act as a heat shield.
Q: Can I make these biscuits ahead of time?
A: Yes, you can prepare the dough ahead of time and store it in the refrigerator for up to 2 days. Let the dough come to room temperature slightly before rolling and baking.
Q: Why are my biscuits not crunchy?
A: The crunchy texture is achieved through the low baking temperature and allowing the biscuits to cool completely on a wire rack. Make sure you are not baking at a higher temperature and avoid storing them in a container while they’re still warm.
Final Thoughts
I sincerely hope this recipe brings you as much joy as it has brought me and my family over the years. The simple pleasure of a homemade biscuit, warm from the oven, is truly something special. Don’t be afraid to experiment with variations and make this recipe your own. I encourage you to share your baking adventures and feedback; I’d love to hear about your experiences and creative twists! Serve these crunchy oat biscuits with a steaming mug of tea for the perfect afternoon treat. Happy baking!