
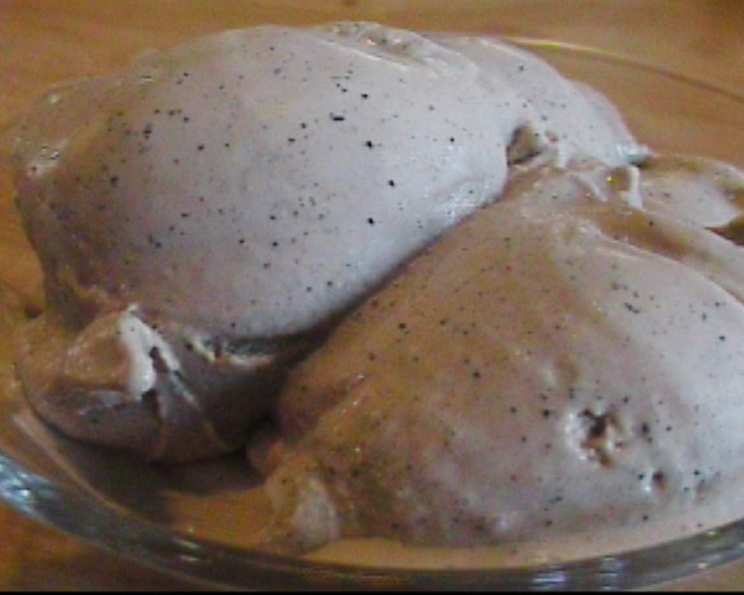
Crushed Coffee Bean Ice Cream: An Intense Frozen Delight
My grandmother, a woman of few words but immense passion, always had a pot of strong, dark coffee brewing. The aroma was as much a part of her as her weathered hands and the twinkle in her eye. This Crushed Coffee Bean Ice Cream reminds me of her – intensely flavorful, unapologetically bold, and utterly comforting. It’s a taste of pure, unadulterated coffee bliss, transformed into a frozen treat that lingers on the palate long after the last spoonful is gone.
Recipe Overview
- Prep Time: 20 minutes
- Cook Time: 15 minutes
- Total Time: At least 2 hours (including chilling and freezing)
- Servings: Approximately 1 quart
- Yield: About 6-8 servings
- Dietary Type: Not Vegan, Not Gluten-Free, Contains Dairy
Ingredients
- 2 cups heavy cream
- 2 cups milk
- ½ cup coffee beans, roasted for 10 minutes at 400 degrees F and crushed
- 8 egg yolks
- ¾ cup sugar
Equipment Needed
- Medium saucepan
- Medium bowl
- Whisk
- Wooden spoon
- Fine mesh sieve
- Ice cream maker
Instructions
-
In a medium saucepan, combine the heavy cream, milk, and crushed coffee beans. Heat over medium heat to just under a boil. Watch carefully to prevent scorching. Small bubbles should form around the edges, but the mixture should not be vigorously boiling.
-
Remove the saucepan from the heat and let the mixture stand for at least 1 hour. This allows the coffee beans to infuse their rich flavor into the cream and milk. For a more intense coffee flavor, you can let it infuse for up to 2 hours.
-
While the coffee is infusing, prepare an ice bath. This will help cool the custard base quickly later. Fill a large bowl with ice and add a little water.
-
In a medium bowl, whisk together the egg yolks and sugar until the mixture is pale yellow and slightly thickened. This usually takes about 2-3 minutes of vigorous whisking.
-
After the coffee infusion is complete, gently reheat the cream mixture over medium-low heat until it is warm to the touch but not simmering. This will help the mixture incorporate smoothly with the egg yolks.
-
Slowly pour the warm cream mixture into the bowl with the egg yolks and sugar, whisking constantly to prevent the eggs from scrambling. This process is called tempering. Add the cream in a slow, steady stream.
-
Once the cream and egg mixture are fully combined, pour it back into the saucepan. Cook over medium heat, stirring constantly with a wooden spoon, until the mixture thickens enough to coat the back of the spoon. This should take about 5-8 minutes. To test for doneness, dip the spoon into the custard and run your finger across the back. If the line remains distinct and doesn’t immediately run back together, the custard is ready. Be careful not to overheat the mixture or it will curdle.
-
Immediately strain the custard through a fine-mesh sieve into a clean bowl. This removes any solids from the coffee beans and ensures a smooth, creamy ice cream texture.
-
Place the bowl with the strained custard into the ice bath to cool it down quickly. Stir occasionally to help release the heat. Cooling the custard rapidly prevents ice crystals from forming, resulting in a smoother ice cream.
-
Once the custard is completely chilled (this usually takes at least 1-2 hours in the refrigerator), pour it into your ice cream maker and freeze according to the manufacturer’s instructions. The freezing time will vary depending on your ice cream maker, but it generally takes around 20-30 minutes.
-
Once the ice cream is churned, it will have a soft-serve consistency. For a firmer texture, transfer it to an airtight container and freeze for an additional 2-3 hours.
Expert Tips & Tricks
- Roasting the coffee beans before crushing them is crucial. It intensifies their flavor and releases their aromatic oils. Be sure to let the beans cool slightly before crushing, as they will be very hot immediately after roasting.
- Do not skip the straining step. It guarantees a silky-smooth ice cream base.
- For an even more intense coffee flavor, consider adding a tablespoon of instant espresso powder to the custard base after straining.
- If your custard curdles while cooking, don’t despair! Immediately remove it from the heat and whisk vigorously. You can also strain it through a fine-mesh sieve to remove any large lumps.
- Chill your ice cream maker bowl thoroughly before using it. This will help the ice cream freeze faster and more evenly.
- If you want to incorporate mix-ins, like chocolate shavings or chopped nuts, add them during the last few minutes of churning.
Serving & Storage Suggestions
Serve this intensely flavored Crushed Coffee Bean Ice Cream on its own for a pure coffee experience, or pair it with chocolate brownies, biscotti, or a warm apple crumble. A dollop of whipped cream and a sprinkle of cocoa powder can also elevate the presentation.
Store leftover ice cream in an airtight container in the freezer. Properly stored, it will last for up to 2 weeks. After that, it may start to develop ice crystals and lose its creamy texture.
This ice cream is best served straight from the freezer, but allow it to soften slightly for a few minutes before scooping for easier serving. Avoid letting it sit at room temperature for too long, as it will melt quickly.
Nutritional Information
Note: Nutritional information is an estimate and may vary based on specific ingredients and portion sizes.
| Nutrient | Amount per Serving | % Daily Value |
|---|---|---|
| Calories | 350 kcal | 18% |
| Total Fat | 25g | 38% |
| Saturated Fat | 15g | 75% |
| Cholesterol | 200mg | 67% |
| Sodium | 50mg | 2% |
| Total Carbohydrate | 20g | 7% |
| Dietary Fiber | 0g | 0% |
| Sugars | 18g | |
| Protein | 5g | 10% |
Variations & Substitutions
- Decaf Version: Use decaffeinated coffee beans for a caffeine-free version of this ice cream.
- Spiced Coffee: Add a pinch of cinnamon, nutmeg, or cardamom to the cream mixture for a warm, spiced coffee flavor.
- Mocha Ice Cream: Add 2 tablespoons of unsweetened cocoa powder to the cream mixture along with the coffee beans.
- Vegan Option: While not easily achieved with this recipe without drastically altering the flavor, consider using a high-fat coconut cream alternative for the heavy cream and substituting the egg yolks with a vegan custard base. The resulting flavor profile will be notably different.
- Different Coffee Bean Varietals: Experiment with different types of coffee beans to explore various flavor profiles.
FAQs (Frequently Asked Questions)
Q: Why do I need to roast the coffee beans before crushing them?
A: Roasting the coffee beans intensifies their flavor and releases their aromatic oils, resulting in a much richer and more complex coffee ice cream.
Q: Can I use pre-ground coffee instead of crushing whole beans?
A: While you can, using freshly crushed coffee beans provides a much more intense and authentic coffee flavor. Pre-ground coffee often lacks the same level of freshness and aroma.
Q: How long can I store this ice cream in the freezer?
A: Properly stored in an airtight container, this ice cream will last for up to 2 weeks in the freezer. After that, it may start to develop ice crystals and lose its creamy texture.
Q: My custard curdled while cooking. What did I do wrong?
A: Overheating the custard can cause the egg yolks to scramble. Cook the custard over medium heat, stirring constantly, and remove it from the heat as soon as it thickens enough to coat the back of a spoon. If it curdles, whisk vigorously or strain it through a fine-mesh sieve.
Q: Can I add alcohol to this ice cream?
A: Yes, you can add a tablespoon or two of coffee liqueur (like Kahlua) to the custard base after straining for an extra layer of flavor.
Final Thoughts
This Crushed Coffee Bean Ice Cream is more than just a dessert; it’s an experience. The intense coffee flavor, combined with the creamy texture, is a truly unforgettable treat. I encourage you to try this recipe and discover the magic of homemade ice cream. Don’t be afraid to experiment with variations and find your perfect cup of coffee in frozen form. Share your creations with friends and family, and let them experience the pure joy of this coffee-infused delight. And if you are feeling particularly adventurous, try pairing it with a shot of espresso for an affogato that will truly awaken your senses!