
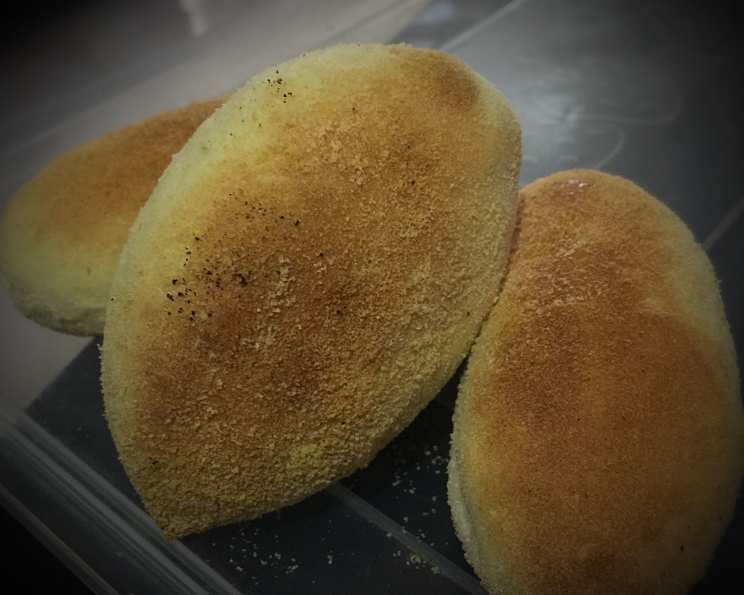
Crusty Pan De Sal: A Taste of Home
The smell alone transports me back to my Lola’s kitchen. Sunlight streaming through the window, the gentle clatter of pots and pans, and the unmistakable aroma of freshly baked bread. But it wasn’t just any bread; it was Pan De Sal, those little golden-brown rolls that hold a piece of my heart and a whole lot of Filipino heritage. Each bite, dipped in a strong cup of coffee, was a warm embrace, a reminder of family and simple joys.
Recipe Overview
- Prep Time: 2 hours
- Cook Time: 15-20 minutes
- Total Time: 3 hours 20 minutes
- Yields: 24 rolls
- Dietary Type: Not specified, but easily adaptable
Ingredients
- 1 tablespoon shortening
- 1 tablespoon salt
- 1 tablespoon sugar
- 1 cup boiling water
- 1 cup water
- 2 ½ teaspoons dry yeast
- 5 cups sifted flour, plus more for dusting
- Breadcrumbs, for coating
Equipment Needed
- Large mixing bowl
- Measuring cups and spoons
- Lightly floured board
- Greased bowl
- Cookie sheet
- Oven
Instructions
- In a large mixing bowl, combine the shortening, sugar, and salt with the boiling water. The hot water will help dissolve the shortening and sugar.
- Allow the mixture to cool to lukewarm. This is crucial, as overly hot water can kill the yeast, preventing the dough from rising.
- Add the water (at room temperature or slightly warm) to the cooled mixture.
- Sprinkle in the dry yeast and stir until completely dissolved.
- Let the mixture stand for about 5 minutes. You should see the yeast begin to activate, forming a slightly foamy layer on top. This confirms that your yeast is alive and well.
- Gradually add the sifted flour to the bowl, mixing until a shaggy dough forms.
- Turn the dough out onto a lightly floured board.
- Knead the dough until it becomes smooth and elastic, about 8-10 minutes. The kneading process develops the gluten in the flour, which gives the Pan De Sal its characteristic chewy texture.
- Place the kneaded dough in a greased bowl, ensuring all sides of the dough are coated with shortening. This prevents the dough from drying out as it rises.
- Cover the bowl with a clean kitchen towel or plastic wrap.
- Let the dough rise in a warm place until it has doubled in size, approximately 1 to 1 ½ hours. The warmer the environment, the faster the dough will rise. A good trick is to place the bowl in a slightly warmed (but turned off) oven.
- Once the dough has doubled, punch it down to release the excess air.
- Turn the dough out onto a lightly floured board again.
- Divide the dough into 24 equal parts. This will ensure that all your Pan De Sal rolls are uniform in size.
- Shape each piece of dough into an oval. A gentle rolling motion with your hands works well.
- Lightly roll each oval in breadcrumbs, ensuring they are evenly coated. The breadcrumbs give the Pan De Sal its signature crusty exterior.
- Place the breadcrumb-coated ovals on a greased cookie sheet, spacing them about 6 inches apart. This allows them enough room to expand during the second rise.
- Cover the cookie sheet with a clean kitchen towel and let the rolls rise in a warm place, free from drafts, until light, about 1 hour.
- Preheat your oven to 425 degrees Fahrenheit (220 degrees Celsius).
- Bake the Pan De Sal in the preheated oven for 15-20 minutes, or until they are golden brown. Keep a close eye on them, as ovens can vary. The Pan De Sal are done when they have a nice golden color and sound hollow when tapped on the bottom.
- Remove from oven and let cool slightly before serving.
Expert Tips & Tricks
- Sifting the flour ensures a lighter and airier texture in your Pan De Sal. Don’t skip this step!
- Proof your yeast before adding it to the other ingredients. If it doesn’t foam up, it’s likely dead and you’ll need to use fresh yeast.
- For a richer flavor, try using melted butter instead of shortening to grease the bowl.
- If you want a slightly sweeter Pan De Sal, increase the sugar by ½ to 1 tablespoon.
- If you live in a very dry climate, you may need to add a tablespoon or two of extra water to the dough to prevent it from drying out.
- Don’t overbake the Pan De Sal, as they can become dry and hard.
- To achieve an even golden-brown color, rotate the cookie sheet halfway through baking.
Serving & Storage Suggestions
Pan De Sal is best served warm, straight from the oven. It’s delicious on its own, or with butter, jam, cheese, or even dipped in coffee or hot chocolate. Leftover Pan De Sal can be stored in an airtight container at room temperature for up to 2 days. To keep them longer, store them in the refrigerator for up to a week, or freeze them for up to 2 months. To reheat, simply wrap them in foil and warm them in a low oven (300 degrees Fahrenheit) for about 10 minutes. You can also refresh them by briefly microwaving them with a damp paper towel.
Nutritional Information
| Nutrient | Amount per Serving | % Daily Value |
|---|---|---|
| Calories | 102.8 kcal | Not Specified |
| Calories from Fat | 7 g | 7% |
| Total Fat | 0.8 g | 1% |
| Saturated Fat | 0.2 g | 0% |
| Cholesterol | 0 mg | 0% |
| Sodium | 291.8 mg | 12% |
| Total Carbohydrate | 20.6 g | 6% |
| Dietary Fiber | 0.8 g | 3% |
| Sugars | 0.6 g | 2% |
| Protein | 2.9 g | 5% |
Variations & Substitutions
- For a slightly different flavor, try using whole wheat flour instead of all-purpose flour. You may need to adjust the amount of water slightly, as whole wheat flour absorbs more liquid.
- If you’re looking for a richer flavor, substitute half of the water with milk.
- Experiment with different types of breadcrumbs. Panko breadcrumbs will give you a crispier crust.
- Add a pinch of garlic powder or onion powder to the dough for a savory twist.
- For a sweeter version, add a teaspoon of cinnamon to the dough and use cinnamon sugar instead of plain breadcrumbs for coating.
FAQs (Frequently Asked Questions)
Q: Why is my Pan De Sal not rising?
A: There are a few reasons why your dough might not be rising. Make sure your yeast is fresh and active, and that the water you’re using is not too hot, as this can kill the yeast. Also, ensure the dough is in a warm, draft-free environment.
Q: Can I use a stand mixer to make this dough?
A: Absolutely! Use the dough hook attachment and mix on low speed until the dough comes together, then increase the speed to medium and knead for about 8-10 minutes.
Q: How do I prevent the Pan De Sal from drying out?
A: Be careful not to overbake them. Also, storing them in an airtight container will help to keep them soft. If they do dry out a bit, you can refresh them by wrapping them in a damp paper towel and microwaving them for a few seconds.
Q: Can I make the dough ahead of time?
A: Yes, you can prepare the dough ahead of time and store it in the refrigerator for up to 24 hours. Just punch it down before refrigerating, and then let it come to room temperature before shaping and baking.
Q: What can I serve with Pan De Sal?
A: Pan De Sal is incredibly versatile! It’s delicious with butter, jam, cheese, eggs, or even used as a base for mini sandwiches. In the Philippines, it’s often enjoyed with coffee or hot chocolate for breakfast or as a snack.
Final Thoughts
I hope this recipe brings as much joy to your kitchen as it has to mine. Baking Pan De Sal is more than just following instructions; it’s about connecting with a culture, sharing a piece of yourself, and creating memories that will last a lifetime. Don’t be afraid to experiment with variations, make it your own, and most importantly, enjoy the process! Share your creations and feedback – I’d love to hear how it goes! Now, go on and fill your home with the comforting aroma of freshly baked Pan De Sal.