
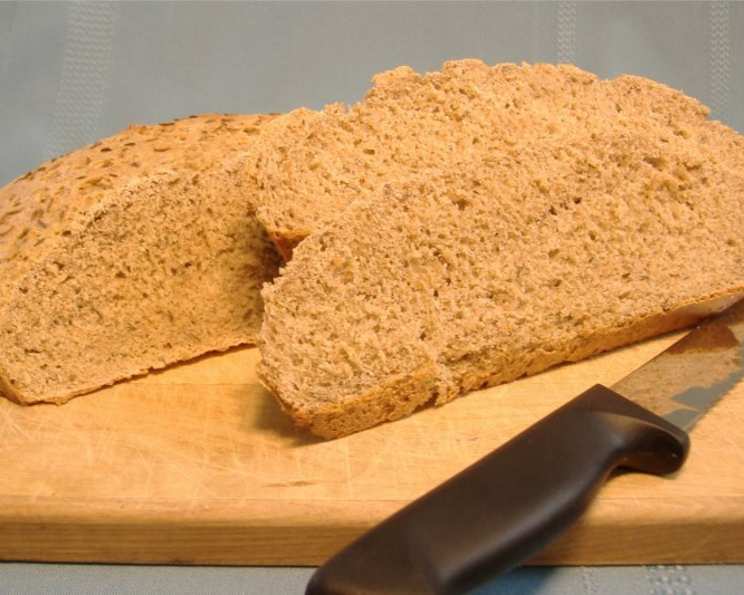
Crusty Sourdough Rye: An Ode to Rustic Baking
The scent of caraway and warm rye flour still evokes memories of my grandmother’s kitchen. She wasn’t a fancy baker, but her sourdough rye was legendary. The crust crackled like autumn leaves underfoot, and the inside was chewy and deeply flavorful. Every slice was a comforting reminder of home, a testament to the simple magic of flour, water, and time. This recipe is a tribute to her, a slightly modernized version that still captures the rustic heart of her original loaf.
Recipe Overview
- Prep Time: 30 minutes (plus 6-24 hours for initial sourdough rest)
- Cook Time: 29-34 minutes
- Total Time: 2 hours 59 minutes – 25 hours 34 minutes (including rising times)
- Servings: 12
- Yield: 1 loaf
- Dietary Type: Vegetarian
Ingredients
- 1 cup sourdough starter, at room temperature
- 1 1/2 cups rye flour
- 1 1/4 cups warm water
- 1 (2 1/4 teaspoon) packet active dry yeast
- 1 cup whole wheat flour
- 1 3/4 cups all-purpose flour, plus 1/2 cup all-purpose flour (for kneading)
- 1 teaspoon salt
- 1 tablespoon sugar
- 2 1/2 tablespoons caraway seeds
Equipment Needed
- Large bowl
- Small bowl
- Plastic wrap
- KitchenAid stand mixer (optional, but recommended)
- Baking stone or baking sheet
- Cooling rack
Instructions
-
In a large bowl, combine the sourdough starter, rye flour, and 1 cup of the warm water. Stir until well blended. For a tangier, more pronounced sourdough flavor, cover the bowl with plastic wrap and let the mixture rest in a warm place for 6 to 24 hours. You’ll know it’s ready when it’s bubbly, sour-smelling, and almost boozy. I typically let mine rest for six hours.
-
In a small bowl, combine the active dry yeast and the remaining 1/4 cup of warm water. Let it stand for about 5 minutes, or until the mixture becomes foamy. This confirms the yeast is active and ready to work its magic.
-
Add the foamy yeast mixture to the sourdough mixture. Then, add the whole wheat flour, 1 3/4 cups of the all-purpose flour, salt, sugar, and caraway seeds.
-
If using a KitchenAid stand mixer, attach the dough hook and stir on low speed until the dough begins to come together. Alternatively, you can mix by hand.
-
Knead the dough for 9 to 10 minutes, either in the stand mixer on speed #2 or by hand, until it becomes smooth and springy. This is a crucial step for developing the gluten, which gives the bread its structure.
-
During the kneading process, add the remaining 1/2 cup of all-purpose flour, one tablespoon or two at a time, as needed to reduce excess stickiness. Be mindful not to add too much flour, as this can result in a dry loaf. Keep in mind that this dough will remain somewhat sticky, even with the added flour.
-
Cover the dough and let it rise in a warm place for about 1 to 1 1/2 hours, or until it has doubled in size. The rising time can vary depending on the temperature of your environment.
-
Once the dough has doubled, gently punch it down to release the air. Knead it a few times to redistribute the air bubbles.
-
Shape the dough into a round loaf and place it on a baking stone or a greased baking sheet.
-
Cover the loaf lightly and allow it to rise again for about 30 minutes, or until it has almost doubled in size.
-
Preheat your oven to 425°F (220°C).
-
Just before baking, use a sharp knife or razor blade to cut a couple of small slashes about 3/4 inch deep on the top of the loaf. This will allow the bread to expand properly during baking and prevent it from cracking unevenly.
-
Spray the loaf generously with water. This creates steam in the oven, which helps to develop a crisp, shiny crust.
-
Bake at 425°F (220°C) for 9 minutes, spraying the loaf with water after 3, 6, and 9 minutes. The initial high heat and steam are essential for achieving that signature crust.
-
Reduce the oven temperature to 400°F (200°C) and bake for another 20-25 minutes, or until the loaf is nicely browned and sounds hollow when tapped on the bottom. This indicates that the bread is fully baked through.
-
Transfer the finished loaf to a cooling rack and let it cool completely before slicing. This is important because the bread continues to cook internally as it cools. Slicing it too soon can result in a gummy texture.
Note: If you choose to let your starter and rye combination rest for several hours (step 1), you might be able to omit the additional yeast in step 2. In this case, expect significantly longer rising times in steps 7 and 10. Keep a close eye on the dough and allow it to double in size before proceeding.
Expert Tips & Tricks
- Temperature is Key: The temperature of your water and the environment where you let the dough rise greatly impacts the final product. Use warm water (around 105-115°F/40-46°C) to activate the yeast, and find a warm spot (around 75-80°F/24-27°C) for rising.
- Sticky Dough, Happy Bread: Resist the urge to add too much flour during kneading. A slightly sticky dough results in a more tender and airy crumb. Trust the process!
- Steam Power: The steam created by spraying the loaf with water is crucial for a crispy crust. If your oven tends to dry out, consider placing a pan of hot water on the bottom rack during baking.
- Oven Variations: Every oven is different. Use the baking times as a guide, but rely on visual cues (color) and the hollow sound test to determine doneness.
Serving & Storage Suggestions
This crusty sourdough rye is fantastic served warm with a smear of butter or cream cheese. It’s also an excellent accompaniment to soups, stews, and charcuterie boards. Leftover bread can be stored at room temperature in a bread box or wrapped in a linen cloth for up to 3 days. For longer storage, wrap tightly in plastic wrap and freeze for up to 2 months. To reheat, thaw completely and warm in a 350°F (175°C) oven for 10-15 minutes, or until heated through.
Nutritional Information
| Nutrient | Amount per Serving | % Daily Value |
|---|---|---|
| Calories | 175 kcal | N/A |
| Calories from Fat | 8 g | 5% |
| Total Fat | 0.9 g | 1% |
| Saturated Fat | 0.1 g | 0% |
| Cholesterol | 0 mg | 0% |
| Sodium | 196.1 mg | 8% |
| Total Carbohydrate | 36.8 g | 12% |
| Dietary Fiber | 3.9 g | 15% |
| Sugars | 1.3 g | N/A |
| Protein | 5.7 g | 11% |
Variations & Substitutions
- Darker Rye: For a more intense rye flavor, use a combination of light and dark rye flour.
- Seeded Sensation: Add other seeds, such as sunflower, pumpkin, or flax seeds, for added texture and nutrition.
- Sweet and Savory: A touch of molasses or honey can add a subtle sweetness that complements the rye flavor beautifully.
- Spice it Up: Try adding a pinch of ground coriander or fennel seeds along with the caraway seeds for a unique flavor profile.
FAQs (Frequently Asked Questions)
Q: Why is my sourdough starter not bubbly?
A: Sourdough starters can be finicky. Ensure you’re feeding it regularly (equal parts flour and water), keeping it in a warm place, and using unbleached flour. It can take a few days or even weeks for a new starter to become active.
Q: Can I use instant yeast instead of active dry yeast?
A: Yes, you can substitute instant yeast. You can add it directly to the dry ingredients without proofing it in water first.
Q: My dough is too sticky to handle. What should I do?
A: Resist the urge to add a lot of extra flour. Instead, lightly flour your hands and the work surface. The dough will become easier to handle as it develops.
Q: How do I know when the bread is fully baked?
A: The loaf should be deeply browned and sound hollow when tapped on the bottom. An internal temperature of 200-210°F (93-99°C) is also a good indicator.
Q: Can I freeze the dough before baking?
A: Yes, you can freeze the dough after the first rise. Punch it down, shape it into a loaf, wrap it tightly in plastic wrap, and freeze. Thaw it in the refrigerator overnight before allowing it to rise again and baking as directed.
Final Thoughts
There’s something truly special about baking your own bread. The process itself is therapeutic, and the reward of a warm, crusty loaf is immeasurable. Don’t be intimidated by sourdough – it’s a journey of learning and experimentation. So, gather your ingredients, embrace the process, and prepare to be amazed by the simple magic of homemade sourdough rye. Share your creations with friends and family, and let the aroma of freshly baked bread fill your home with warmth and joy.