
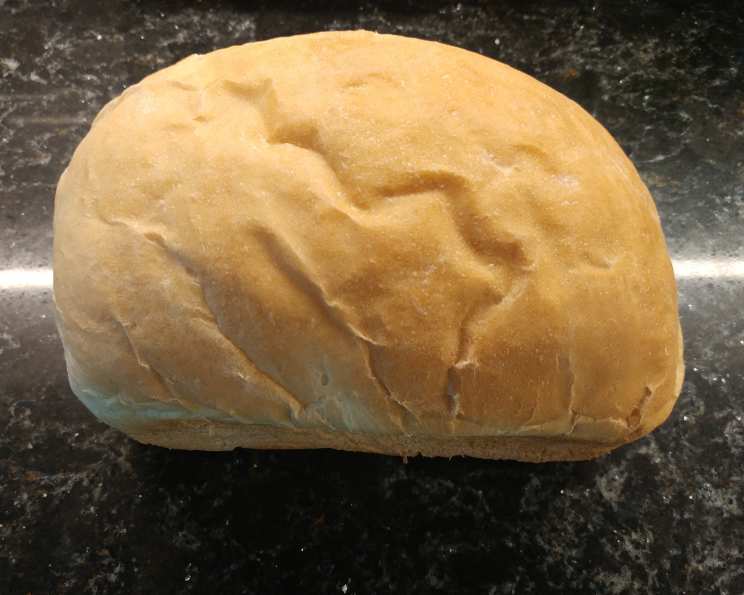
The Soul-Satisfying Simplicity of Crusty White Bread
I still remember the aroma that would fill our kitchen every Sunday morning. It was the unmistakable scent of my grandmother’s crusty white bread, a scent that promised warmth, comfort, and a taste of pure, unadulterated goodness. The crust, thick and golden brown, practically crackled as she sliced into it, revealing a soft, airy interior perfect for soaking up butter and homemade jam. It was more than just bread; it was a symbol of family, tradition, and love, all baked into a simple loaf.
Recipe Overview
- Prep Time: 2 hours
- Cook Time: 35 minutes
- Total Time: 2 hours 35 minutes
- Yields: 2 loaves
- Dietary Type: Vegetarian
Ingredients
- 2 (1/4 ounce) packages active dry yeast
- 2 cups warm water (about 105-115°F)
- 2 tablespoons sugar
- 1 tablespoon salt
- 1/4 cup oil (vegetable or olive oil works well)
- 6 – 6 1/2 cups all-purpose flour
Equipment Needed
- Large mixing bowl
- Measuring cups and spoons
- Clean kitchen towel
- Two 9×5 inch loaf pans
- Oven
Instructions
-
Activate the yeast: In a large mixing bowl, dissolve the active dry yeast in warm water. Let it stand for about 5-10 minutes, or until it becomes foamy. This indicates that the yeast is alive and active. If it doesn’t foam, your yeast might be old and need replacing.
-
Combine wet and dry ingredients: To the yeast mixture, add the sugar, salt, oil, and 3 cups of the all-purpose flour. Mix well until a smooth batter forms. You can use a wooden spoon or a stand mixer with a dough hook.
-
Gradually add flour: Gradually add the remaining flour, about 1/2 cup at a time, mixing after each addition. The goal is to form a dough that is easy to handle and not too sticky. You might not need to use all 6 1/2 cups of flour, so add it until the dough pulls away from the sides of the bowl.
-
Knead the dough: Turn the dough out onto a lightly floured surface, preferably a clean, cloth-covered countertop. Knead the dough for 8-10 minutes until it becomes smooth and elastic. Kneading develops the gluten, which gives the bread its structure and chewiness. Use a push-turn-fold motion, pushing the dough away from you with the heel of your hand, turning it a quarter turn, folding it over, and repeating.
-
First rise: Place the kneaded dough in a lightly oiled bowl, turning to coat the entire surface. This prevents the dough from drying out. Cover the bowl with a damp cloth and let the dough rise in a warm place for 1 hour, or until doubled in size. A warm environment encourages the yeast to ferment, producing the gas that makes the bread rise.
-
Punch down and divide: After the first rise, gently punch down the dough to release the air. Divide the dough in half.
-
Shape the loaves: Roll each half of the dough into a 9×18 inch rectangle. Starting at the short side, tightly roll up the rectangle into a log. Pinch the seam to seal it and tuck the ends under the roll to create a smooth, even shape.
-
Place in pans: Place each roll, seam side down, in a greased 9×5 inch loaf pan. Greasing the pans ensures that the bread doesn’t stick.
-
Second rise: Cover the loaf pans with a damp cloth and let the dough rise again for 1 hour, or until doubled in size. This second rise is crucial for a light and airy texture.
-
Bake: Preheat your oven to 400°F (200°C). Bake the loaves for approximately 35 minutes, or until they are golden brown and sound hollow when tapped on the bottom. If the tops are browning too quickly, you can loosely tent them with foil during the last 10-15 minutes of baking.
-
Cool: Remove the loaves from the pans and let them cool completely on a wire rack before slicing. This prevents the bread from becoming soggy.
Expert Tips & Tricks
- Water Temperature: The water temperature is critical for activating the yeast. Too cold, and the yeast won’t activate. Too hot, and it will kill the yeast. Aim for 105-115°F (40-46°C). A kitchen thermometer is your best friend here!
- Kneading Time: Don’t skimp on the kneading! Proper kneading develops the gluten, which is essential for a good texture. The dough should be smooth and elastic.
- Proofing Environment: A warm, draft-free environment is ideal for proofing. You can create a proofing box by placing the dough in a slightly warmed oven (turned off!) or near a warm stovetop.
- Scoring the Loaves: For a more professional look (and to control how the bread expands in the oven), you can score the tops of the loaves with a sharp knife or a lame before baking. Make a few shallow diagonal slashes across the top.
- Shiny Crust: For a shinier crust, brush the tops of the loaves with an egg wash (one egg beaten with a tablespoon of water) before baking.
- Crispier Crust: For an extra-crispy crust, place a pan of hot water on the bottom rack of the oven while baking. The steam helps create a beautiful, crackly crust.
Serving & Storage Suggestions
Serve this crusty white bread warm, sliced, and slathered with butter, jam, or your favorite spread. It’s also excellent for sandwiches, toast, or as a side to soups and stews.
Store leftover bread in an airtight container at room temperature for up to 3 days. For longer storage, wrap the bread tightly in plastic wrap and freeze it for up to 2 months. To thaw, let it sit at room temperature for a few hours or warm it in a low oven (300°F/150°C) for about 15-20 minutes.
To refresh slightly stale bread, lightly dampen the crust with water and bake it in a 350°F (175°C) oven for 5-10 minutes. This will help to re-crisp the crust.
Nutritional Information
| Nutrient | Amount per Serving | % Daily Value |
|---|---|---|
| Calories | 839 kcal | N/A |
| Calories from Fat | N/A | N/A |
| Total Fat | 15.75g | 24% |
| Saturated Fat | 2.1g | 10% |
| Cholesterol | 0mg | 0% |
| Sodium | 1753.3mg | 73% |
| Total Carbohydrate | 150.85g | 50% |
| Dietary Fiber | 6g | 24% |
| Sugars | 6.8g | N/A |
| Protein | 20.8g | 42% |
Note: Nutritional information is an estimate and may vary based on specific ingredients and portion sizes.
Variations & Substitutions
- Whole Wheat Crusty Bread: Substitute up to half of the all-purpose flour with whole wheat flour for a nuttier flavor and increased fiber.
- Herb-Infused Crusty Bread: Add 1-2 tablespoons of dried herbs, such as rosemary, thyme, or oregano, to the dough for a savory twist.
- Garlic Crusty Bread: Mix in 2-3 cloves of minced garlic with the wet ingredients for a flavorful garlic bread.
- Olive Crusty Bread: Add 1/2 cup of chopped olives (kalamata or green olives work well) to the dough for a Mediterranean-inspired loaf.
- Sweet Crusty Bread: Increase the sugar to 1/4 cup and add 1 teaspoon of vanilla extract for a slightly sweeter loaf.
FAQs (Frequently Asked Questions)
Q: Why isn’t my dough rising?
A: Several factors can affect the dough’s ability to rise, including using old or inactive yeast, water that is too hot or too cold, or a room that is too cold. Make sure your yeast is fresh, your water is at the correct temperature, and your dough is in a warm, draft-free location.
Q: My crusty bread is too dense. What did I do wrong?
A: Dense bread is often a result of not kneading the dough enough, not allowing it to rise for a sufficient amount of time, or using too much flour. Ensure you knead the dough until it is smooth and elastic and let it rise until it has doubled in size.
Q: Can I use bread flour instead of all-purpose flour?
A: Yes, bread flour can be used for this recipe. It has a higher protein content than all-purpose flour, which will result in a chewier, more structured loaf.
Q: How do I get a really crispy crust?
A: Baking the bread at a higher temperature (425°F/220°C) or using steam in the oven can help achieve a crispier crust. As mentioned above, place a pan of hot water on the bottom rack of the oven while baking.
Q: Can I make the dough ahead of time and bake it later?
A: Yes, you can make the dough ahead of time. After the first rise, punch down the dough, wrap it tightly in plastic wrap, and refrigerate it for up to 24 hours. When ready to bake, remove the dough from the refrigerator, let it come to room temperature for about 30 minutes, and then proceed with the recipe as directed.
Final Thoughts
This recipe for crusty white bread is more than just a set of instructions; it’s an invitation to create something truly special, something that will fill your home with warmth and your heart with joy. Don’t be intimidated – bread baking is a skill anyone can master. Gather your ingredients, follow the steps, and most importantly, enjoy the process. And when that first slice comes out of the oven, crust crackling and aroma filling the air, I hope you’ll feel that same sense of comfort and connection that my grandmother instilled in me, one perfectly baked loaf at a time. So, go ahead, give it a try, and let me know how it turns out. Perhaps pair it with a hearty tomato soup for a truly comforting meal. Happy baking!