
Cuisinart Food Processor Pizza Dough: A Chef’s Secret to Effortless Pizza
My grandmother, a woman who believed everything tasted better homemade, always said the secret to good pizza was in the dough. I remember watching her painstakingly knead for what seemed like hours, the flour dusting her apron like a fresh snowfall. I tried replicating her method for years, but the results were always… uneven. Then, I discovered the magic of the food processor. This recipe, adapted from my trusty Cuisinart cookbook, captures the spirit of her traditional dough with the ease of modern technology. Now, I can whip up perfect pizza dough any night of the week, bringing a taste of those cherished memories to my own kitchen.
Recipe Overview
- Prep Time: 15 minutes
- Cook Time: 15-20 minutes (depending on toppings and oven)
- Total Time: 1 hour 20 minutes (includes rising time)
- Servings: 6
- Yield: 3 12-inch crusts
- Dietary Type: Vegetarian (easily made vegan)
Ingredients
- 2 teaspoons active dry yeast
- 1 teaspoon granulated sugar
- 1 1/4 cups warm water (105-115 degrees F or 40-46 degrees C)
- 3 1/3 cups all-purpose flour (plus extra for dusting)
- 1 1/2 teaspoons kosher salt
- 3 teaspoons extra virgin olive oil
Equipment Needed
- Cuisinart Food Processor
- 2-cup liquid measuring cup
- Plastic food storage bag
- Rolling pin
- Baking sheet or pizza stone
Instructions
-
Activate the Yeast: In a 2-cup liquid measuring cup, dissolve the yeast and sugar in the warm water. It’s crucial that the water is within the specified temperature range – too cold and the yeast won’t activate; too hot and you’ll kill it. Let the mixture stand for about 3-5 minutes, or until it becomes foamy. This indicates that the yeast is alive and well, ready to work its magic.
-
Combine Dry Ingredients: Insert the dough blade into the Cuisinart food processor work bowl. Add the flour and salt. Make sure the bowl is clean and dry before you start.
-
Incorporate Wet Ingredients: With the machine running on the dough speed, slowly pour the yeast mixture through the small feed tube as fast as the flour will absorb it. Observe carefully – you want a steady stream, but not so fast that the liquid pools on top of the flour.
-
Knead the Dough: Process until the dough cleans the sides of the work bowl and forms a ball. Then, process for an additional 30 seconds to knead the dough. The dough may be slightly sticky at this point – that’s perfectly normal.
-
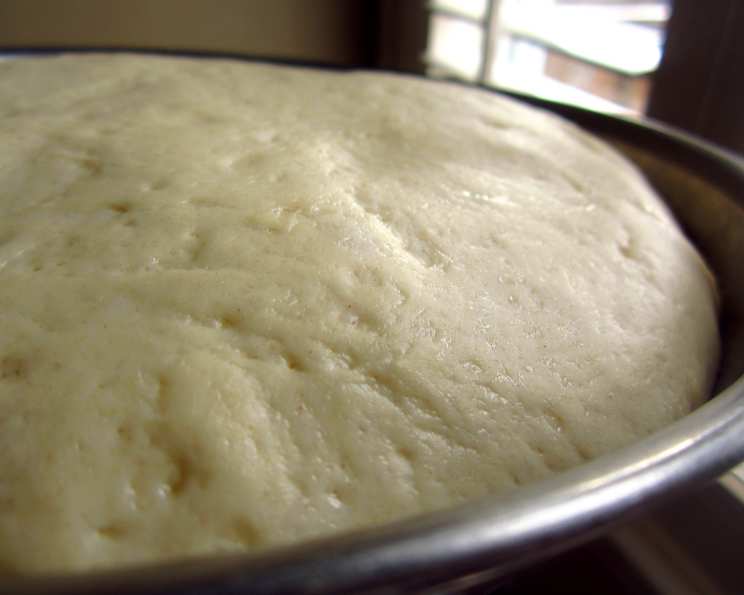
First Rise: Coat the dough evenly with 2 teaspoons of olive oil. This will prevent it from drying out and sticking to the bag. Transfer the dough to a plastic food storage bag and seal the top. Let the dough rise in a warm place for about 45 minutes. A slightly warm oven (turned off!) or a sunny spot on the counter works well. The dough should roughly double in size.
-
Prepare Toppings: While the dough is rising, now is the perfect time to prepare all your pizza toppings. Chop vegetables, cook any meats, and grate your cheese. Having everything ready to go will make assembling the pizzas quick and easy.
-
Shape the Dough: After the dough has risen, place it on a lightly floured surface and punch it down to release the air. Divide the dough into 3 equal portions if you’re making the full yield. Roll each portion into your desired crust size and shape. You can make round pizzas, rectangular pizzas, or even individual mini pizzas – get creative!
-
Add Toppings and Bake: Preheat your oven to 450°F (232°C). Place the rolled-out dough onto a baking sheet or pizza stone. Add your favorite toppings and bake for 15-20 minutes, or until the crust is golden brown and the cheese is melted and bubbly. Baking time can vary depending on your oven and the thickness of your crust, so keep a close eye on it.
Expert Tips & Tricks
- Don’t Overwork the Dough: The food processor makes it easy to over-knead the dough, which can result in a tough crust. Be sure to stop processing as soon as the dough forms a ball and cleans the sides of the bowl.
- Warm Water is Key: Using water that is too hot will kill the yeast, while water that is too cold will prevent it from activating. Use a thermometer to ensure the water is within the ideal temperature range of 105-115°F (40-46°C).
- Preheat Your Baking Surface: For a crispier crust, preheat your baking sheet or pizza stone in the oven while it’s preheating. This will help to cook the bottom of the crust more evenly.
- Par-Bake the Crust: If you’re using a lot of wet toppings, such as fresh tomatoes or mushrooms, consider par-baking the crust for a few minutes before adding the toppings. This will help to prevent the crust from becoming soggy.
- Experiment with Flour: For a slightly different flavor and texture, try substituting some of the all-purpose flour with bread flour or whole wheat flour.
Serving & Storage Suggestions
Serve your freshly baked pizza immediately for the best flavor and texture. Garnish with fresh herbs like basil or oregano for an extra touch of freshness.
Leftover pizza can be stored in an airtight container in the refrigerator for up to 3 days. To reheat, warm in a preheated oven at 350°F (175°C) for 5-10 minutes, or until heated through. You can also reheat individual slices in a skillet over medium heat for a crispy crust.
For longer storage, you can freeze the baked pizza. Allow the pizza to cool completely, then wrap it tightly in plastic wrap and aluminum foil. Freeze for up to 2 months. To reheat, thaw overnight in the refrigerator, then bake as directed above. You can also freeze the unbaked dough after the first rise. Wrap it tightly in plastic wrap and freeze for up to 2 months. Thaw overnight in the refrigerator before rolling out and baking.
Nutritional Information
(Estimated, per serving, without toppings):
| Nutrient | Amount per Serving | % Daily Value |
|---|---|---|
| Calories | 280 kcal | 14% |
| Total Fat | 3g | 4% |
| Saturated Fat | 0.4g | 2% |
| Cholesterol | 0mg | 0% |
| Sodium | 440mg | 19% |
| Total Carbohydrate | 54g | 18% |
| Dietary Fiber | 2g | 7% |
| Sugars | 1g | 2% |
| Protein | 8g | 16% |
Variations & Substitutions
- Gluten-Free Pizza: Substitute the all-purpose flour with a gluten-free flour blend. You may need to add a binder, such as xanthan gum, to help the dough hold together.
- Vegan Pizza: Omit the cheese or use a plant-based cheese alternative. Get creative with your toppings – roasted vegetables, grilled tofu, and cashew cream are all great options.
- Herb-Infused Dough: Add fresh herbs, such as rosemary, thyme, or oregano, to the dough for extra flavor.
- Spicy Pizza: Add a pinch of red pepper flakes to the dough for a little heat.
FAQs (Frequently Asked Questions)
Q: Can I use bread flour instead of all-purpose flour?
A: Yes, you can substitute some or all of the all-purpose flour with bread flour for a chewier crust.
Q: My dough is too sticky. What should I do?
A: Add a tablespoon of flour at a time until the dough is no longer sticky. Be careful not to add too much flour, as this can make the crust tough.
Q: Can I make the dough ahead of time?
A: Yes, you can make the dough up to 24 hours in advance. After the first rise, punch down the dough, wrap it tightly in plastic wrap, and refrigerate. Allow the dough to come to room temperature before rolling out and baking.
Q: How do I get a crispy crust?
A: Preheat your baking sheet or pizza stone in the oven while it’s preheating. You can also brush the crust with olive oil before adding the toppings.
Q: Can I freeze the dough?
A: Yes, you can freeze the dough after the first rise. Wrap it tightly in plastic wrap and freeze for up to 2 months. Thaw overnight in the refrigerator before rolling out and baking.
Final Thoughts
This Cuisinart food processor pizza dough is a game-changer, transforming pizza night from a daunting task into a simple joy. With minimal effort, you can create a delicious, homemade crust that’s far superior to anything you can buy in a store. Don’t be afraid to experiment with different toppings and variations to create your own signature pizza. Gather your friends and family, fire up the oven, and get ready to enjoy a truly memorable meal. I encourage you to try this recipe, and I would love to hear about your experiences in the comments below! Perhaps pair it with a crisp Italian salad and a glass of your favorite wine for the perfect homemade feast.