
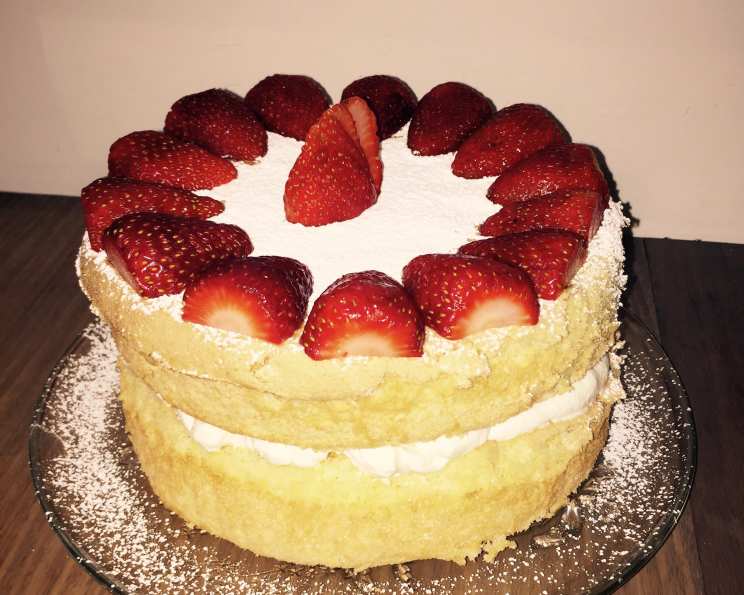
Custard Powder Sponge: The No-Fail Delight
My grandmother, bless her heart, wasn’t much of a baker. Her strengths lay in hearty stews and comforting roasts, but cakes? Those were often…experimental. However, there was one cake, a golden, airy sponge, that she made flawlessly every single time. The secret, she confided with a wink, was custard powder. The mere aroma of it baking now transports me back to her cozy kitchen, filled with warmth, laughter, and the promise of a simple, perfect treat.
Recipe Overview
- Prep Time: 15 minutes
- Cook Time: 20 minutes
- Total Time: 35 minutes
- Servings: Variable, depends on slice size
- Yields: 2 sponges
- Dietary Type: Not suitable for dairy-free, gluten-free diets
Ingredients
- 4 eggs
- ¾ cup cornflour
- ¾ cup caster sugar
- 1 tablespoon custard powder
- 1 teaspoon cream of tartar
- ½ teaspoon bicarbonate of soda
Equipment Needed
- Electric mixer (stand or hand-held)
- 2 greased and lined sandwich tins (round or square)
- Sifter
- Cooling rack
Instructions
-
Begin by preheating your oven. If you have a fan-forced oven, preheat to 190°C (375°F). If you have a conventional oven (not fan-forced), preheat to 200°C (390°F). It’s important to have the oven at the correct temperature before the batter is ready.
-
Separate the eggs. Place the egg whites into a clean, dry bowl. It’s crucial that there is no trace of yolk in the whites, as this can prevent them from whipping up properly.
-
Using an electric mixer, beat the egg whites until stiff peaks form. Stiff peaks mean that when you lift the beaters, the peaks of the egg whites stand straight up and don’t flop over. This is a key step to achieving a light and airy sponge.
-
In a separate bowl, add the egg yolks and caster sugar. Beat with the electric mixer until the mixture is pale and creamy. This process incorporates air and helps to create a tender crumb.
-
In a third bowl, sift together the cornflour, custard powder, cream of tartar, and bicarbonate of soda. Sifting ensures that there are no lumps and that the dry ingredients are evenly distributed, which is important for a consistent texture.
-
Gently fold the yolk and sugar mixture into the stiffly beaten egg whites. Be careful not to overmix, as this will deflate the egg whites and result in a dense cake. Fold until just combined; a few streaks of egg white are okay.
-
Gradually fold the sifted dry ingredients into the egg mixture. Again, be gentle and avoid overmixing. Fold until just combined, ensuring that there are no pockets of dry flour remaining. The batter should be light and airy.
-
Divide the batter evenly between the two prepared sandwich tins. Spread the batter evenly in each tin for uniform baking.
-
If using a fan-forced oven, reduce the heat to 170°C (340°F). If using a conventional oven, reduce the heat to 180°C (355°F).
-
Place the tins on the middle shelf of the preheated oven and bake for 20 minutes. The cakes are done when they are golden brown and a skewer inserted into the center comes out clean.
-
Once baked, remove the tins from the oven and let the cakes cool in the tins for a few minutes before turning them out onto a wire rack to cool completely. Cooling on a wire rack prevents the cakes from becoming soggy.
-
Once completely cool, fill with your favorite fillings, such as jam and fresh cream.
-
Enjoy!
Expert Tips & Tricks
- Room Temperature Eggs: Using eggs at room temperature will help them whip up more easily and create a lighter, fluffier sponge.
- Gentle Folding: The key to a light and airy sponge is gentle folding. Avoid overmixing at all costs, as this will deflate the batter and result in a dense cake.
- Oven Temperature is Crucial: Ensure your oven is accurately preheated and that you adjust the temperature accordingly for fan-forced or conventional ovens. This will ensure even baking. An oven thermometer is a worthwhile investment.
- Doneness Test: A skewer inserted into the center of the cake should come out clean. If it doesn’t, bake for a few more minutes and test again.
- Prevent Sticking: Greasing and lining the sandwich tins with parchment paper is essential to prevent the cakes from sticking.
- Even Layers: For even sponge layers, use a kitchen scale to ensure that each tin receives the same amount of batter.
- Custard Powder Choice: Using a good quality custard powder will contribute significantly to the flavour and colour of the cake.
Serving & Storage Suggestions
This Custard Powder Sponge is best served fresh, ideally on the same day it’s baked. Filled with jam and cream, it makes a delightful afternoon tea treat.
Storage: Leftover sponge can be stored in an airtight container at room temperature for up to 2 days or in the refrigerator for up to 4 days. Note that cream-filled sponges will need to be refrigerated. Sponge cake can also be frozen, unfilled, for up to 2 months. Wrap it tightly in plastic wrap and then in foil to prevent freezer burn. Thaw at room temperature before filling and serving.
Nutritional Information
Please note that the following nutritional information is an estimate and will vary based on specific ingredients and portion sizes.
| Nutrient | Amount per Serving (Estimated) | % Daily Value (Estimated) |
|---|---|---|
| Calories | 300 kcal | 15% |
| Total Fat | 8g | 12% |
| Saturated Fat | 3g | 15% |
| Cholesterol | 180mg | 60% |
| Sodium | 230mg | 10% |
| Total Carbohydrate | 55g | 18% |
| Dietary Fiber | 1g | 4% |
| Sugars | 38g | – |
| Protein | 4g | 8% |
Variations & Substitutions
- Lemon Zest: Add the zest of one lemon to the batter for a bright, citrusy flavor.
- Almond Extract: A few drops of almond extract can enhance the custard powder flavor.
- Chocolate Sponge: Substitute 2 tablespoons of cornflour with 2 tablespoons of cocoa powder for a chocolate version.
- Gluten-Free Option: Replace the cornflour with a gluten-free blend specifically designed for baking. You may need to experiment with the quantity to achieve the desired texture.
- Different Fillings: Try different jams, such as raspberry, apricot, or strawberry. Other filling options include lemon curd, chocolate ganache, or buttercream frosting.
- Seasonal Fruit: Add sliced seasonal fruits, such as strawberries, raspberries, or peaches, to the filling for a refreshing twist.
FAQs (Frequently Asked Questions)
Q: Why is it important to sift the dry ingredients?
A: Sifting ensures that the dry ingredients are evenly distributed and that there are no lumps, which can result in an uneven texture.
Q: Can I use self-raising flour instead of cornflour and bicarbonate of soda?
A: No, this recipe relies on the specific properties of cornflour, cream of tartar and bicarbonate of soda to achieve its unique texture. Using self-raising flour will not produce the same result.
Q: What if my egg whites don’t whip up properly?
A: Make sure your bowl and beaters are clean and dry. Even a small amount of grease can prevent egg whites from whipping properly. Also, ensure there’s no yolk in the whites.
Q: How do I know when the sponge is cooked through?
A: Insert a skewer into the center of the sponge. If it comes out clean, the sponge is cooked through. If it comes out with batter on it, continue baking for a few more minutes and test again.
Q: Can I make this recipe as one large cake instead of two sandwich sponges?
A: Yes, you can bake this recipe in one larger cake tin, but you’ll need to increase the baking time. Start by checking for doneness after 25 minutes and continue baking until a skewer inserted into the center comes out clean. Note that the edges may become slightly darker.
Final Thoughts
There you have it: a simple, reliable, and utterly delicious Custard Powder Sponge recipe that’s sure to impress. Don’t be intimidated by baking – this recipe is truly no-fail! Give it a try, and I promise you’ll be rewarded with a light, airy, and flavorful cake that’s perfect for any occasion. Don’t forget to share your creations and feedback! Pair it with a cup of tea for the perfect afternoon treat.