
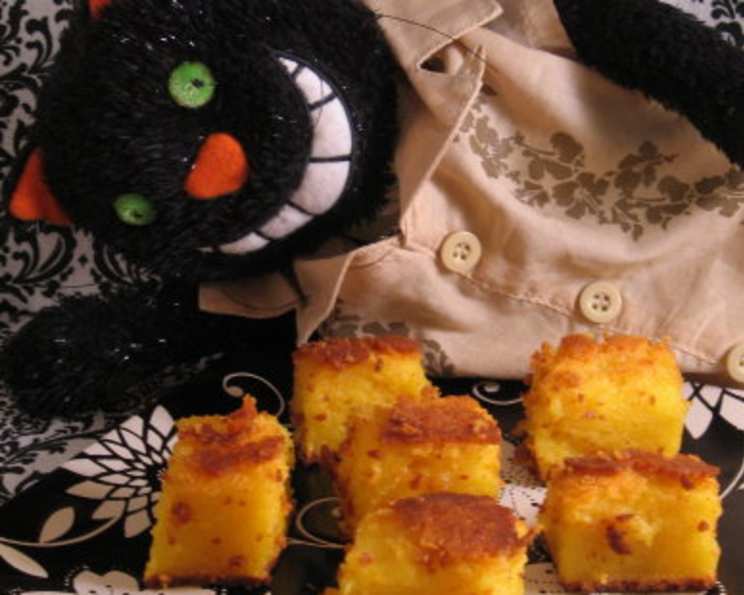
Da Best Butter Mochi
My earliest memory of butter mochi involves a sun-drenched picnic at Ala Moana Beach Park in Honolulu. The air, thick with the scent of plumeria and saltwater, buzzed with laughter and ukulele music. Auntie Lei, a woman whose smile could melt glaciers, unveiled a foil-covered pan. Inside, nestled like golden jewels, were squares of butter mochi. Chewy, sweet, and impossibly buttery, each bite transported me to a realm of pure happiness. It wasn’t just a dessert; it was a taste of home, a symbol of aloha, and a reminder of the importance of family.
Recipe Overview
- Prep Time: 15 minutes
- Cook Time: 1 hour 30 minutes
- Total Time: 1 hour 45 minutes
- Servings: 10-12
- Yield: One 9×13 inch pan
- Dietary Type: Not Gluten-Free
Ingredients
- 4 cups mochi flour (also known as glutinous rice flour)
- 3 teaspoons baking powder
- 4 cups whole milk
- 2 cups sugar
- 4 eggs
- 2 teaspoons vanilla extract
- 8 tablespoons (1 stick) butter, melted
Equipment Needed
- 9×13 inch baking pan
- Mixing bowl
- Electric mixer
- Measuring cups and spoons
- Whisk
Instructions
- Preheat your oven to 325°F (160°C). While the oven heats, prepare your 9×13 inch baking pan by greasing it thoroughly with butter or cooking spray. This will prevent the mochi from sticking and ensure easy removal after baking.
- In a large mixing bowl, combine the mochi flour and baking powder. Whisk together until well blended. This ensures that the baking powder is evenly distributed, which is crucial for the mochi to rise properly and achieve a light, airy texture.
- In a separate bowl, whisk together the whole milk, sugar, eggs, and vanilla extract. Mix until the sugar is completely dissolved and the mixture is smooth. The eggs should be fully incorporated to avoid any eggy taste in the final product.
- Pour the wet ingredients (milk, sugar, eggs, and vanilla) into the dry ingredients (mochi flour and baking powder). Using an electric mixer, blend all the ingredients together until everything is completely combined and you have a smooth batter. Be sure to scrape down the sides of the bowl to ensure that no mochi flour remains unincorporated. A well-blended batter is essential for a uniform texture in the finished mochi.
- Slowly drizzle the melted butter into the batter while continuing to mix on low speed. Ensure the butter is evenly distributed throughout the batter. The melted butter is what gives butter mochi its rich flavor and characteristic chewy texture.
- Pour the batter into the prepared 9×13 inch baking pan. Spread the batter evenly to ensure that the mochi bakes uniformly.
- Bake in the preheated oven at 325°F (160°C) for 1.5 hours. The mochi is done when the top is golden brown and a toothpick inserted into the center comes out clean or with only a few moist crumbs attached. The baking time may vary slightly depending on your oven, so keep an eye on it towards the end.
- Remove the butter mochi from the oven and let it cool completely in the pan before cutting into squares. This allows the mochi to firm up, making it easier to cut and serve.
- Once cooled, cut into squares and serve.
Expert Tips & Tricks
- Use High-Quality Mochi Flour: The quality of your mochi flour significantly impacts the final texture. Look for brands specifically labeled “glutinous rice flour” or “sweet rice flour.”
- Don’t Overmix: Overmixing the batter can develop the gluten in the mochi flour, resulting in a tougher mochi. Mix just until the ingredients are combined.
- Evenly Distribute the Butter: Ensure the melted butter is thoroughly incorporated into the batter. This will create a more consistent and delicious texture throughout the mochi.
- Adjust Baking Time: Ovens can vary, so check the mochi for doneness around the 1 hour 15-minute mark. If the top is browning too quickly, you can tent it with foil to prevent burning.
- Make it Ahead: Butter mochi can be made a day in advance. Just store it at room temperature, tightly covered, and it will be ready to enjoy.
Serving & Storage Suggestions
Butter mochi is best served at room temperature. Its chewy texture and buttery flavor are most enjoyable when it’s not too warm or too cold. Arrange the cut squares on a platter for an attractive presentation. For storage, keep leftover butter mochi in an airtight container at room temperature for up to 3 days, or in the refrigerator for up to a week. You can also freeze it for longer storage, up to 2 months. To reheat, simply let it thaw at room temperature or warm it in the microwave for a few seconds.
Nutritional Information
| Nutrient | Amount per Serving | % Daily Value |
|---|---|---|
| Calories | 558.8 kcal | N/A |
| Calories from Fat | 136 g | 24% |
| Total Fat | 15.2 g | 23% |
| Saturated Fat | 8.5 g | 42% |
| Cholesterol | 108.6 mg | 36% |
| Sodium | 260.9 mg | 10% |
| Total Carbohydrate | 95.9 g | 31% |
| Dietary Fiber | 1.5 g | 6% |
| Sugars | 45.1 g | N/A |
| Protein | 9.4 g | 18% |
Note: Nutritional information is an estimate and can vary based on specific ingredients and serving sizes.
Variations & Substitutions
- Coconut Butter Mochi: Substitute 1 cup of the whole milk with 1 cup of coconut milk for a tropical twist.
- Chocolate Butter Mochi: Add 1/2 cup of cocoa powder to the dry ingredients for a chocolatey treat.
- Matcha Butter Mochi: Whisk 2 tablespoons of matcha powder into the dry ingredients for a vibrant green color and earthy flavor.
- Brown Butter Butter Mochi: Brown the butter before melting it for a nutty and complex flavor.
- Mochi with Toppings: Add toppings after pouring the batter into the pan such as toasted coconut flakes, chocolate chips, or macadamia nuts.
FAQs (Frequently Asked Questions)
Q: Can I use a different type of flour?
A: No, mochi flour (glutinous rice flour) is essential for the chewy texture. Other flours will not work the same.
Q: Can I reduce the amount of sugar?
A: You can reduce the sugar slightly, but keep in mind it affects the texture and sweetness. Reducing it by more than 1/4 cup might alter the final result significantly.
Q: How do I know when the butter mochi is done?
A: The top should be golden brown and a toothpick inserted into the center should come out clean or with only a few moist crumbs.
Q: Can I make this recipe vegan?
A: It would be challenging to make this fully vegan without significantly altering the texture. You could try using flax eggs and non-dairy milk, but the result may not be the same.
Q: Why is my butter mochi gummy?
A: It might be underbaked. Make sure to bake it until a toothpick comes out clean.
Final Thoughts
Butter mochi is more than just a dessert; it’s a symbol of sharing, connection, and simple joys. This recipe is a testament to the fact that sometimes, the most humble ingredients, when combined with love and care, can create something truly extraordinary. I encourage you to try this recipe and experience the magic of butter mochi for yourself. Whether you’re sharing it with family, bringing it to a potluck, or simply enjoying a quiet moment of sweetness, I hope it brings a little bit of aloha into your life. Don’t hesitate to experiment with variations and make it your own – and please share your creations and feedback!