
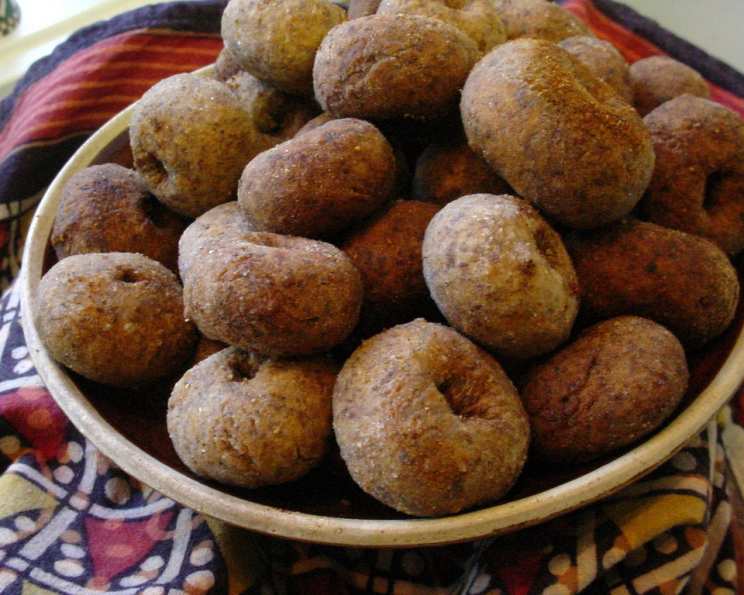
Daal Pakoda: Crispy, Golden Lentil Fritters
The memory hits me every time I smell that familiar, earthy aroma of frying lentils. It takes me back to rainy afternoons in my grandmother’s kitchen, the air thick with humidity and the promise of something warm and comforting. We’d huddle around the stove, watching her deftly drop spoonfuls of spiced lentil batter into the hot oil. The sizzle, the anticipation, and finally, the reward of biting into a crispy, golden daal pakoda – pure, unadulterated joy on a plate. These aren’t just fritters; they’re edible memories, a taste of home.
Recipe Overview
- Prep Time: 2 hours 15 minutes
- Cook Time: 15 minutes
- Total Time: 2 hours 30 minutes
- Servings: 3
- Dietary Type: Vegan (depending on oil used)
Ingredients
- 1 cup black lentils or 1 cup yellow lentils
- ½ cup chopped onion
- 2 chopped green chilies
- 1 teaspoon chat masala (optional)
- ¼ cup chopped cilantro
- ½ cup chickpea flour
- Salt to taste
- Oil for frying
Equipment Needed
- Large bowl
- Grinder or food processor
- Frying pan or deep fryer
- Slotted spoon
- Paper towels
Instructions
-
Begin by soaking the lentils. Place either the black lentils or yellow lentils in a large bowl and cover with enough water to completely submerge them. Allow the lentils to soak for 2 hours. This soaking process is crucial as it softens the lentils, making them easier to grind and resulting in a smoother pakoda batter.
-
After soaking, drain the lentils thoroughly. Transfer the drained lentils to a grinder or food processor. Add a small amount of fresh water if needed to help the mixture blend smoothly. Grind the lentils into a smooth paste. Be patient; you may need to scrape down the sides of the grinder a few times to ensure even consistency.
-
In a large mixing bowl, combine the ground lentil paste with the chopped cilantro, chopped onions, salt, and chopped green chilies. At this stage, you can also add the chat masala if you desire. This adds a tangy and savory flavor, enhancing the overall taste profile of the pakodas. Remember, the amount of green chilies should be adjusted to your spice preference.
-
In a separate bowl, dissolve the chickpea flour in about ½ cup of water. Stir well to ensure there are no lumps, creating a thick paste. The chickpea flour acts as a binding agent, holding the pakodas together during frying.
-
Add the chickpea flour paste to the bowl with the other ingredients and mix thoroughly. The resulting batter should be thick enough to form small balls but not too thick that it becomes dry.
-
Check the consistency of the batter. It should be thick enough to hold its shape when spooned, but not so thick that it’s difficult to work with. If the batter appears too thin, gradually add more chickpea flour, a tablespoon at a time, until you achieve the desired consistency.
-
Heat the cooking oil in a frying pan or deep fryer over medium-high heat. The oil should be hot enough to cook the pakodas quickly without burning them. A good way to test the oil’s temperature is to drop a tiny piece of batter into the oil. If it sizzles and floats to the surface, the oil is ready.
-
Carefully drop small spoonfuls of the batter into the hot oil. Be careful not to overcrowd the pan, as this will lower the oil temperature and result in soggy pakodas.
-
Fry the pakodas until they are golden brown on all sides. Turn them occasionally to ensure even cooking. This usually takes about 3-5 minutes per batch, depending on the size and thickness of the pakodas.
-
Once the pakodas are golden brown and crispy, remove them from the oil with a slotted spoon and place them on a plate lined with paper towels to drain any excess oil.
-
Serve the daal pakodas hot. They are delicious on their own or with your favorite ketchup or Indian chutney.
Expert Tips & Tricks
- Soaking is key: Don’t skip the soaking process! It’s essential for achieving the right texture.
- Spice it up: Feel free to adjust the amount of green chilies to your liking. You can also add other spices like ginger-garlic paste or red chili powder for extra flavor.
- Crispy texture: For extra crispy pakodas, add a tablespoon of hot oil to the batter before frying.
- Make ahead: The batter can be prepared ahead of time and stored in the refrigerator for up to 24 hours.
- Don’t overcrowd: Overcrowding the pan will lower the oil temperature and result in soggy pakodas. Fry in batches for best results.
- Air Fryer Option: For a healthier alternative, you can also air fry these pakodas. Preheat your air fryer to 375°F (190°C) and cook for 12-15 minutes, flipping halfway through, until golden brown and crispy.
Serving & Storage Suggestions
Serve these delightful daal pakodas hot, straight from the fryer, for the ultimate crispy experience. They pair perfectly with a variety of accompaniments. Consider serving them with a vibrant green chutney, a tangy tamarind chutney, or even just a simple tomato ketchup. For a more substantial meal, serve them alongside a bowl of steaming hot daal and rice.
Leftover daal pakodas can be stored in an airtight container in the refrigerator for up to 2 days. To reheat, you can bake them in a preheated oven at 350°F (175°C) for about 10-15 minutes, or until heated through. You can also reheat them in a microwave, but they will lose some of their crispiness. For the best results, reheat them in an air fryer to restore their crispy texture.
Nutritional Information
| Nutrient | Amount per Serving | % Daily Value |
|---|---|---|
| Calories | 308.8 kcal | N/A |
| Calories from Fat | 16 g | 5% |
| Total Fat | 1.8 g | 2% |
| Saturated Fat | 0.2 g | 1% |
| Cholesterol | 0 mg | 0% |
| Sodium | 17.2 mg | 0% |
| Total Carbohydrate | 52.9 g | 17% |
| Dietary Fiber | 22 g | 88% |
| Sugars | 5.7 g | N/A |
| Protein | 20.8 g | 41% |
Note: Nutritional information is an estimate and may vary based on specific ingredients and cooking methods.
Variations & Substitutions
- Gluten-Free: This recipe is naturally gluten-free thanks to the use of chickpea flour. However, always double-check the labels of your ingredients to ensure they are certified gluten-free if you have a severe allergy.
- Spice Level: Adjust the amount of green chilies to control the heat. You can also add a pinch of red chili powder for a different kind of spice.
- Lentil Variety: While the recipe calls for black or yellow lentils, you can experiment with other types of lentils, such as red lentils or moong daal. Each type will yield a slightly different flavor and texture.
- Vegetable Additions: Get creative and add other chopped vegetables to the batter, such as spinach, fenugreek leaves (methi), or grated carrots.
- Herbs: Try different herbs instead of or in addition to cilantro, such as mint or parsley.
FAQs (Frequently Asked Questions)
Q: Can I use pre-soaked lentils?
A: Yes, if you have pre-soaked lentils, ensure they’ve been soaked for at least 2 hours to achieve the desired texture.
Q: How do I prevent the pakodas from being too oily?
A: Ensure the oil is hot enough before frying. Also, don’t overcrowd the pan. Fry in batches and drain the pakodas on paper towels to remove excess oil.
Q: Can I bake these instead of frying?
A: While frying gives the best results, you can try baking them. Bake at 375°F (190°C) for about 20-25 minutes, flipping halfway through. They won’t be as crispy, but it’s a healthier option.
Q: What can I use instead of chickpea flour?
A: If you don’t have chickpea flour, you can use rice flour or besan as a substitute, although the flavor profile will differ slightly.
Q: How long will the batter last in the refrigerator?
A: The batter can be stored in the refrigerator for up to 24 hours. Stir well before using.
Final Thoughts
Daal pakodas are more than just a snack; they’re a celebration of simple ingredients transformed into something extraordinary. The crispy exterior, the soft and flavorful interior, and the comforting aroma make them a perfect treat for any occasion. So, gather your ingredients, roll up your sleeves, and get ready to create your own batch of delicious memories. Don’t be afraid to experiment with different spices and vegetable additions to make this recipe your own. And most importantly, enjoy the process and share your creations with loved ones. After all, the best dishes are always made with love.