
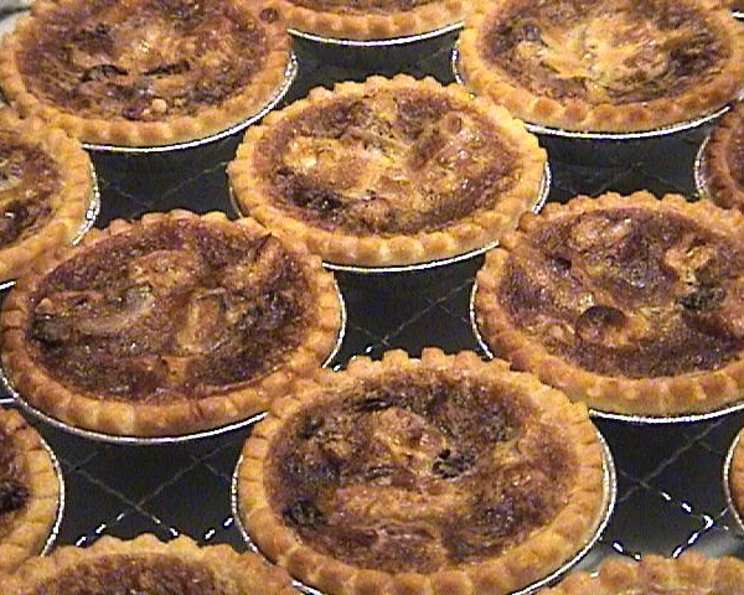
Dad’s Butter Tarts: A Sweet Christmas Tradition
The scent of butter, brown sugar, and vanilla – that’s the smell of Christmas in our family. And it always begins with Dad’s Butter Tarts. I remember standing on a stool next to him in the kitchen, my hands dusted with flour, as we carefully pressed pre-made tart shells into muffin tins. He’d let me sprinkle extra raisins on top of a few, just for me. These weren’t just tarts; they were little golden cups filled with love, patience, and a whole lot of sugary goodness that defined the holidays.
Recipe Overview
- Prep Time: 20 minutes
- Cook Time: 15 minutes
- Total Time: 35 minutes
- Yields: 36 tarts
- Dietary Type: Not specified
Ingredients
- 2 eggs
- 1 cup brown sugar
- 1 teaspoon vanilla
- 1 cup corn syrup
- 1 cup sultana raisins
- 4 tablespoons melted margarine
- 36 large prepared tart shells
Equipment Needed
- Large mixing bowl
- Measuring cups and spoons
- Whisk or mixing spoon
- Muffin tins (for holding tart shells)
- Oven
Instructions
-
Preheat your oven to 350°F (175°C). Ensure the oven rack is positioned in the center for even baking.
-
In a large mixing bowl, combine the eggs, brown sugar, vanilla, and corn syrup.
-
Mix these ingredients thoroughly until they are well combined. A whisk works best for this step, ensuring a smooth and even consistency. Don’t overbeat; just blend until everything is nicely incorporated.
-
Add the melted margarine to the mixture. Gently stir it in until it’s evenly distributed. Avoid vigorous mixing, which can alter the texture of the filling.
-
Now, add the sultana raisins to the bowl. Fold them in gently, ensuring they are well dispersed throughout the mixture. This even distribution is key to a perfect tart in every bite.
-
Carefully fill the prepared tart shells with the mixture. Fill them almost to the top, but leave a little space to allow for expansion during baking. Overfilling can lead to spills in the oven.
-
Arrange the filled tart shells in muffin tins. This will provide stability and prevent them from tipping over while baking.
-
Bake in the preheated oven for approximately 15 minutes. Keep a close watch; baking times can vary depending on your oven.
-
Check for doneness. The tarts are ready when the filling is set but still slightly jiggly in the center and the crusts are golden brown.
-
Remove the muffin tins from the oven and let the tarts cool slightly before carefully removing them from the tins.
-
Allow the tarts to cool completely on a wire rack before serving. This prevents them from sticking and ensures the filling sets properly.
Expert Tips & Tricks
- For a richer flavor, consider using brown butter instead of melted margarine. To make brown butter, melt the margarine in a light-colored saucepan over medium heat. Continue cooking until the butter melts, then foams, then turns a nutty brown color and releases a toasted aroma. Be careful not to burn it! Let it cool slightly before adding it to the filling mixture.
- If your filling seems too runny, add a tablespoon of all-purpose flour to the mixture. This will help thicken the filling and prevent it from running over the tart shells during baking.
- To prevent the tart shells from browning too quickly, you can tent them with aluminum foil during the last few minutes of baking.
- For an extra touch, sprinkle a pinch of sea salt over the warm tarts just after removing them from the oven. The salt enhances the sweetness and adds a delightful contrast of flavors.
Serving & Storage Suggestions
These butter tarts are best served at room temperature, allowing the filling to achieve the perfect consistency. They are delicious on their own or served with a dollop of whipped cream or a scoop of vanilla ice cream. For a festive touch, dust them with powdered sugar before serving.
To store leftover butter tarts, place them in an airtight container at room temperature for up to 3 days. For longer storage, they can be refrigerated for up to a week. You can also freeze them for up to 2 months. To freeze, arrange the tarts in a single layer on a baking sheet and freeze until solid. Then, transfer them to a freezer bag or container.
To reheat frozen butter tarts, thaw them in the refrigerator overnight or at room temperature for a few hours. You can also reheat them in a preheated oven at 300°F (150°C) for 5-10 minutes, or until warmed through.
Nutritional Information
| Nutrient | Amount per Serving | % Daily Value |
|---|---|---|
| Calories | 75 kcal | N/A |
| Calories from Fat | 14 g | 19% |
| Total Fat | 1.6 g | 2% |
| Saturated Fat | 0.3 g | 1% |
| Cholesterol | 11.8 mg | 3% |
| Sodium | 21.7 mg | 0% |
| Total Carbohydrate | 15.7 g | 5% |
| Dietary Fiber | 0.1 g | 0% |
| Sugars | 10.6 g | 42% |
| Protein | 0.5 g | 0% |
Note: Nutritional information is an estimate and may vary depending on specific ingredients and portion sizes.
Variations & Substitutions
- Nutty Butter Tarts: Add chopped pecans or walnuts to the filling mixture for a delightful crunch and nutty flavor.
- Maple Butter Tarts: Substitute maple syrup for half of the corn syrup for a richer, more complex flavor.
- Chocolate Chip Butter Tarts: Add miniature chocolate chips to the filling mixture for a chocolatey twist.
- Gluten-Free Butter Tarts: Use gluten-free tart shells and ensure that all other ingredients are gluten-free as well.
- Dried Cranberry Butter Tarts: Replace the raisins with dried cranberries for a tart and festive twist.
FAQs (Frequently Asked Questions)
Q: Can I use a different type of raisin?
A: Yes, you can substitute golden raisins or even chopped dried cranberries for the sultana raisins, depending on your preference.
Q: Can I make the tart shells from scratch?
A: Absolutely! If you prefer a homemade crust, use your favorite pastry recipe for tart shells. Just be sure to pre-bake them slightly before filling.
Q: What if my filling is too thick?
A: If the filling seems too thick, add a tablespoon or two of milk or water to thin it out to the desired consistency.
Q: Can I add a liquor to the filling?
A: A tablespoon of rum or bourbon added to the filling can add depth of flavour, however, add this with caution.
Q: Why did my tarts overflow?
A: Overfilling the tart shells is usually the culprit. Make sure to leave a little space at the top to allow for expansion during baking.
Final Thoughts
I sincerely hope you give this recipe for Dad’s Butter Tarts a try. They’re more than just a dessert; they’re a connection to family, tradition, and the simple joys of the holiday season. Whether you’re baking them for a Christmas gathering, a special occasion, or simply to treat yourself, I’m sure these tarts will bring a smile to your face. Feel free to experiment with variations, share your feedback, and most importantly, savor every delicious bite! Consider pairing them with a warm cup of spiced apple cider or a glass of dessert wine for the ultimate indulgence. Happy baking!