
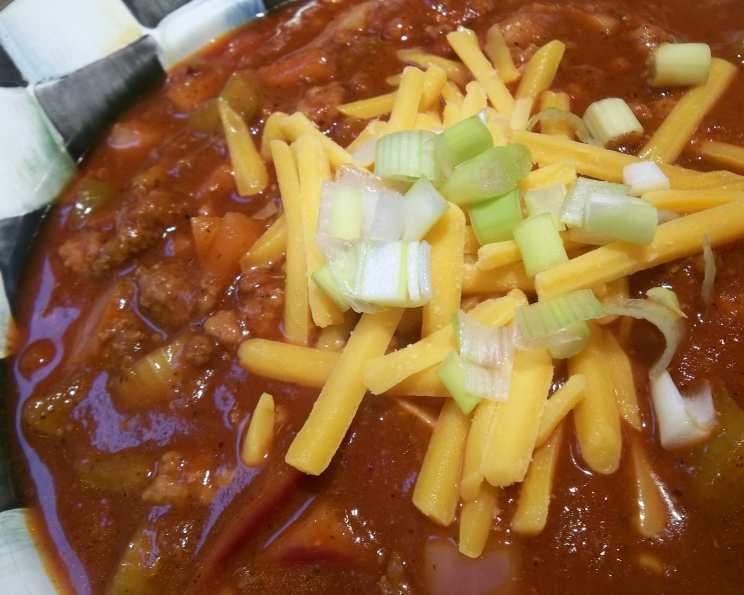
Dad’s Famous Chili: A Wendy’s Inspired Classic
My dad wasn’t much of a cook, truth be told. His culinary repertoire consisted mainly of grilling burgers and making the occasional batch of spaghetti. But there was one dish, a glorious, hearty chili, that he absolutely nailed. It wasn’t fancy, no exotic spices or slow-cooked meats, but it was pure comfort in a bowl. Every time I make this chili, the aroma alone transports me back to cozy weekend afternoons spent huddled around the TV, a steaming bowl warming my hands and soul. It’s a taste of home, simple and perfect, and I’m thrilled to share it with you.
Recipe Overview
- Prep Time: 20 minutes
- Cook Time: 1 hour 30 minutes
- Total Time: 1 hour 50 minutes
- Servings: 15
- Yield: Large Pot
- Dietary Type: Adaptable to Gluten-Free, Dairy-Free
Ingredients
- 2 lbs fresh ground beef
- 1 quart tomato juice
- 1 (29 ounce) can tomato puree
- 1 (15 ounce) can red kidney beans, drained
- 1 (15 ounce) can pinto beans, drained
- 1 medium-large onion, chopped
- 1/2 cup celery, diced
- 1/4 cup green pepper, diced
- 1/4 cup chili powder
- 1 teaspoon cumin (if you like real flavor, add more)
- 1 1/2 teaspoons garlic powder
- 1 teaspoon salt
- 1/2 teaspoon black pepper
- 1/2 teaspoon oregano
- 1/2 teaspoon sugar
- 1/8 teaspoon cayenne pepper
Equipment Needed
- Large frying pan
- 6-quart pot with lid
- Cutting board
- Knife
Instructions
- First, brown the ground beef in a large frying pan over medium-high heat. Make sure to break it up into smaller pieces as it cooks. This helps ensure even cooking and a better texture in the final chili.
- Once the ground beef is fully browned, drain off any excess grease. Nobody wants greasy chili!
- Transfer the drained beef to a 6-quart pot.
- Add the remaining ingredients to the pot: the tomato juice, tomato puree, drained red kidney beans, drained pinto beans, chopped onion, diced celery, diced green pepper, chili powder, cumin, garlic powder, salt, black pepper, oregano, sugar, and cayenne pepper.
- Stir everything together well to ensure all the ingredients are combined and the spices are evenly distributed.
- Cover the pot with a lid.
- Bring the chili to a gentle simmer over medium-low heat.
- Let the chili simmer for 1 to 1 1/2 hours, stirring every 15 minutes. This is important to prevent the chili from sticking to the bottom of the pot and burning. It also helps to meld the flavors together.
- After the simmering time, taste and adjust seasonings as needed. You might want to add more chili powder for extra heat, or a touch more salt and pepper to bring out the flavors.
Expert Tips & Tricks
- Boost the Flavor: For an even richer flavor, try adding a tablespoon of unsweetened cocoa powder to the chili during the last 30 minutes of simmering. It deepens the flavor profile and adds a subtle complexity.
- Make it Ahead: Chili is a fantastic make-ahead dish. In fact, the flavors often improve after a day or two in the refrigerator. Prepare the chili a day or two in advance and simply reheat it before serving.
- Spice Level Control: The 1/8 teaspoon of cayenne pepper provides a subtle kick. If you prefer a spicier chili, feel free to add more cayenne pepper or a pinch of red pepper flakes.
- Veggie Boost: Don’t be afraid to add other vegetables! Diced carrots, zucchini, or even corn can be great additions to this chili. Add them along with the celery and green pepper.
- Thickening the Chili: If your chili is too thin for your liking, you can thicken it by mashing some of the beans against the side of the pot. This releases their starch and helps to thicken the chili naturally. Alternatively, you can mix a tablespoon of cornstarch with a tablespoon of cold water to create a slurry and stir it into the chili during the last 15 minutes of simmering.
Serving & Storage Suggestions
Serve your Dad’s Famous Chili hot in bowls. Consider topping it with shredded cheddar cheese, a dollop of sour cream or Greek yogurt, chopped green onions, or a sprinkle of crushed tortilla chips for added flavor and texture. A side of cornbread or crusty bread is also a welcome addition.
Leftover chili can be stored in an airtight container in the refrigerator for up to 3-4 days. You can also freeze it for longer storage, up to 2-3 months. To reheat, simply warm it up in a pot on the stovetop over medium heat, stirring occasionally, or microwave it in a microwave-safe bowl. If frozen, thaw it overnight in the refrigerator before reheating.
Nutritional Information
Please note that these are estimated values and may vary based on specific ingredients and portion sizes.
| Nutrient | Amount per Serving | % Daily Value |
|---|---|---|
| Calories | 244 kcal | 12% |
| Total Fat | 10g | 15% |
| Saturated Fat | 4g | 20% |
| Cholesterol | 41mg | 14% |
| Sodium | 322mg | 13% |
| Total Carbohydrate | 22g | 7% |
| Dietary Fiber | 7g | 28% |
| Sugars | 5g | N/A |
| Protein | 18g | 36% |
Variations & Substitutions
- Vegetarian/Vegan Chili: Substitute the ground beef with plant-based ground meat crumbles or lentils. Be sure to adjust the cooking time accordingly.
- Gluten-Free Chili: This recipe is naturally gluten-free, but always double-check the labels of your spices and canned goods to ensure they are certified gluten-free.
- Different Beans: Feel free to experiment with different types of beans, such as black beans, cannellini beans, or great northern beans.
- Spicier Chili: Add a chopped jalapeño pepper or a few dashes of your favorite hot sauce for extra heat.
- Smoky Chili: Add a teaspoon of smoked paprika to give the chili a smoky flavor.
FAQs (Frequently Asked Questions)
Q: Can I use a different cut of meat besides ground beef?
A: Yes, you can use other cuts of beef such as chuck roast, but you’ll need to increase the simmering time to ensure the meat becomes tender. Brown the chuck roast and cut into cubes before adding it to the pot.
Q: Can I make this chili in a slow cooker?
A: Absolutely! Brown the ground beef as directed, then transfer all the ingredients to a slow cooker. Cook on low for 6-8 hours or on high for 3-4 hours.
Q: How can I make this chili less spicy?
A: Omit the cayenne pepper altogether. You can also add a dollop of sour cream or Greek yogurt when serving to help cool down the heat.
Q: Can I add more vegetables to this chili?
A: Yes, feel free to add other vegetables such as corn, zucchini, or diced carrots. Add them along with the celery and green pepper.
Q: What’s the best way to reheat leftover chili?
A: You can reheat leftover chili in a pot on the stovetop over medium heat, stirring occasionally, or in the microwave in a microwave-safe bowl.
Final Thoughts
This chili recipe is more than just a dish; it’s a warm hug in a bowl, a taste of simpler times, and a reminder of family. Whether you’re looking for a comforting meal on a cold day, a crowd-pleasing dish for a gathering, or just a taste of home, I hope you give this recipe a try. Don’t be afraid to experiment and make it your own. I’d love to hear your feedback, variations, and serving suggestions! Pair it with a cold beer or a glass of red wine for the perfect cozy meal. Happy cooking!