
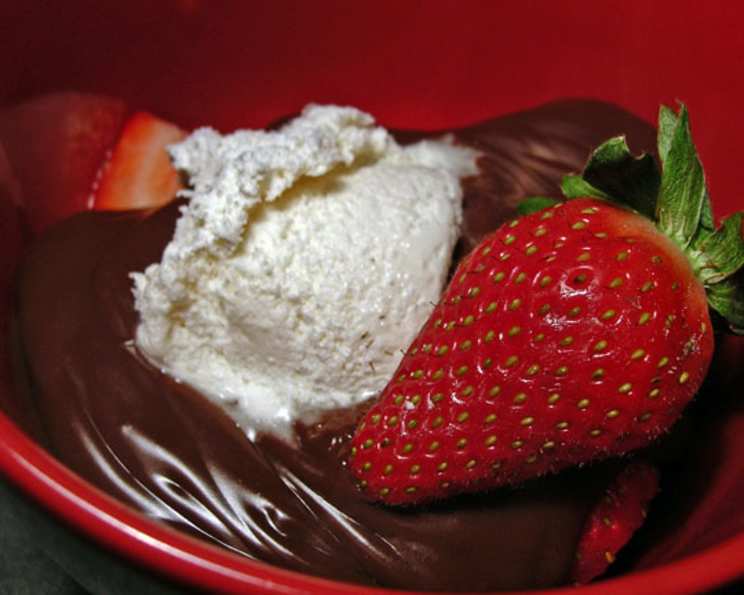
Dad’s Homemade Chocolate Pudding: A Taste of Childhood
I can still picture my dad standing over the stove, a wooden spoon in hand, his brow furrowed in concentration as he stirred a bubbling concoction. The rich, bittersweet aroma of cocoa would fill the kitchen, a promise of the decadent treat to come. It wasn’t just dessert; it was an act of love, a simple pleasure that transformed an ordinary evening into something special. Dad’s homemade chocolate pudding wasn’t fancy, but it was perfect – a spoonful of pure comfort that tasted like home.
Recipe Overview
- Prep Time: 5 minutes
- Cook Time: 15 minutes
- Total Time: 20 minutes
- Servings: 4
- Yield: 4 servings
- Dietary Type: Vegetarian (easily adaptable to vegan – see variations)
Ingredients
- 6 tablespoons sugar (or your preferred sugar substitute, such as Splenda)
- 4 tablespoons cornstarch (slightly heaping)
- 2 tablespoons cocoa powder (heaping)
- 1 pinch salt
- 1 teaspoon vanilla extract
- 2 cups milk (any type, including 1%, 2%, whole, or non-dairy alternatives like almond or soy milk)
Equipment Needed
- Medium saucepan
- Whisk or wooden spoon
- Measuring spoons and cups
- Serving bowls or glasses
Instructions
- In a medium saucepan, combine the sugar, cornstarch, cocoa powder, and salt. This is your dry ingredient mix. Be sure to remove any lumps of cocoa powder or cornstarch using the back of a spoon or whisk. A smooth, lump-free base is crucial for a silky-smooth pudding.
- Gradually add the milk to the dry ingredients, whisking constantly to create a smooth slurry. Ensure the milk is fully incorporated and there are no remaining clumps of dry ingredients clinging to the bottom or sides of the pan. The goal is to create a homogenous mixture before applying heat.
- Place the saucepan over medium-high heat on the stovetop. Stir the mixture constantly with a whisk or wooden spoon. Consistent stirring is essential to prevent scorching and ensure even thickening.
- Continue stirring the pudding mixture constantly until it thickens to your desired consistency. This usually takes about 5-10 minutes after the mixture begins to bubble. You’ll know it’s ready when it coats the back of a spoon and leaves a clear line when you run your finger through it. Reduce the heat to medium if the mixture begins to bubble too vigorously.
- Remove the saucepan from the heat and immediately stir in the vanilla extract. Stir until the vanilla is fully incorporated. The vanilla adds a layer of warmth and complexity to the chocolate flavor.
- Pour the hot pudding into individual serving bowls or glasses.
- Serve immediately or chill in the refrigerator for a colder treat.
Expert Tips & Tricks
- For an extra smooth pudding: After cooking, press the pudding through a fine-mesh sieve to remove any remaining lumps.
- Preventing a skin from forming: To prevent a skin from forming on the surface of the pudding as it cools, press a piece of plastic wrap directly onto the surface of the pudding.
- Adjusting sweetness: Taste the pudding before adding the vanilla extract and adjust the amount of sugar to your liking.
- Boosting chocolate flavor: Add a tablespoon of chocolate chips to the mixture while it’s still hot. Stir until melted and fully incorporated.
- Dealing with lumps: If lumps do form during cooking, don’t panic! Immediately remove the pan from the heat and vigorously whisk the mixture until the lumps disappear. You can also use an immersion blender for a super smooth result.
Serving & Storage Suggestions
This Dad’s Homemade Chocolate Pudding is delicious served warm or cold. Garnish with a dollop of whipped cream, a sprinkle of chocolate shavings, or a few fresh berries for an elegant presentation.
Leftover pudding can be stored in an airtight container in the refrigerator for up to 3 days. To reheat, gently warm the pudding in a saucepan over low heat, stirring constantly until heated through. You can also microwave it in 30-second intervals, stirring in between, until warmed.
While freezing is not recommended due to potential changes in texture, the pudding is best enjoyed fresh or within a few days of making it.
Nutritional Information
Note: Nutritional information is an estimate and may vary based on specific ingredients used.
| Nutrient | Amount per Serving | % Daily Value |
|---|---|---|
| Calories | 195 kcal | 10% |
| Total Fat | 5g | 6% |
| Saturated Fat | 3g | 15% |
| Cholesterol | 18mg | 6% |
| Sodium | 100mg | 4% |
| Total Carbohydrate | 34g | 12% |
| Dietary Fiber | 1g | 4% |
| Sugars | 20g | N/A |
| Protein | 5g | 10% |
Variations & Substitutions
- Vegan Chocolate Pudding: Substitute the milk with your favorite non-dairy milk alternative, such as almond milk, soy milk, or oat milk. Ensure the vanilla extract is also vegan-friendly.
- Dairy-Free Chocolate Pudding: Use a dairy-free milk alternative. Double-check all other ingredients for hidden dairy.
- Peanut Butter Chocolate Pudding: Swirl in a tablespoon or two of peanut butter after removing the pudding from the heat.
- Mexican Chocolate Pudding: Add a pinch of cinnamon and a dash of cayenne pepper to the dry ingredients for a warm, spicy twist.
- Mint Chocolate Pudding: Stir in a few drops of peppermint extract after removing the pudding from the heat. Garnish with fresh mint leaves.
- Dark Chocolate Pudding: Use dark cocoa powder for a richer, more intense chocolate flavor.
- Sugar-Free Chocolate Pudding: Use your preferred sugar substitute, such as stevia or erythritol, in place of the sugar. Adjust the amount to your liking. Splenda also works well, as indicated by the original recipe creator.
FAQs (Frequently Asked Questions)
Q: Why is my pudding lumpy?
A: Lumps in pudding often occur when the cornstarch isn’t fully dissolved before heating or if the mixture isn’t stirred constantly during cooking. Use a whisk to thoroughly combine the ingredients and stir continuously over medium heat. If lumps persist, try using an immersion blender to smooth them out or pass the cooked pudding through a fine-mesh sieve.
Q: Can I use a different type of milk?
A: Yes! Any type of milk will work, including whole milk, 2%, 1%, skim milk, and non-dairy alternatives like almond milk, soy milk, or oat milk. The fat content of the milk will affect the richness of the pudding, so consider that when choosing.
Q: How do I prevent a skin from forming on top of the pudding as it cools?
A: Press a piece of plastic wrap directly onto the surface of the pudding while it’s cooling. This will prevent a skin from forming. Alternatively, you can whisk the pudding periodically as it cools.
Q: Can I make this pudding ahead of time?
A: Absolutely! This pudding is great made in advance. Store it in an airtight container in the refrigerator for up to 3 days. Be sure to press plastic wrap against the surface to prevent a skin from forming.
Q: Can I add other flavorings to the pudding?
A: Yes! Feel free to experiment with other flavorings, such as coffee extract, almond extract, or citrus zest. Add the flavorings after removing the pudding from the heat.
Final Thoughts
Dad’s Homemade Chocolate Pudding is more than just a dessert; it’s a memory, a feeling, a taste of home. It’s a simple recipe that’s easy to make and endlessly customizable. I hope you’ll try this recipe and create your own cherished memories. Don’t be afraid to get creative with variations and substitutions to make it your own. Whether you enjoy it warm from the stove or chilled from the fridge, I’m sure this pudding will bring a smile to your face. So, gather your ingredients, grab a spoon, and get ready to experience the joy of homemade chocolate pudding!