
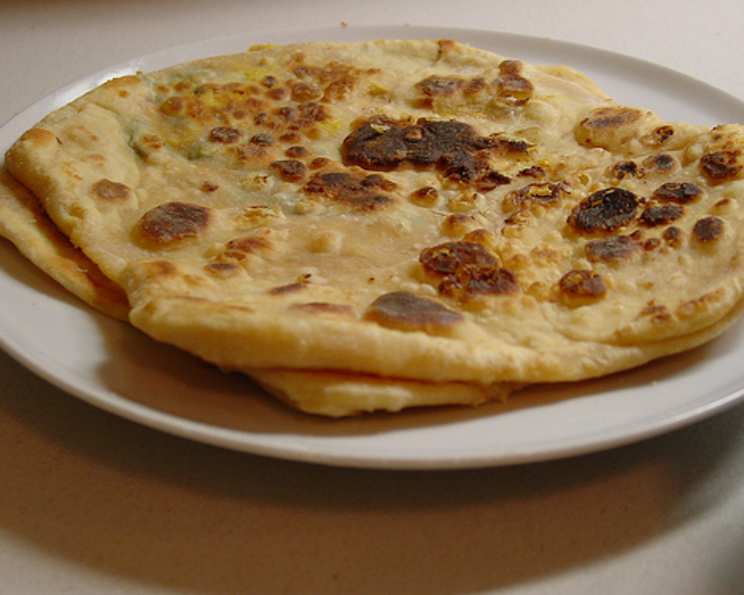
Daikon Radish Stuffed Flatbread (Mooli Paratha)
The aroma of mooli paratha always takes me back to my grandmother’s kitchen in Punjab. I remember sitting on a small stool, mesmerized by her nimble hands as she expertly rolled out the dough, stuffed it with the spiced radish mixture, and then deftly cooked it on the tawa. The steam rising from the golden-brown flatbread, carrying with it the pungent scent of radish and the comforting warmth of ghee, is a memory I cherish, a true taste of home that I’m excited to share with you.
Recipe Overview
- Prep Time: 30 minutes
- Cook Time: 25 minutes
- Total Time: 55 minutes
- Servings: 4
- Dietary Type: Vegetarian
Ingredients
For the Dough:
- 2 cups wheat flour
- Salt to taste
- ½ teaspoon chili powder
- ½ teaspoon jeera powder (cuminseed)
- 2 tablespoons oil
- Water from the grated radish, for kneading the dough (explained below)
For the Filling:
- 1 medium daikon radish, grated (after grating, squeeze out the water/juice; use it for kneading the dough)
- ½ teaspoon ajwain (carom seeds, optional)
- ¼ teaspoon turmeric powder
- ½ teaspoon jeera powder (cuminseed)
- ½ medium onion, grated, juice squeezed out and discarded
- Salt to taste
- ¼ teaspoon chili powder
- 2 tablespoons cilantro leaves, finely chopped
- Oil, for frying
Equipment Needed
- Mixing bowls
- Grater
- Clean kitchen towel or cheesecloth
- Rolling pin
- Tawa (flat griddle pan) or frying pan
- Spatula
Instructions
-
Prepare the dough: In a large mixing bowl, combine the wheat flour, salt, chili powder, jeera powder, and oil. Mix well.
-
Knead the dough: Grate the daikon radish. Place the grated radish in a clean kitchen towel or cheesecloth and squeeze out as much water as possible. Reserve this radish water. Use this radish water, adding more plain water if needed, to knead the flour mixture into a smooth, pliable dough. Discard any leftover radish water.
-
Rest the dough: Cover the dough with a damp cloth and let it rest in a warm place for at least 30 minutes. This allows the gluten to relax, resulting in softer parathas.
-
Prepare the radish filling: Place the grated daikon radish in a bowl. Add salt and let it sit for 15 minutes. This helps draw out excess moisture.
-
Squeeze out more water: After 15 minutes, squeeze out any additional water from the salted, grated radish. Discard this water.
-
Combine the filling ingredients: To the squeezed-dry grated radish, add the ajwain (if using), turmeric powder, jeera powder, grated onion (with the juice squeezed out and discarded), salt, chili powder, and finely chopped cilantro leaves. Mix all the filling ingredients thoroughly.
-
Shape the dough: Divide the rested dough into small, equal-sized balls, slightly larger than an egg.
-
Prepare the filling balls: Make smaller balls of the filling mixture, about the size of an egg yolk.
-
Roll out the dough: On a lightly floured surface, flatten one dough ball with your fingers. Dip it in dry flour and roll it out using a rolling pin into a small circle, about the size of a teacup saucer.
-
Stuff the dough: Place one filling ball in the center of the rolled-out dough circle.
-
Seal the filling: Gather the edges of the dough around the filling, pinching them together to completely enclose the filling. Ensure there are no air pockets. This is a crucial step to prevent the filling from leaking during cooking.
-
Re-roll the paratha: Gently flatten the stuffed dough ball with your hands. Dip it in dry flour, and roll it out again using a rolling pin, this time into a larger circle, slightly bigger than a saucer. Be gentle while rolling to prevent the filling from bursting out.
-
Cook the paratha: Heat a teaspoon of oil on a tawa or frying pan over medium heat.
-
Shallow fry: Place the rolled-out paratha on the hot tawa. Cook for a minute or two, or until the bottom side starts to get light golden brown spots.
-
Flip and cook the other side: Flip the paratha and cook the other side for another minute or two until it also develops golden brown spots.
-
Add more oil: Drizzle a little oil (about ½ teaspoon) around the edges of the paratha. Flip it again and cook, pressing gently with a spatula, until both sides are golden brown and crispy.
-
Repeat: Repeat steps 7-16 with the remaining dough and filling.
Expert Tips & Tricks
- Squeezing the radish is key: Don’t skip the squeezing process! Removing excess moisture from both the dough and the filling is crucial for achieving the right texture and preventing soggy parathas.
- Rolling technique: Roll the paratha gently, starting from the center and moving outwards. This helps distribute the filling evenly and prevents tearing.
- Don’t overcook: Overcooking can make the parathas hard and dry. Cook them until they are golden brown and slightly puffed up.
- Ghee vs. Oil: For a richer flavor, use ghee (clarified butter) instead of oil for frying.
Serving & Storage Suggestions
Serve the hot mooli paratha immediately with a dollop of butter or ghee, yogurt (plain or flavored), or your favorite Indian pickle. These parathas are best enjoyed fresh but can be stored in an airtight container in the refrigerator for up to 2-3 days. Reheat them on a tawa or in a microwave. To reheat on a tawa, lightly grease the tawa and cook the paratha on both sides until warm. If freezing, wrap each paratha individually in plastic wrap and then place them in a freezer bag. They can be frozen for up to 2 months. Thaw them completely before reheating.
Nutritional Information
| Nutrient | Amount per Serving | % Daily Value |
|---|---|---|
| Calories | 273 kcal | N/A |
| Total Fat | 8.1 g | 12% |
| Saturated Fat | 1.1 g | 5% |
| Cholesterol | 0 mg | 0% |
| Sodium | 8.2 mg | 0% |
| Total Carbohydrate | 45.4 g | 15% |
| Dietary Fiber | 7.7 g | 30% |
| Sugars | 0.9 g | N/A |
| Protein | 8.5 g | N/A |
Note: Nutritional information is an estimate and may vary based on specific ingredients and preparation methods.
Variations & Substitutions
- Gluten-free: Try using a gluten-free flour blend to make gluten-free parathas. Be sure to adjust the amount of water as needed.
- Spicier: Increase the amount of chili powder in both the dough and the filling for a spicier paratha.
- Different vegetables: Experiment with other grated vegetables like carrots, potatoes, or cauliflower as fillings.
- Herbs: Add other fresh herbs like mint or coriander to the filling for a different flavor profile.
FAQs (Frequently Asked Questions)
Q: Can I make the dough ahead of time?
A: Yes, you can make the dough a day ahead of time and store it in the refrigerator. Be sure to bring it to room temperature before rolling it out.
Q: How do I prevent the filling from leaking out?
A: Make sure to seal the filling completely within the dough, ensuring there are no air pockets. Also, roll the paratha gently and evenly.
Q: Can I bake these parathas instead of frying them?
A: While traditionally fried, you can bake them in a preheated oven at 375°F (190°C) for about 15-20 minutes, flipping halfway through. Brush with oil before baking.
Q: What if I don’t have ajwain seeds?
A: Ajwain seeds are optional. If you don’t have them, you can simply omit them from the recipe.
Q: How do I reheat leftover parathas without them becoming dry?
A: The best way to reheat leftover parathas is on a lightly greased tawa over medium heat. You can also microwave them, but they may become slightly softer.
Final Thoughts
I hope this recipe for Daikon Radish Stuffed Flatbread (Mooli Paratha) brings the same warmth and comfort to your kitchen as it does to mine. Don’t be intimidated by the slightly longer list of steps; each one is simple and contributes to the delicious final result. I encourage you to try making these parathas and share your experiences. Pair them with a refreshing yogurt raita or a steaming cup of chai for a complete and satisfying meal. Enjoy!