
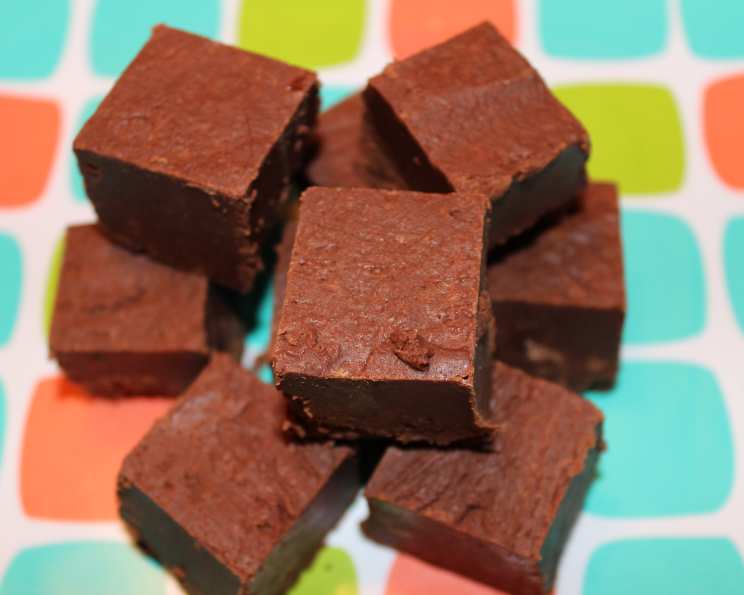
Dairy-Free Decadence: The Chocolate Fudge That Fooled Everyone
I’ll never forget the first time I made this fudge. It was for my sister’s birthday, and she had recently discovered she was lactose intolerant. Determined to make a dessert she could enjoy, I embarked on a mission to create a dairy-free chocolate fudge that didn’t compromise on flavor or texture. After some experimenting, this recipe was born. The look on her face when she took that first bite, the pure, unadulterated joy, made all the trial and error worthwhile. It was so rich and chocolatey that nobody could believe it was dairy-free, and that’s a reaction I’ve seen repeated countless times since. It’s become a go-to treat for potlucks, holidays, and anytime I need a guaranteed crowd-pleaser.
Recipe Overview
- Prep Time: 5 minutes
- Cook Time: 15 minutes
- Total Time: 20 minutes
- Servings: 24
- Yield: About 2 pounds
- Dietary Type: Dairy-Free
Ingredients
- 3/4 cup dairy-free margarine (Nucoa Buttery Sticks)
- 2/3 cup full-fat soy milk (Silk Original, red carton)
- 3 cups sugar
- 2 cups non-dairy chocolate chips (Kirkland Signature Brand from Costco are dairy free)
- 1 teaspoon vanilla
- 1 (7 ounce) jar marshmallow cream (or homemade)
Equipment Needed
- Large pot
- Candy thermometer
- Greased 9×13 inch pan
Instructions
- In a large pot, combine the dairy-free margarine, soy milk, and sugar.
- Cook over medium-high heat, stirring continuously to prevent scorching, until the mixture reaches 234 degrees Fahrenheit on a candy thermometer. This is crucial for achieving the correct fudge consistency. Be patient and stir constantly!
- Remove the pot from the heat immediately once it reaches the target temperature.
- Add the non-dairy chocolate chips and stir until they are completely melted and thoroughly mixed into the hot mixture. This might take a minute or two, so keep stirring until smooth.
- Stir in the vanilla extract until well combined. The vanilla will enhance the chocolate flavor.
- Incorporate the marshmallow cream into the chocolate mixture. Stir until the marshmallow cream is completely mixed in and the batter is uniform in color and texture. Make sure there are no streaks of marshmallow remaining.
- Pour the fudge into a greased 9×13 inch pan. Spread the mixture evenly using a spatula.
- Let the fudge cool completely. You can speed up the cooling process by placing it in the refrigerator. This usually takes about an hour. Once cooled and firm, cut into squares and serve.
Expert Tips & Tricks
- The Candy Thermometer is Key: Reaching 234°F is essential for the fudge to set properly. If you don’t have a candy thermometer, you can test the doneness by dropping a small amount of the mixture into a glass of cold water. If it forms a soft ball, it’s ready.
- Don’t Overcook: Overcooking will result in a dry, crumbly fudge. Undercooking will leave you with a soft, gooey mess.
- Stir, Stir, Stir: Continuous stirring is crucial to prevent the sugar from crystallizing and the mixture from scorching. Pay special attention to the bottom of the pot.
- Even Cooling: For even cooling and clean cuts, avoid disturbing the fudge while it’s setting.
- Homemade Marshmallow Cream: While store-bought marshmallow cream works perfectly well, homemade marshmallow cream elevates the fudge to another level. It adds a richer, more complex flavor.
- Add a Pinch of Salt: A tiny pinch of salt (about 1/8 teaspoon) added along with the vanilla can enhance the sweetness and chocolate flavor.
Serving & Storage Suggestions
This dairy-free chocolate fudge is best served at room temperature or slightly chilled. Cut into small squares for individual servings. It pairs perfectly with a cup of coffee or tea.
To store, keep the fudge in an airtight container at room temperature for up to 3 days, or in the refrigerator for up to a week. For longer storage, you can freeze the fudge for up to 2 months. Wrap it tightly in plastic wrap and then place it in a freezer-safe bag or container. To thaw, place it in the refrigerator overnight.
Nutritional Information
(Note: This is an estimate and can vary based on specific ingredient brands.)
| Nutrient | Amount per Serving | % Daily Value |
|---|---|---|
| Calories | 150 kcal | 8% |
| Total Fat | 5g | 8% |
| Saturated Fat | 3g | 15% |
| Cholesterol | 0mg | 0% |
| Sodium | 10mg | 0% |
| Total Carbohydrate | 25g | 8% |
| Dietary Fiber | 0g | 0% |
| Sugars | 20g | – |
| Protein | 1g | 2% |
Variations & Substitutions
- Nutty Fudge: Add 1 cup of chopped nuts (such as walnuts, pecans, or almonds) along with the vanilla for a nutty twist.
- Peanut Butter Swirl: Swirl in 1/2 cup of peanut butter into the fudge after pouring it into the pan.
- Mint Chocolate Fudge: Add 1/2 teaspoon of peppermint extract along with the vanilla for a refreshing minty flavor.
- Espresso Fudge: Add 1 tablespoon of instant espresso powder along with the chocolate chips for a mocha-flavored fudge.
- Coconut Flakes: Sprinkle shredded coconut on top of the fudge before it cools for added texture and flavor.
- Different Non-Dairy Milk: While soy milk is recommended, you can experiment with other non-dairy milks like almond milk or oat milk, but be aware that the texture and flavor might slightly differ. Use full-fat versions for the best results.
- Different Non-Dairy Margarine: Look for dairy-free margarine sticks specifically designed for baking. These tend to have a higher fat content, which is crucial for a smooth fudge texture.
FAQs (Frequently Asked Questions)
Q: Can I use regular chocolate chips instead of non-dairy chocolate chips?
A: No, if you want to keep this fudge dairy-free, you need to use non-dairy chocolate chips. Many brands offer excellent dairy-free options.
Q: Can I use a different brand of dairy-free margarine?
A: Yes, you can, but make sure it’s a baking stick variety that is designed to be used like butter in recipes.
Q: How do I know when the fudge is done cooking?
A: The best way to tell is by using a candy thermometer. The mixture needs to reach 234 degrees Fahrenheit.
Q: Can I make this fudge ahead of time?
A: Absolutely! This fudge can be made several days in advance and stored in an airtight container.
Q: What if my fudge is too soft or doesn’t set properly?
A: It likely wasn’t cooked to a high enough temperature. You can try melting it again in a saucepan, bringing it to 234°F, and then cooling it again.
Final Thoughts
This dairy-free chocolate fudge is a testament to the fact that you don’t have to sacrifice flavor or texture when making dietary accommodations. It’s a rich, decadent treat that’s sure to please everyone, regardless of their dietary needs. So go ahead, give it a try! Share it with your friends and family, and watch their faces light up with delight. And don’t be surprised if they ask for the recipe – just be sure to tell them it’s a secret! Enjoy the chocolatey goodness!